


Customizing Character Pack Props
As of August 5th, 2025, Golaem will no longer provide direct support.
All support for Autodesk Golaem will now be handled exclusively through Autodesk support channels and this website will be deactivated soon.
Please bookmark the Autodesk Golaem Support section for any future support needs related to Autodesk Golaem packages.
Even if using the standard Golaem Crowd Character Pack model, it is possible to customize its props to match production requirements.
Modifying An Existing Prop
- Open the appropriate source .ma file (e.g. for Arnold: /crowd/shaders/CMO-man_golaemAR.ma)
- Modify the existing prop as needed (skinning weights, mesh geometry…)
- Open the Character Maker, load the crowdMan.gcha Character File and go to the Geometry Tab
- Select the Character Node in main workspace, and remove its Geometry File in the Asset Properties panel by clicking on the
 button. It may be a good idea to write down the current Bounding Box values, as they will be needed afterwards.
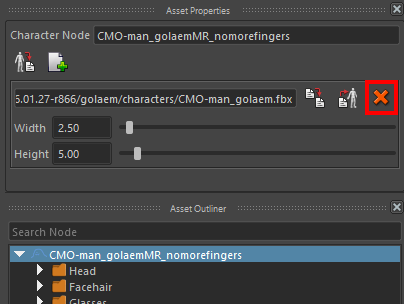
- Click on the Export geometry file
 button, and save the new .fbx to the /crowd/fbx directory.
 - Change the Bounding Box Width and Height of the created Geometry File (you can check the bounding box size in the viewport). They should be similar to the previous ones, or bigger if the modified props are outside the previous bounding box
- Save the Character File (.gcha)

Note that if a Simulation Cache has already been exported, it is not needed to re-export it to take the modified prop into account. As soon as the Character File has been saved, the rendering will be correctly affected.
Disabling An Existing Prop
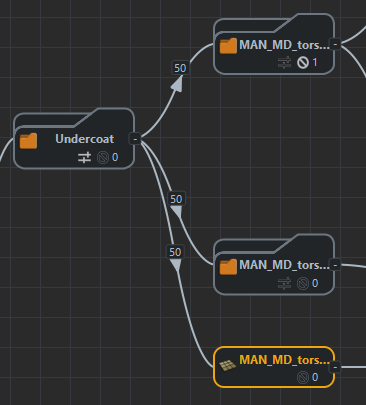
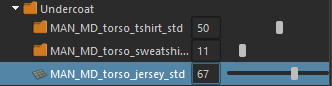
The simplest way to disable a prop is to set its weight to 0 n the Rendering Types view of the Geometry Tab in the Character Maker and save the Character File (.gcha)

Example of a prop removed from a Rendering Type (the long t-shirt)
Note that if a Simulation Cache has already been exported, it is not needed to re-export it to take the modified prop into account. As soon as the Character File has been saved, the rendering will be correctly affected.
Adding A New Prop
- Open the appropriate character source file (e.g. /crowd/shaders/CMO-man_golaemAR.ma for Arnold)
- Create the new prop, and skin it to the existing skeleton. To find it more easily later, maybe it is better to put it into an existing Maya group, or to create a new one
- Assign a shader to the newly created props (either an existing or a new one)
- Open the Character Maker, and load the appropriate crowdMan.gcha Character File
- Select the Asset Group node to which you want to add the new prop (either an existing Asset Group or a newly created Asset Group)
- Select the added prop mesh in Maya and click on the Import Geometry button
 in the Geometry Tab
 - A new Mesh Asset node is added to the selected Asset Group node. The shaders of the mesh are also imported as Shading Group nodes, Shader Asset nodes and Shader Attribute nodes (if found)
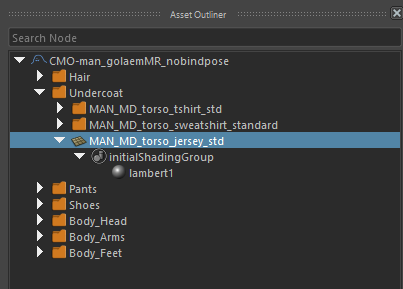
New Mesh Asset node in the main workspace and in the Asset Outliner
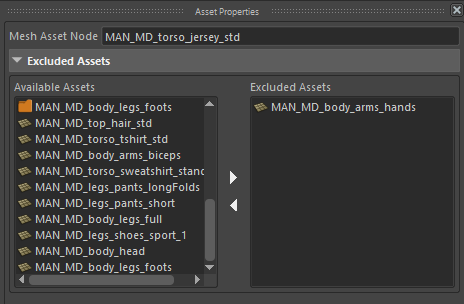
- If needed, add incompatible meshes or groups as Excluded Assets
- Delete the existing Geometry File and recreate it (see Modifying an Existing Prop above)
- In the Rendering Types view, set a weight for the new prop
- Save the Character File (.gcha)
Note that if a Simulation Cache has already been exported, it is not needed to re-export it to take the modified prop into account. As soon as the Character File has been saved, the rendering will be correctly affected. However if some new shaders have been assigned to props, they should be imported in the crowd scene used for rendering.