


Displacement
As of August 5th, 2025, Golaem will no longer provide direct support.
All support for Autodesk Golaem will now be handled exclusively through Autodesk support channels and this website will be deactivated soon.
Please bookmark the Autodesk Golaem Support section for any future support needs related to Autodesk Golaem packages.
The Crowd Render Proxy allows to add Displacement on Entities geometry to add details at render time. As Redshift Displacement parameters can not be stored in the Character Geometry File (.fbx or .gcg), displacement information must be stored at the Character File level.
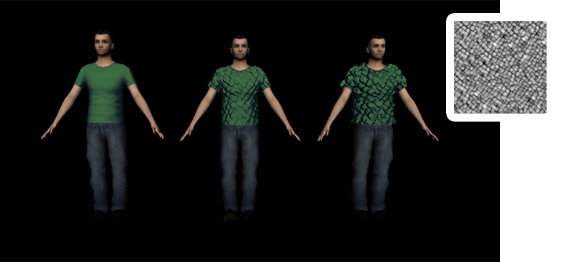
Examples of Displacement Mapping with different displacement amounts
Creation
- open the Character File in the Character Maker and go to the Geometry Tab
- select the Mesh you want to displace in the Main Workspace
- drag and drop a Shader Node from the Asset Nodes tab
- enter a name for the Shader
- enter "displacement" as the category of the Shader

Example of a Displacement Shader applied to a Shading Group Node
Configuration
It is possible to configure a Displacement Shader by linking to the Shading Group Node some specific Shader Attributes. Here are the supported Shader Attributes (those parameters are the same attributes defined by Redshift for each mesh in Maya):
| Attribute Name | Type | Description |
| disp_maxDisplace | float | Maximum length the displacement shaders/textures will be displacing the vertices by (notice that this value can also be controlled with a ppAttribute). |
| disp_scale | float | Scales the displacement results, which has the effect of accentuating or toning down the displacement (notice that this value can also be controlled with a ppAttribute). |
| disp_autobump | int | Emulates what would happen if you were to tessellate your geometry to a sub-pixel level and modifies the surface normals accordingly, as if they were bump-mapped. (notice that this value can also be controlled with a ppAttribute). |
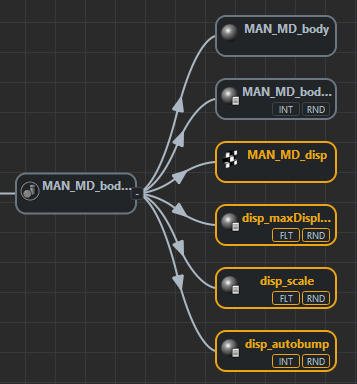
Example of Shader Attributes applied to a Displacement Shader
To work properly, the default Subdivision parameters of the Crowd Render Proxy should be changed as specified in Redshift User Guide.