Adding Texture Diversity
As of August 5th, 2025, Golaem will no longer provide direct support.
All support for Autodesk Golaem will now be handled exclusively through Autodesk support channels and this website will be deactivated.
Please bookmark the Autodesk Golaem Support section for any future support needs related to Autodesk Golaem packages.
Here is how to add diversity to your crowd textures with the Switch shader.
BASIC WORKFLOW
CONFIGURE THE GCHA
- In the Golaem Character Maker  Geometry tab select the piece of geometry on which you want to assign the shader switch variation and select its Shader.
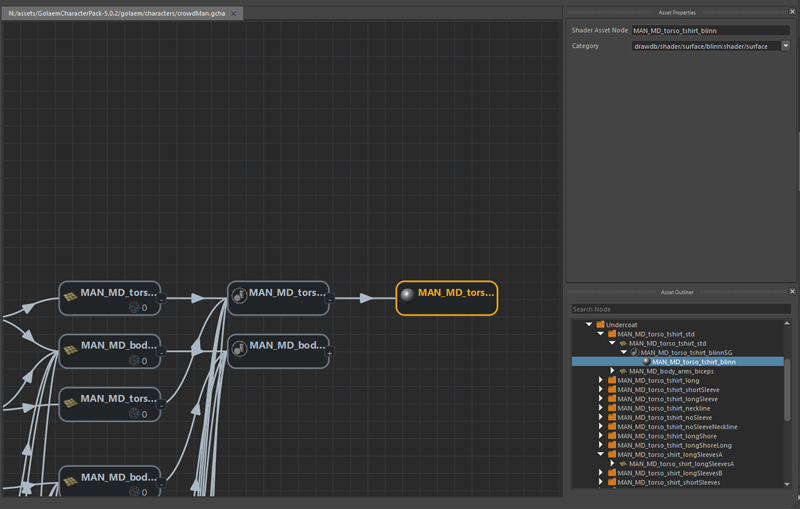
- Drag and drop a Shader Attribute node and link it to the desired shader node.
- Assuming you want to change the T-shirt texture, name your new attribute MAN_MD_torso_tshirt_blinn_textureIdx_value and give it a range
(0 to 3 if you've plugged 4 textures in the switch shader)
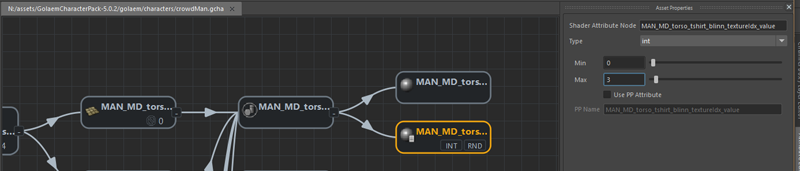
- Don't forget to save your gcha.
SHADING GRAPH INTEGRATION
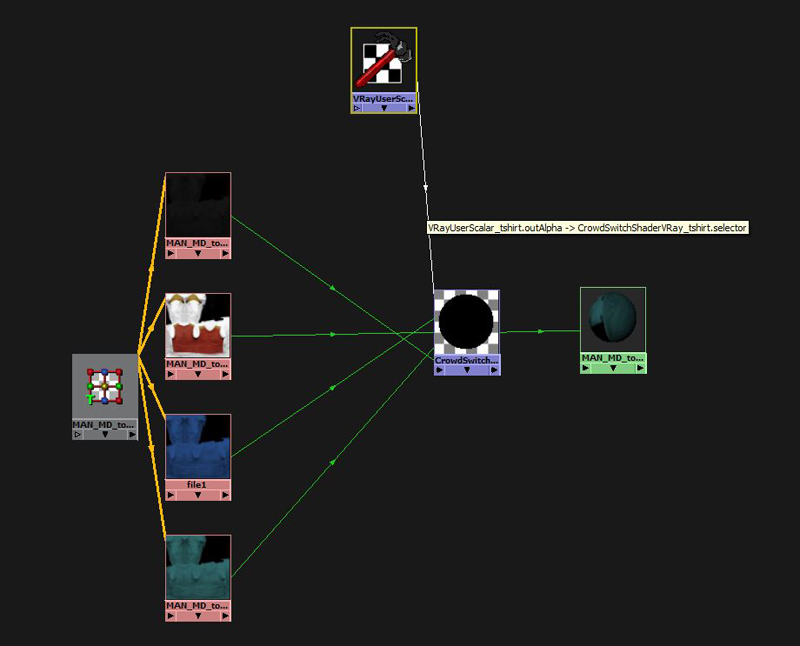
| Renderer | Node to feed the Switch |
| Vray | VrayUserScalar (can be used to return either an integer or a floating value) |
| Arnold | aiUserDataInt |
| Redshift | RedshiftUserDataInteger |
| Renderman Studio | PxrAttribute (can be used to return either an integer or a floating value) |
- In the feeder node (VRayUserScalar for example), query your shader attribute: MAN_MD_torso_tshirt_blinn_textureIdx_value.
- Hit render!

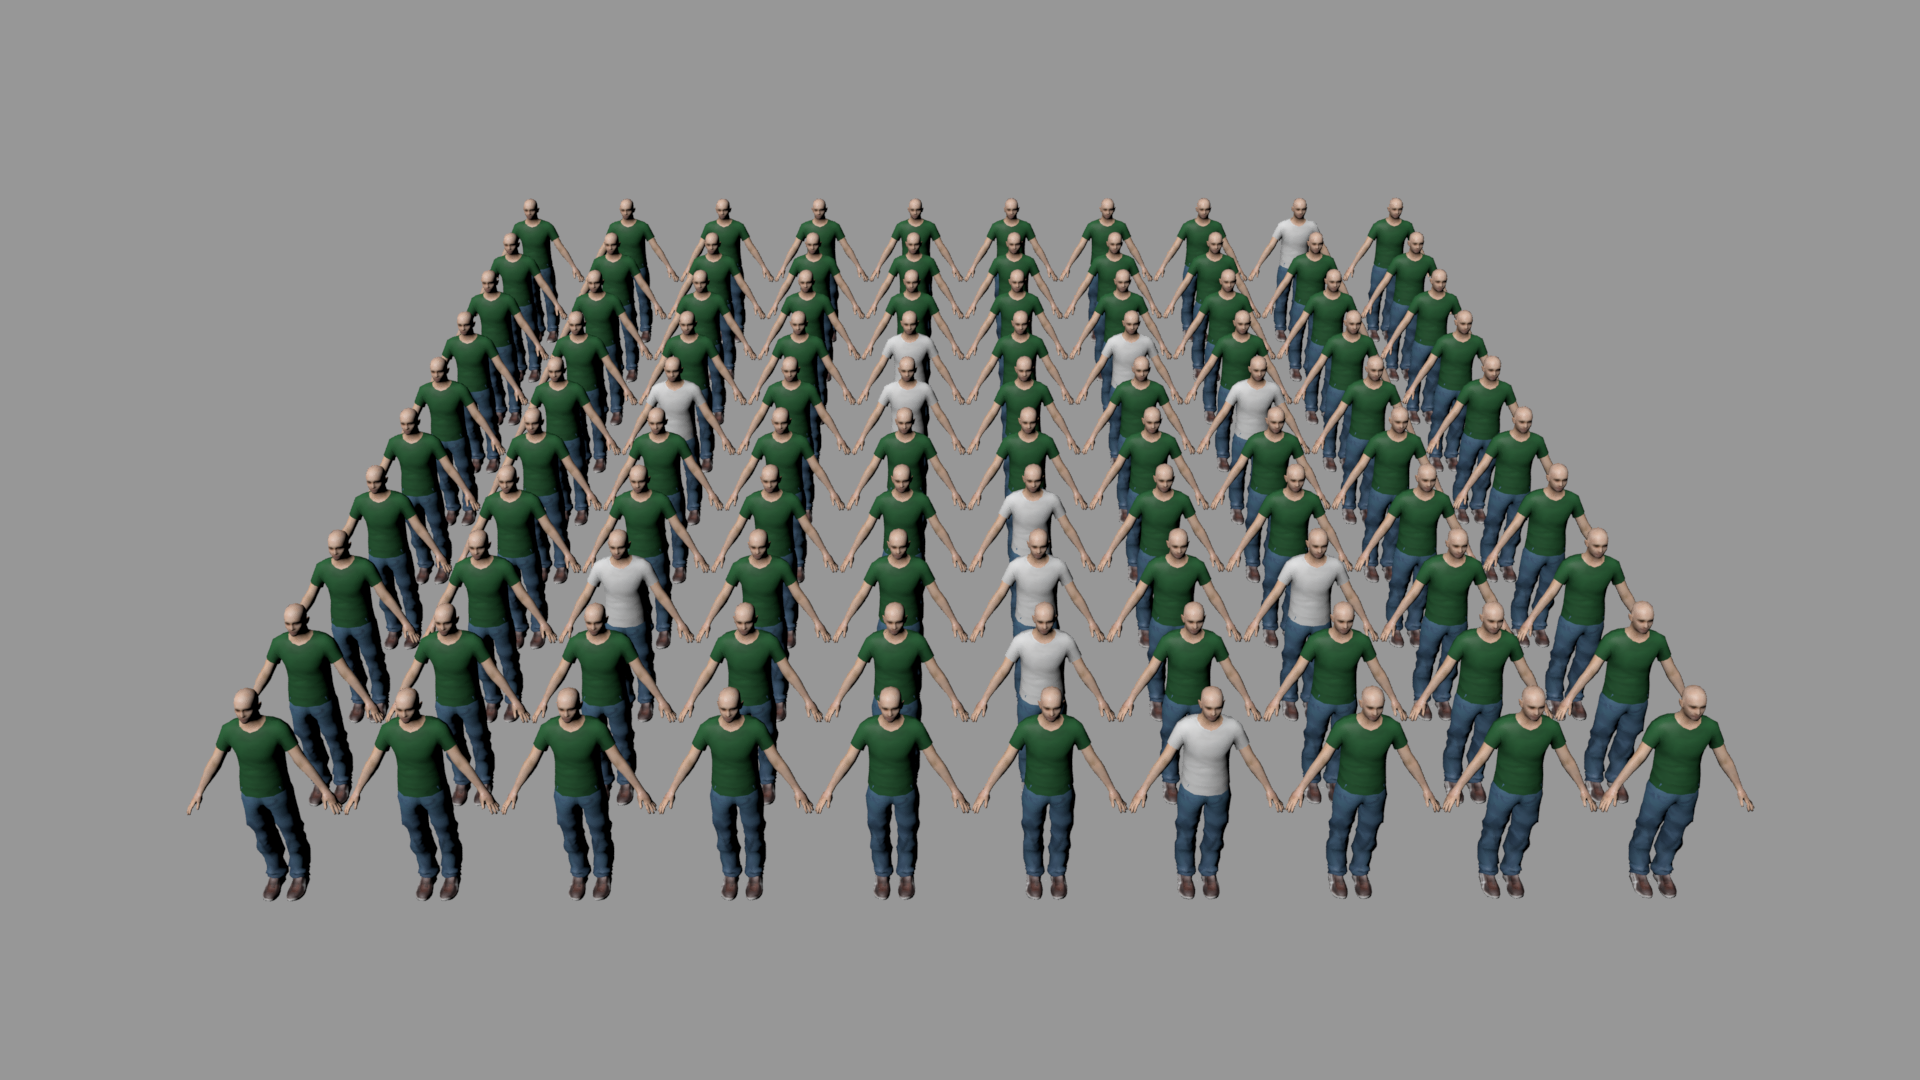
Textures being switched randomly by the Shader attribute
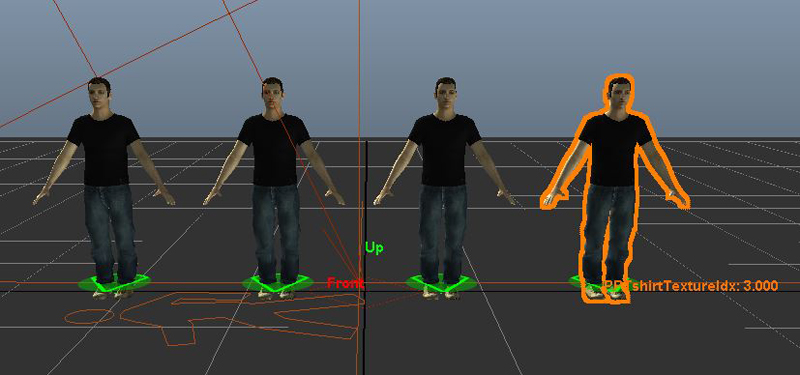
FEEDING THE SWITCH SHADER WITH PP ATTRIBUTE
Here is how to have a much better control over the switch shader by using the PP attributes.
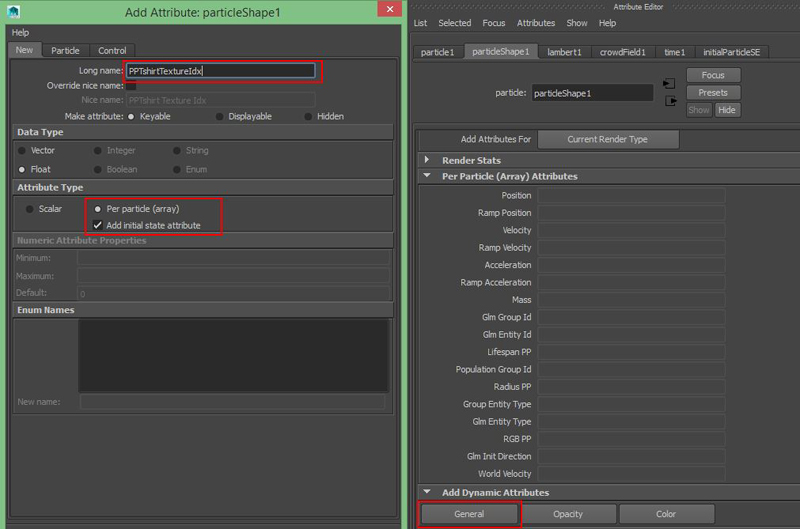
CREATE THE PP ATTRIBUTE

CONFIGURE THE GCHA
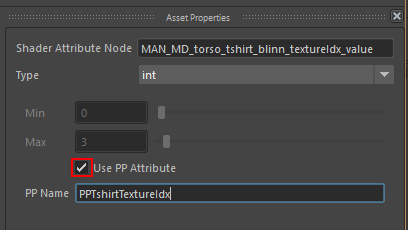
- Go back in the Golaem Character maker Geometry tab and select the previously created Shader Attribute Node.
- In the Asset Properties window check the box "Use value from PP attribute" and query the PP attribute: PPTshirtTextureIdx.
- Don't forget to save your gcha!
EXPORT THE SIMULATION
 (in the Addition Per Particle Attributes To Export section)
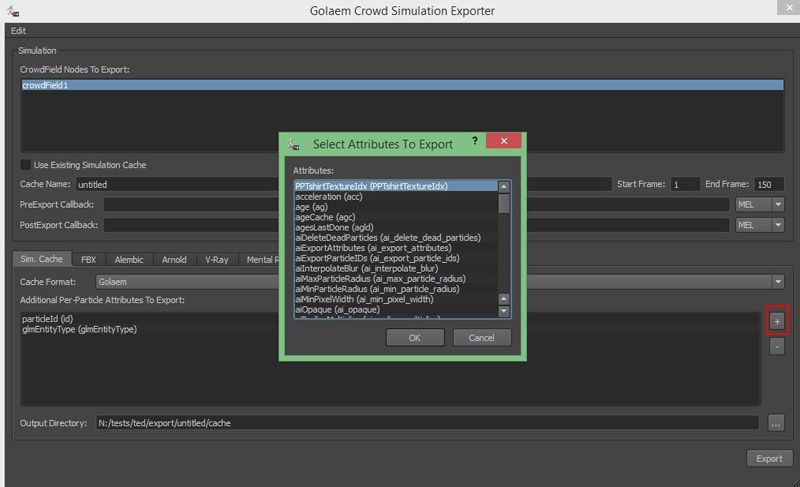
SWITCHING BETWEEN MORE THAN 10 TEXTURES
Even if the Switch Shader has only 10 inputs, it's possible to switch between an infinite number of inputs, using the Default Shader input and the Start Selector attributes.
The Default Shader input redirects the shading graph if the value of the Selector is out of the bounds of its Switch Shader (comprised between [Selector;Selector+10[ )

Example of a shading graph allowing to plug 30 shaders
And the configuration of the Start Offset for each Switch Shader:
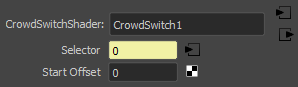
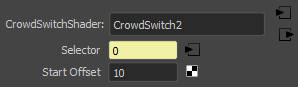

Thus, if the selector value is between [0;9], the value is picked within CrowdSwitch1, between [10;19] within CrowdSwitch2 and between [20;29] within CrowdSwitch3.
ADJUSTING TEXTURE DIVERSITY WITH SHADING ATTRIBUTES WEIGHTS
A very easy way to set more texture weight on one character could be to map the same texture multiple times into the switch shader.

the green file has much more chances to be mapped to an entity.
Remember to set the Min/Max values of your shading attributes accordingly:

Render the simulation to see the result: