


Converting 3dsMax (Biped) Characters & Motions
As of August 5th, 2025, Golaem will no longer provide direct support.
All support for Autodesk Golaem will now be handled exclusively through Autodesk support channels and this website will be deactivated soon.
Please bookmark the Autodesk Golaem Support section for any future support needs related to Autodesk Golaem packages.
Many Golaem Crowd users like the Rocketbox characters, reknown for their quality and large diversity of models and animations. It is pretty straightforward to import them in Golaem Crowd, but there are a few tricks involved.
Rockebox characters are usually provided for Max and/or Maya. If you already have a Maya character, you can skip the first part.
Exporting from 3DSMax
We will use a FBX file to transfer the character from Max to Maya. As usual, a FBX transfer is not as straigtforward as it should be and some precautions should be taken.
1. The character meshes are stored in their own layers, which are given the same name as the mesh. Maya will artificially rename the mesh when loading the FBX which will be complicating the asset management step. The best way to avoid it, is to put each mesh in the default layer, and delete the source layers.
- Open the Layers Manager (Tools/Manage Layers menu)
- Expand mesh layer.
- Right click on the mesh and choose "select"
- Right-click on the default layer, and choose "Add selected object"
- Delete the source mesh layer
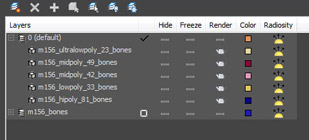
The final layers arrangement
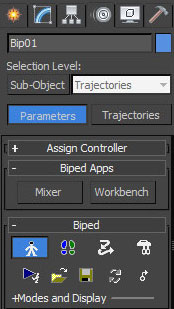
2. It is recommended to change the structure of your skeleton in order to be more Golaem-compliant. Select the root of your biped and go to structure mode by clicking on the little character in the Biped Panel
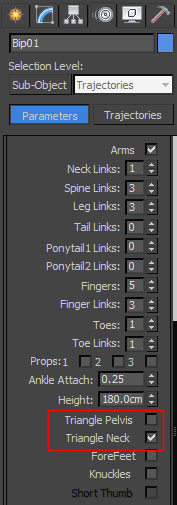
3. In the Parameters below, uncheck Triangle Pelvis, and check Triangle Neck
4. Optionally, you may want to load an animation and export it as well. Just select the root of the character and load a .bip file
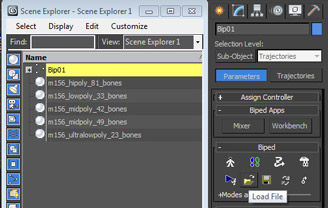
Loading a Bip animation file
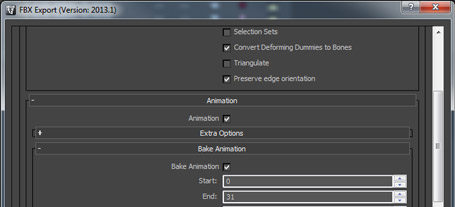
5. Export the character as a FBX file. If you need to keep animation, do not forget to check "Bake Animation" in the final export dialog.
As fbx may modify the names of your assets , check the box use scene name to avoid further problems.
6. Open Maya and import your .fbx file
Loading the rig
Check the Importing Custom Characters Tutorial to know how to create a Character File (.gcha) file corresponding to your RocketBox character.
Note that this step is mandatory.
Warning: In a rocketbox joint hierachy Thighs are linked to the firtst Spine (Bip01Spine), to be able to use motion retargeting, please map this spine as a root and leave the two first joints Bip01 and Bip01pelvis unmapped.
Setting the Geometry
1. Open the Character Maker's Geometry Tab and select your character's geometry in the outliner.
2. Click on the Import Geometry button  , this will load the geometry and shading nodes of your character.
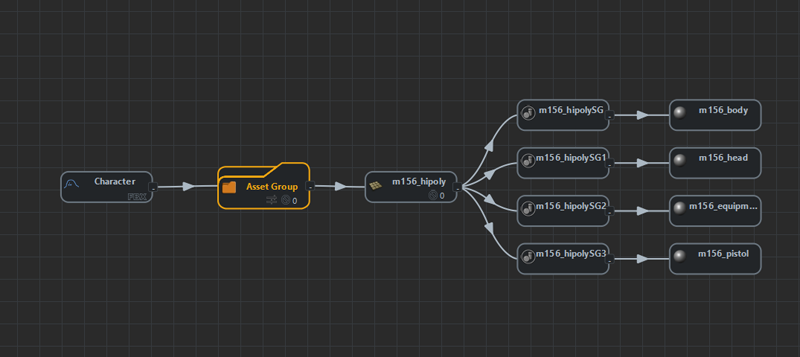
3. Drag and drop an Asset Group node before the Mesh Asset nodes and link them. Link the Character node to the Asset Group.
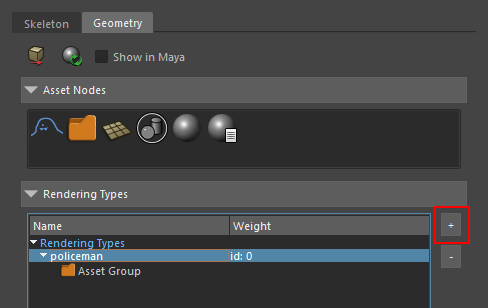
4. Go into the Rendering Types section and click "+" to create a rendering type. name it after your character (e.g. policeman)
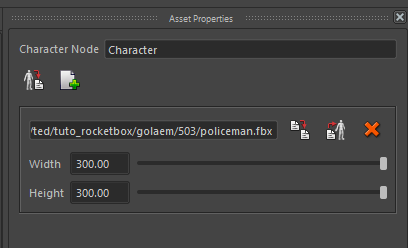
5. Select the Character Node and go into its Asset Properties. (if the tab is hidden right click the Toolbar and tick the box).
6. Click the Export Geometry File Button  and edit the bounding box of your character.
7. Save your Gcha.
8. On another side select your shaded character and save it as a .ma this file must contain every shaders to be used at render time.
Using the created character
You can check our tutorials and use the created characters as you would use a character from the samples or the character pack.
However as Rocketbox characters are built using meters (instead of centimeters, which is the default Golaem Crowd scale), you will probably need to scale them.
9. To work with the correct scale go into the Crowd Manager attributes and change the scale to centimeter. You will have to delete your poptool and create a new one.
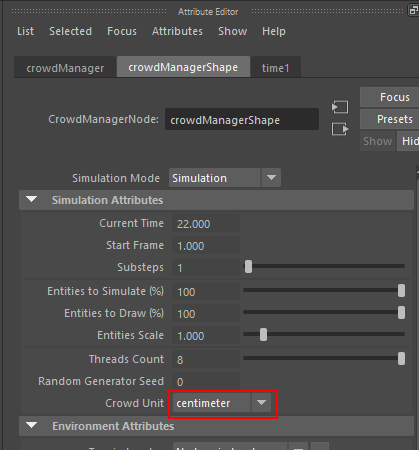
The Crowd Manager attributes
Here is a facial animation demo that we created using Rocketbox characters: