After placing your crowds here are some easy ways to create ambiance in your stadium (on top of the wave shown in the basic stadium workflow).
CREATE RANDOM MOTION LOOPS
It is simple to create an ambiance in a stadium using a few looping motions started randomly.
1. Open the Behavior Editor , and double-click on your first EntityType. A tab appear, corresponding to the Behavior of the characters from this EntityType.
2. Drag and drop a Motion Behavior on the Behavior Flow.
3. Select it and check your attribute editor. The main attribute is a list of motions that should be played. Just click folder icon and browse to your motions.
When adding multiple motions by clicking the "Add New Motion Clip" button, one motion will be randomly chosen each time the behavior start. It will help you to easily add animation diversity to your stadium.
If you want your motions to loop endlessly just click the Loop button. To add more animation diversity just go back to the Motion Behavior attributes and set the Start Percent Max to 1 this way your agents will play the motion at a random starting time.
SWITCHING FROM ONE RANDOM MOTION LOOP TO ANOTHER
Here is how to create more complex animations with characters switching from one animation to another in 5 easy steps:
1. Open the Behavior Editor , and double click on your first EntityType.
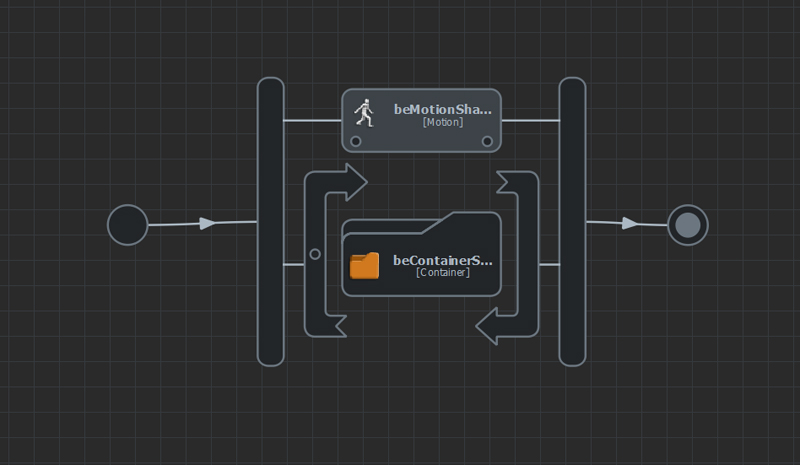
2. Then drag and drop a Loop Operator on it as we are going to loop a group of motion clips.
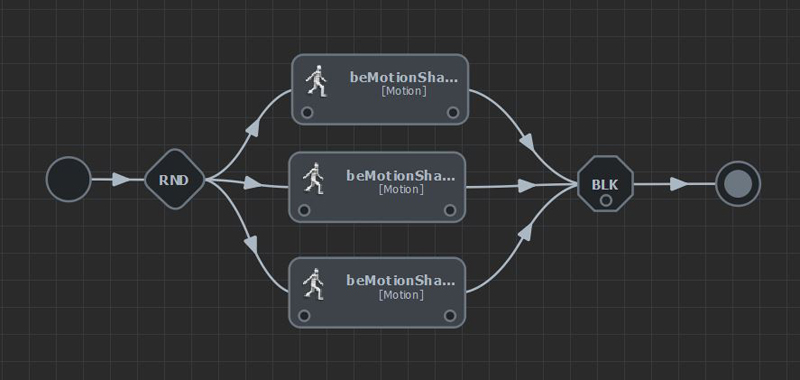
4. Go inside the Behavior Container and drop a Random Operator on the Behavior flow. Create as many Motion Behaviors as you need and load one motion clip per Motion Behavior. Link your Motion Behaviors right behind the Random Operator.
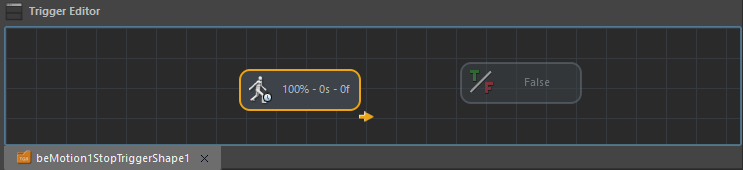
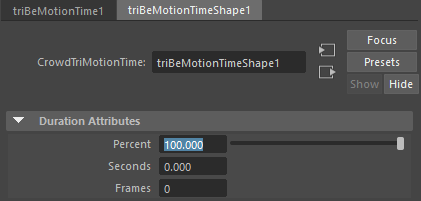
5. Double-click on the Stop Triggers of your Motion Behaviors to edit them (e.g. drag and drop a Motion Time trigger from the library and set it to 100%). Do not forget to right-click on it to set it as Root Trigger.
In this example the behavior ends after being played 100%.
Each time a stop trigger is reached, the corresponding Motion Behavior stops and the Loop operator restart the container which leads to a new random choice of Motion behavior to be started.
ADD A BACKGROUND MOTION
To unify the look of this crowd switching motions all time, we can add a background animation for all our entities.
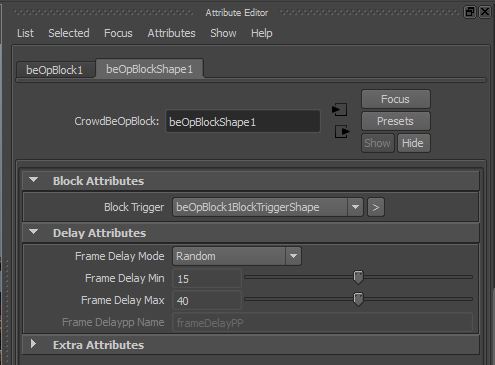
6. Drag and drop a Block Operator at the end of this Behavior Flow.
7. And set its values to the desired amount of frames. It will delay the switch between you motions.
8. Now that the entities are returning to T-pose between each motion Behaviors it is time to add our background animation. Go back at the first level of the EntityTypeContainer and add the Motion Behavior in parallel of the container.
For the quality of the motion blending choose a motion very similar to the others. For example: if all your motions begins and ends with your character standing, choose a standing animation.
9. Go into the attributes of this Motion Behavior and edit the priority weight to a small value in order to play your motion in Background
10. Play your simulation, your agents will endlessly loop between the different motions.
HOW TO USE A SOUND CLIP TO DRIVE THE BEHAVIOR TRIGGERS
Behavior triggers can be driven through an attribute of another object. We could use this feature to trigger a Behavior with a sound file. You could achieve this in 3 ways, using AudioWave plugin, SOuP’s audioToArray node and MASH’s audio node. The latter two give more precise control over the sampling frequencies of the sound file. For the scope of learning we outline the method using the audioWave plugin, but the concept remains same with the other plugins. (see at the bottom for details of other plugins)
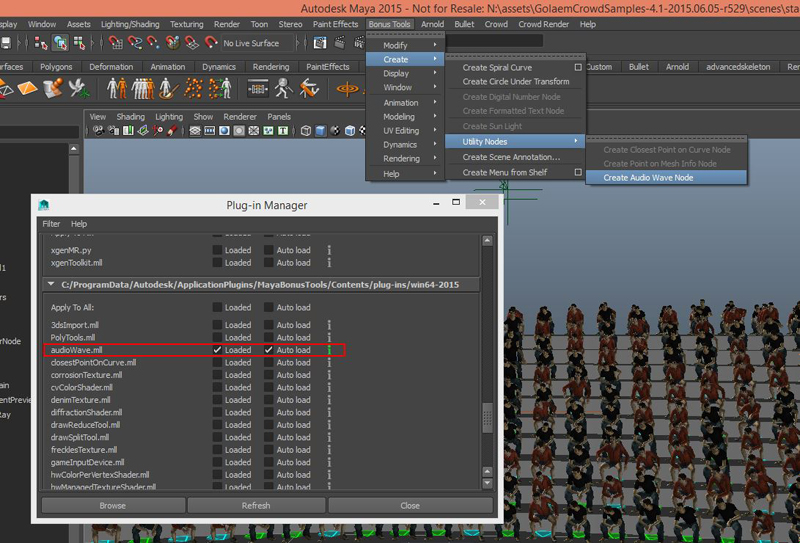
1. Download and install BonusTools for your current version of Maya.
2. Load the audioWave plugin.
3. Make sure you are using the right type of audio file format to use in Maya. For more details refer to
Tip: Editing the source sound file to remove noise or to amplify the required waveform would give better results.
4. Import the sound file to preview on the timeline, File > Import. This will be used for only preview.
5. Create the audioWave node. BonusTools > Create > Utility Nodes > Create Audio Wave Node. If the option is greyed out, you would need to save the file or set the audioWave plugin to Auto Load and restart Maya. Alternatively you can use the command “createNode audioWave”. To see the node in the outliner you would need to turn off “Show Dag Objects Only” for the outliner.
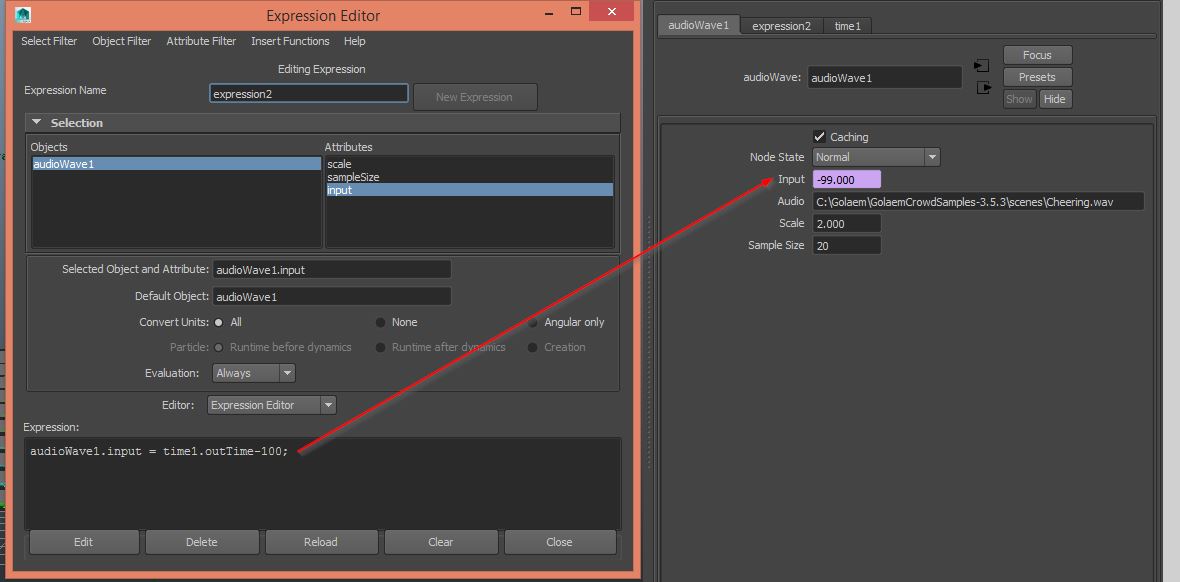
6. Connect the time1.outTime to the input of the audioWave. By default the audio file starts at the frame 1, if you want to offset the start then it is easier to set an expression for the input (for example: audioWave1.input = time1.outTime -100;)
7. Set the path for the audio file in the Audio field of the audioWave.
8. Connect the output of the audioWave to the drivenAttribute in the startTrigger for the behavior you want to trigger.
9. Set the conditions for the drivenAttribute Trigger.
10. Tweak the sample size and the scale to get the required value to trigger your MotionBehavior
Example showing a wave motion triggered by an audio file


 , and double-click on your first EntityType. A tab appear, corresponding to the Behavior of the characters from this EntityType.
 on the Behavior Flow.
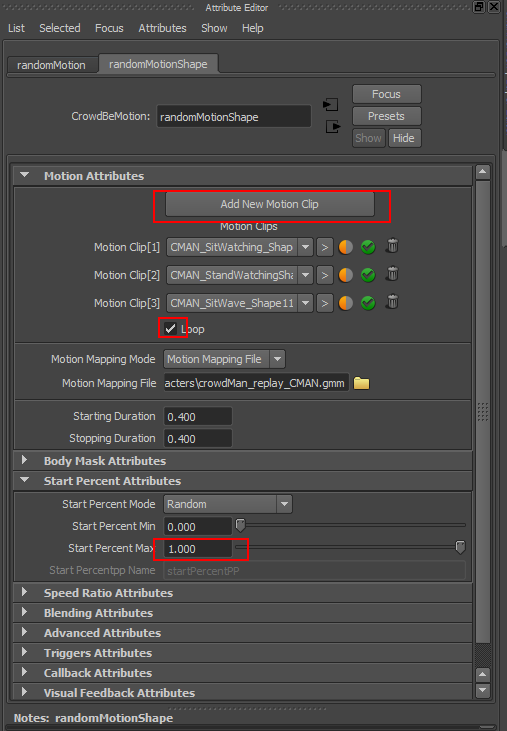
 on it as we are going to loop a group of motion clips.
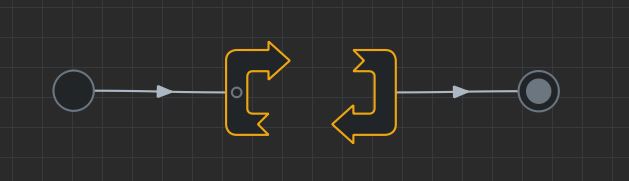
 on the Loop Operator
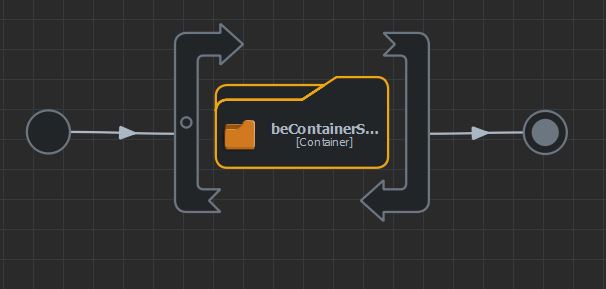
 on the Behavior flow. Create as many Motion Behaviors
  as you need and load one motion clip per Motion Behavior. Link your Motion Behaviors right behind the Random Operator.
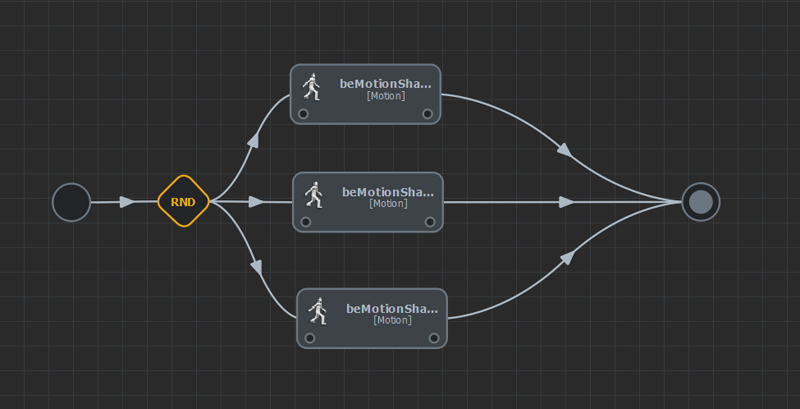
 at the end of this Behavior Flow.