


Procedural Fur
As of August 5th, 2025, Golaem will no longer provide direct support.
All support for Autodesk Golaem will now be handled exclusively through Autodesk support channels and this website will be deactivated soon.
Please bookmark the Autodesk Golaem Support section for any future support needs related to Autodesk Golaem packages.
This tutorial shows how to setup Golaem characters to use fur assets. Fur assets in Golaem are defined in a proprietary file format and can be imported from any fur system that can export to Alembic. Importing fur from XGen interactive grooming is supported automatically but it is also possible to use Alembic to import Yeti, Ornatrix, Houdini fur or any other system which can store its fur as an Alembic file:
Fur rendering is supported with Arnold, Renderman, V-Ray, Redshift & Guerilla Render
Creating the fur assets in Maya
Golaem can convert XGen interactive grooming into fur assets directly from Maya. To create XGen interactive grooming fur on your meshes, refer to Maya's online help here. Previous workflow XGen fur is not supported, but can be converted to XGen interactive grooming as stated here.
For any other fur system, please refer to it's documentation to see how to create fur it in Maya and export it to Alembic.
Another way is to import fur from Maya Curves. This is specially relevant since if the curves need to be skinned, as skinning information of curves can be retrieved from Maya Curves, which is not possible with Alembic. In that case insure that the skinning skeleton is the same as the one declared in the gcha.
Fur assets must be created from the same pose as the one defined in the Golaem character (see the Character Maker documentation here).
Importing fur in the Character Maker
Importing XGen interactive grooming fur
The Character Maker can import XGen Fur Assets according to the transform hierarchy defined in Maya, just like meshes. To import fur assets from XGen, select one or more xgmSplineDescription nodes or one or more transforms containing such nodes and click on the Import Geometry  button. For each XGen node, the user will be prompted to choose where to save the Golaem fur file (see animation below). The fur Shading Groups, Shader Assets and any connected Shader Attribute nodes are also imported, just like for mesh assets.
Importing XGen fur
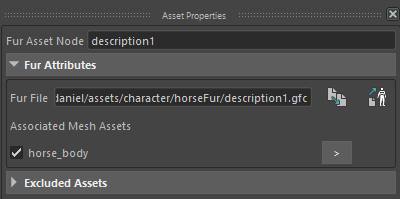
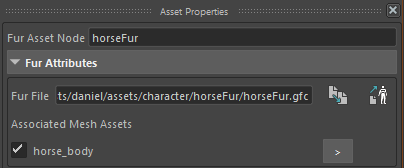
Each Fur Asset node is automatically linked to the Mesh Asset(s) on which the fur is generated. This information is shown in the Asset Properties panel (see image below). The fur meshes must be present in the Maya scene in the same pose as the one defined in the Golaem character.
Importing fur manually from an Alembic file
Fur can be imported manually from other fur systems (such as Yeti, Ornatrix or Houdini Fur). The steps are described below.
Before importing fur from alembic files, make sure that the associated meshes are in the Maya scene in the same pose as the one defined in the Golaem character, and that they are imported as Mesh Assets in the Character Maker.
- Create a new Fur Asset node (either through drag and drop or by using the Tab key) and connect it to the geometry hierarchy. You can rename it to any name you want.
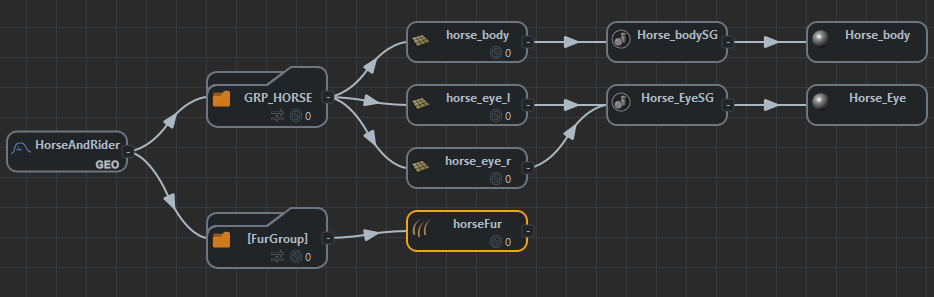
- Select the new Fur Asset node and, in the Asset Properties panel, click on the Import Fur From Alembic
 button.
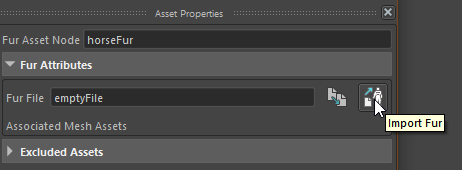
- In the following dialog, select the Alembic file to import
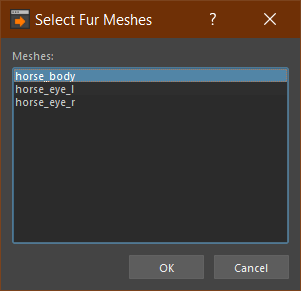
- Select the fur mesh(es) on which to generate the fur (among the Mesh Assets already present in the Golaem character)
- Select the file to which to save the Golaem fur. After a processing step, this Golaem fur file and the associated Mesh Asset(s) will appear in the Asset Properties panel. A message in the script editor will show the number of curves that were successfully imported from the Alembic file.
- Import fur shaders manually, either by creating Shader Groups and Shader Asset nodes manually or by selecting a shading group or shader and clicking on Import Geometry. Fur shaders will have to be assigned to a visible Maya geometry (mesh or fur) at render time.
Importing fur manually from Maya Curves, Skinning Support
Fur can also be imported manually from Maya curves. This allows to get back the skinning information which is lacking from alembic, while the UVs are generated automatically from 0 (base) to 1 (tip) of each curve.
Before importing fur from Maya Curves, make sure that the associated meshes are in the Maya scene in the same pose as the one defined in the Golaem character, and that they are imported as Mesh Assets in the Character Maker. Also make sure that the skeleton used for the skinning is the one exported in the gcha.
- Create a new Fur Asset node (either through drag and drop or by using the Tab key) and connect it to the geometry hierarchy. You can rename it to any name you want.
- Select the maya curves you wish to import
- Select the new Fur Asset node and, in the Asset Properties panel, click on the Import Fur From Maya Curves
 button.
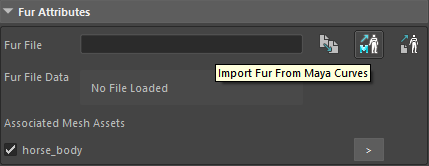
- Select the fur mesh(es) on which to generate the fur (among the Mesh Assets already present in the Golaem character)
- Select the file to which to save the Golaem fur. After a processing step, this Golaem fur file and the associated Mesh Asset(s) will appear in the Asset Properties panel. A message in the script editor will show the number of curves that were successfully imported from the Alembic file.
- Import fur shaders manually, either by creating Shader Groups and Shader Asset nodes manually or by selecting a shading group or shader and clicking on Import Geometry. Fur shaders will have to be assigned to a visible Maya geometry (mesh or fur) at render time.
Once this is done, if the fur is skinned, it will be automatically bound to the skeleton in the cache and while rendering, as for the meshes.
Mixing import from different sources
It may sometimes be difficult to import everything from a single source (xgen, alembic, maya curves). It is possible to mix different import, by reimporting some data from an existing, and configured, fur asset node. If you attempt to import some fur from an already existing fur asset, you will reach this window :
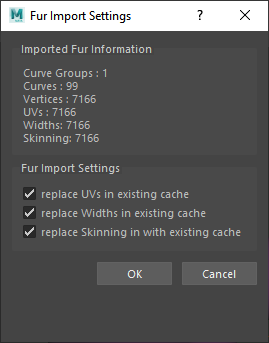
It will display what is mergeable in the new import, based on the total curve count, among UVs, widths & skinning information. A mergeable source is a source with the same count of curves, forbidden merge will be grayed.
If you wish to reimport totally a fur asset, just clear the Fur File field, and import again.
Fur animations mode
By default the fur will be animated on a scalp basis : The fur is rigidly bound to its base mesh. This is thereafter mentionned as the "scalp" mode.
If weights are imported for the curve, then the fur will be skinned according to the bones/weights available.
It is also possible to mix both ways by settings total weights to something between 0 (full scalp mode) to fully skinned (total weights for a vertex >= 1). A common use would be to fix the base vertices of hair to the base mesh (scalp), while letting hair tips being driven by specific bones for example (skinned).
Creating Fur Asset Variations
Fur Assets follow the same rules as Mesh Assets regarding asset variation, and they can be mixed with Mesh Assets in the same Asset Group. To create Fur Asset variations, connect several Fur Assets to a weighted Asset Goup node (see documentation here). The only additional constraint for a Fur Asset to be selected is that the associated Mesh Assets be selected, as fur cannot be generated without its supporting mesh(es). See below an example of Fur Asset variations.
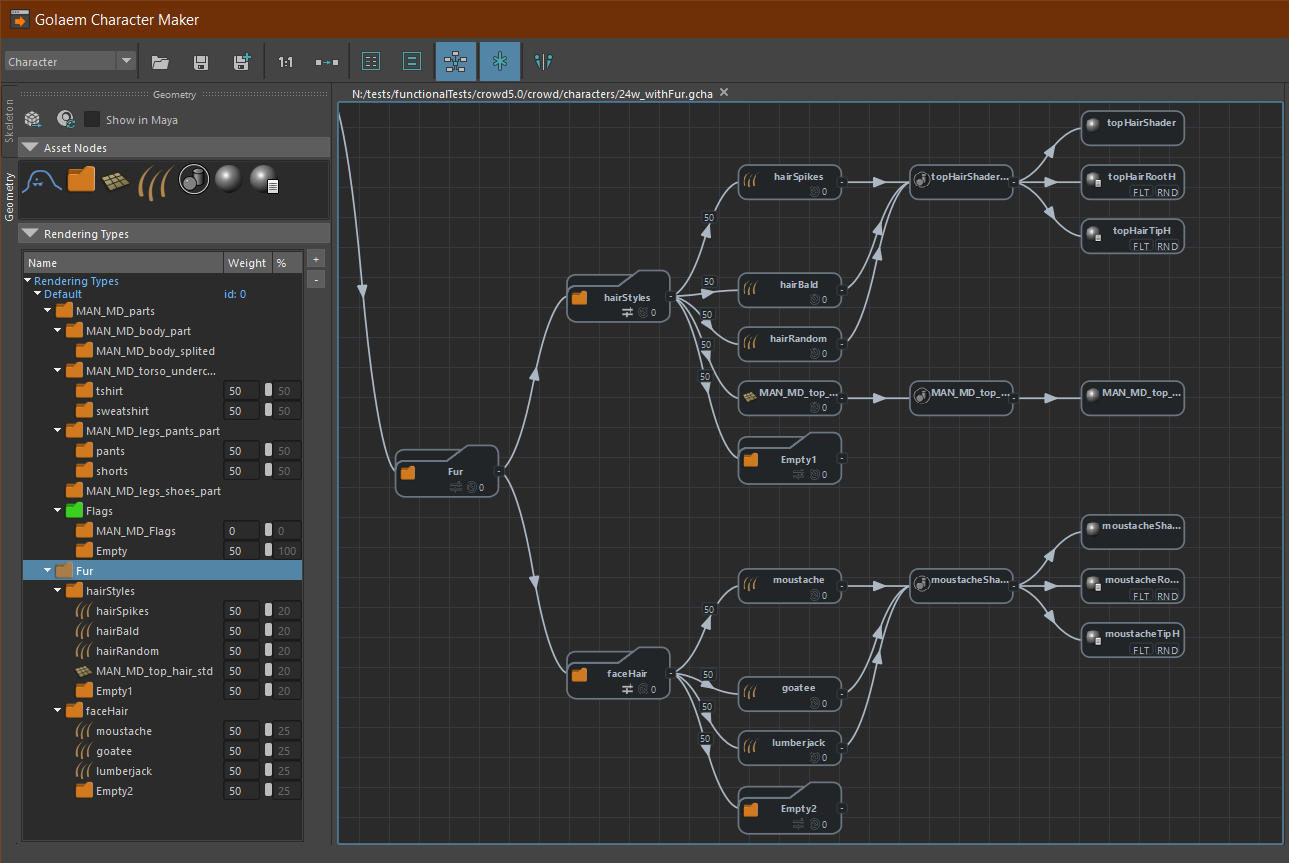
Example of Fur Asset variations
Viewing Fur in Maya's Viewport
Fur can be previewed in Maya's Viewport 2.0 only in Cache Replay mode. To enable Fur previz, select the Simulation Cache Proxy Manager node and enable the Display Fur attribute in the Render Previz Fur Display Attributes group. You can also change the percentage of rendered fur with the Display Fur Percent attribute. This will only affect Viewport display, it doesn't apply to rendering.
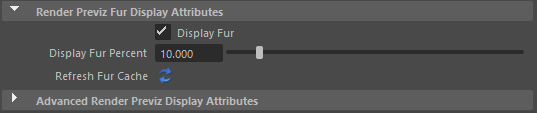
Fur Previz Attributes
Fur previz is computed on the fly when changing the current Maya frame and stored into a memory cache. To refresh it, click on the Refresh Fur Cache button. If you edit the Simulation Cache Layout, you must save the Layout file and refresh the fur cache or switch to a frame that hasn't been cached yet to see the Fur previz changes.
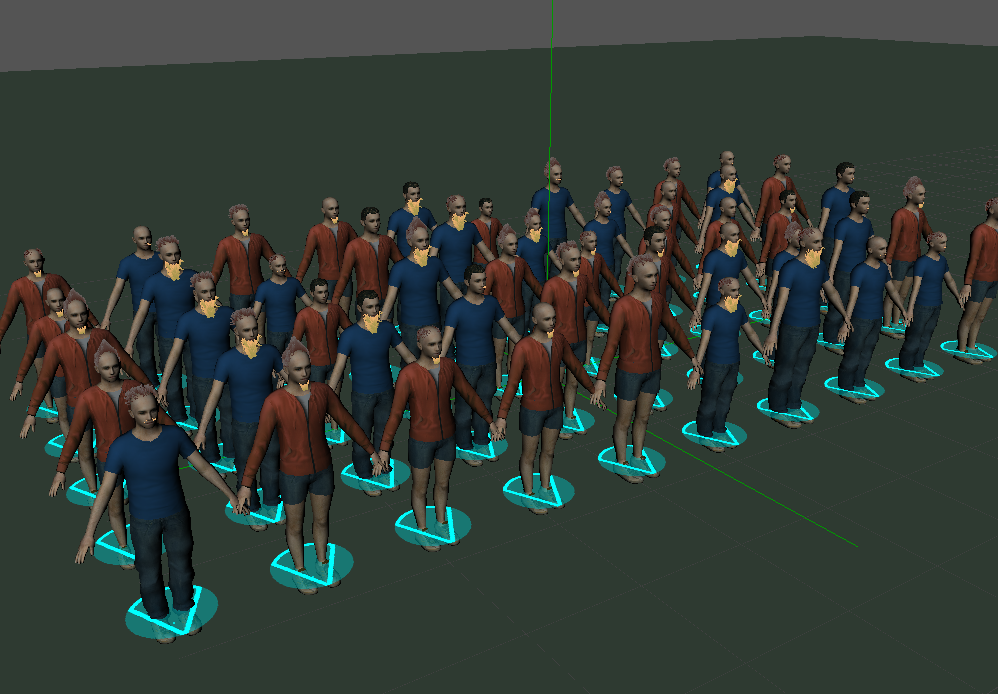
Example of Fur Previz in Maya's Viewport 2.0
Fur Previz does not display shader variation, but colors and textures can be taken into account - fur root and tip colors can be different, as defined in a hairPhysicalShader node. They are defined in the Advanced Render Previz Display Attributes group on the Simulation Cache Proxy Manager node.
Rendering Procedural Fur
Once the Fur Assets properly set up, just hit the render button. Shader variations work just like for Mesh Assets (see the texture / material diversity and color variation tutorials).
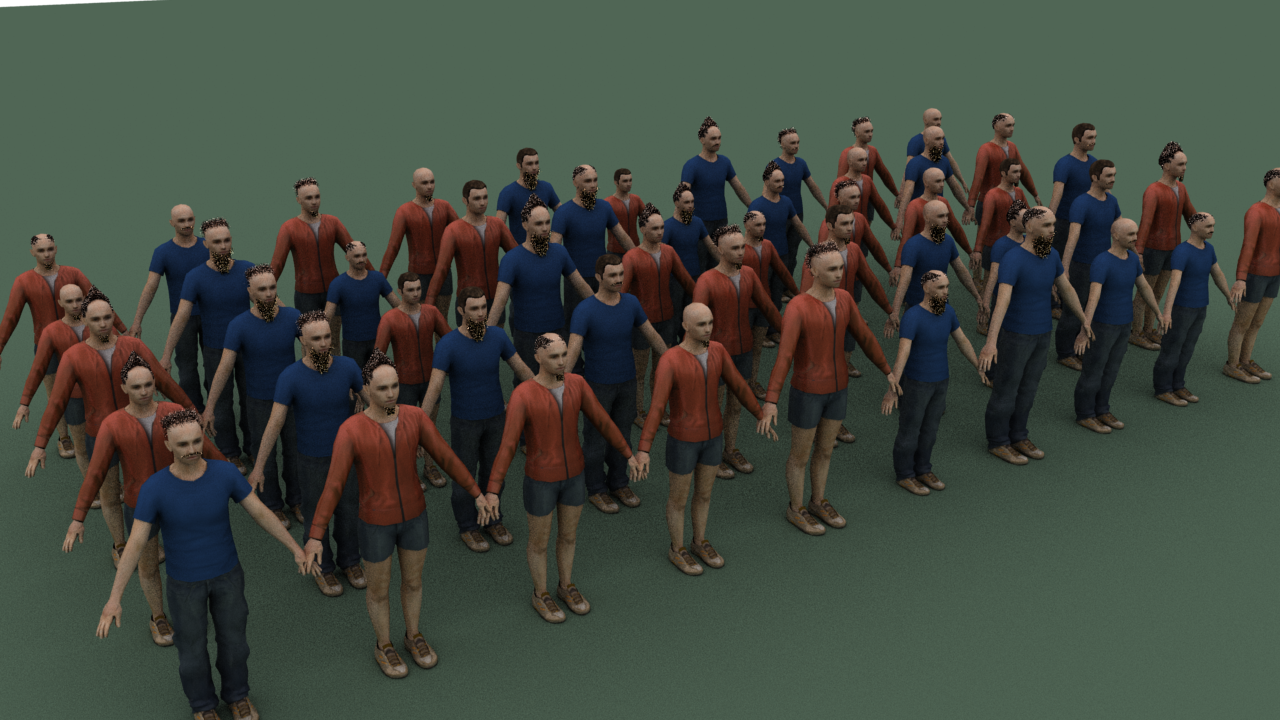
Example of Fur render in Arnold
Refreshing Fur Assets
If you change any fur aspect in Maya (sculpting, brushes, density, width, etc.), you'll need to refresh the Fur Asset files in the Character Maker.
With XGen interactive grooming, you only need to reselect the XGen (xgmSplineDescription) node in Maya and click on the Import Geometry button. You'll be prompted to save the Golaem fur file again. You can override the original file. Refreshing shaders also works with XGen interactive grooming, just like refreshing shaders for Mesh Assets, using the Reset Shader button in the Geometry Tab.
With other fur systems, you'll need to reexport the fur to Alembic, and redo the manual steps described in the section above, or reimport the maya curves after clearing out the file name field.
Do not forget to save the character file after the fur files have been recreated.
If fur previz is active, you'll need to click on the Refresh Fur Cache button on the Simulation Cache Proxy Manager to see the changes.