


Main Workspace (Geometry)
When in the Character Mode, in the Geometry Tab, the Main Workspace displays the character's Geometry Assets as a node-based graphical interface.

Character Maker Main Workspace - Geometry
Geometry Asset Nodes
To add a node, drag and drop it from the Asset Nodes view, or press the TAB key inside the Main Workspace and select the node to add. Nodes must be linked directly or indirectly to the Character Node, otherwise they will be discarded. To link two nodes, draw a link by dragging the mouse while holding the middle button, or use the link button  on the toolbar. See the Character Maker Controls page for more information.
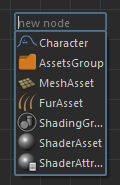
Creating a Geometry Asset node with the TAB key
Here are the types of Geometry Asset Nodes:
| Name | Icon | Main Workspace Representation | Description |
| Character Node |  |
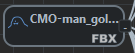 |
This is the root node for all the geometry assets. There must be one and only one Character Node. All other geometry asset nodes must be connected (directly or indirectly) to this node in order to be taken into account. NameThe name of the node is set in its properties panel. Geometry FileThe geometry files of the Character node are set in its properties panel. An icon shows the status of the first geometry file:
Context Menu
|
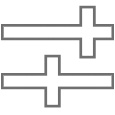
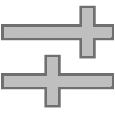
| Asset Group Node |  |
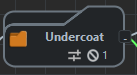 |
An Asset Group Node represents a group of assets. An Asset Group can contain any number of Asset Groups, Mesh Assets or Fur Assets. If an Asset Group is weighted, only one of its child nodes will be chosen at render time according to the asset group's weights, otherwise all of its child nodes will be chosen. An Asset Group node can only be connected to another Asset Group node or to the Character Node. NameThe name of the node is set in its properties panel. Weighted GroupTo toggle the Asset Group as weighted or not, click on the
Excluded AssetsThe icon indicates if the Asset Group has any excluded assets. Excluded assets are edited in the node's properties panel.
Context Menu
|
| Mesh Asset Node |  |
 |
A Mesh Asset directly represents a Maya mesh associated to the Character. A Mesh Asset node can only be connected to an Asset Group node. It can contain one or more Shading Group nodes. NameThe name of the node is set in its properties panel. Excluded AssetsThe icon indicates if the Mesh Asset has any excluded assets. Excluded assets are edited in the node's properties panel.
Context Menu
|
| Fur Asset Node |  |
 |
A Fur Asset defines how to render fur procedurally on a supporting Mesh Asset. A Fur Asset node can only be connected to an Asset Group node. It can contain one Shading Group node. NameThe name of the node is set in its properties panel. Excluded AssetsThe icon indicates if the Fur Asset has any excluded assets. Excluded assets are edited in the node's properties panel.
Context Menu
|
| Shading Group Node |  |
 |
A Shading Group Node represents the name of the shading group applied on a mesh of the rendered geometry or a fur asset. Each Mesh Asset or Fur Asset node can have one or more Shading Group nodes attached to it. A Shading Group node can only be connected to a Mesh Asset or Fur Asset node. Depending on the renderer, Maya must contain either the shading group or its shaders, otherwise the corresponding meshes or fur assets will be rendered with the default shader (for more info, see the rendering workflow). Shading Group nodes can also contain one or more Shader Attribute nodes. NameThe name of the node is set in its properties panel. Context Menu
|
| Shader Asset Node |
|
 |
A Shader Asset Node represents the name of the shader applied on a mesh of the rendered geometry or a fur asset. A Shader Asset node can only be connected to a Shading Group node. Depending on the renderer, Maya must contain either the shading group or its shaders, otherwise the corresponding meshes or fur assets will be rendered with the default shader (for more info, see the rendering workflow). NameThe name of the node is set in its properties panel. CategoryThe icon of the shader depends on its category which is set in its properties panel. Context Menu
|
| Shader Attribute Node |  |
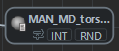 |
Shader Attribute nodes are used to pass random or Attribute or Channel values to the shading graph. These values can be retrieved by using the user data shaders provided for each renderer (for more info, see the rendering workflow). NameThe name of the node is set in its properties panel. TypeThere are 4 possible Shader Attribute types, defined with a toggle box or in the node's properties panel:
Random/Attribute/ChannelThe Shader Attribute value can be either random or read from a Golaem attribute or channel. This option is defined with a toggle box or in the node's properties panel. It is not available for STR Shader Attributes.
Weighted Integer/Float Shader AttributesInteger or Float Shader Attribute values can be weighted in random mode. To toggle weights click on the
Context Menu
|
| Skeleton Override Node |  |
 |
A Skeleton Override Node represents a change in the skeleton bone position / orientation / scale. This allows to bring skeleton diversity directly within the Golaem character file, without using a global entity scale which sometimes might looks weird. The diversity is ensured
NameThe name of the node is set in its properties panel. Context Menu
|
| Blind Data Override Node |  |
 |
A Blind Data Override Node represents a change in the blind data values (usually blend shapes). This allows to bring blind data diversity directly within the Golaem character file, without having to use a behavior. NameThe name of the node is set in its properties panel. Context Menu
|
| Physics Override Node |  |
 |
A Physics Override node represents an override the Physics properties of a bone of the skeleton (ragdoll shapes). It allows to change the physics collision shape of an Entity depending on its geometry assignment. NameThe name of the node is set in its properties panel. Context Menu
|
 No geometry file was set
 The geometry file is present
 The geometry file was not found
 /
/ icon. Only an Asset Group with two or more child nodes can be weighted. This property can also be changed in the node's
  Indicates that the Asset Group has no excluded assets. It is followed by a 0.
 Indicates that the Asset Group has excluded assets. It is followed by the number of excluded assets.


Asset Group Weights
Weighted Asset Groups display the weights of their assets as text boxes on the links to their child nodes. The displayed weights depend on the Rendering Type selected in the Rendering Types Panel. If no Rendering Type is selected (or the root "Rendering Types" item is selected), the weights displayed are the default weights. They are all displayed in white. If a Rendering Type is selected, the weights displayed are the weights in that Rendering Type. The weights it overrides are displayed in green. To change the weights of a Rendering Type, make sure it is selected in the Rendering Types Panel. Then click on a weight box and drag upwards to increase the weight, or drag downwards to decrease it. Weights can also be changed directly in the Rendering Types Panel with sliders, or by selecting an Asset Group node and editing the sliders in its properties panel.
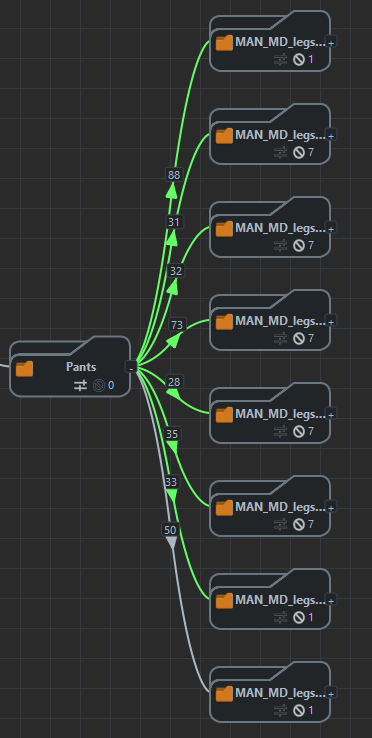
Asset Group weights in the Main Workspace
Expand/Collapse a node
Each Geometry Asset node that has child nodes displays a toggle box for collapsing or expanding it. If the node is collapsed by clicking on the "-" button, its child nodes will be hidden. If the node is expanded by clicking on the "+" button, its child nodes will be displayed. If Auto Layout is enabled, the nodes will be rearranged automatically.

Expand/Collapse button and its tooltip
To expand/collapse all the items, Shift + click on the toggle box. It's also possible to expand/collapse by one level starting from a node by pressing Shift and turning the mouse wheel while hovering over the node.
Expand/Collapse by one level with Auto Layout enabled
Enable/Disable weights
When a Geometry Asset Node has children, it can behave as a simple group or as a weighted group. It can be tedious to enable or disable this weighting ability on a complex tree. In that case, you can enable or disable recusively the weights on all children of a Geometry Asset Node.

Enable/Disable weights on all children recursively, with the asset node contextual menu