Setting up your character for Physics
As of August 5th, 2025, Golaem will no longer provide direct support.
All support for Autodesk Golaem will now be handled exclusively through Autodesk support channels and this website will be deactivated soon.
Please bookmark the Autodesk Golaem Support section for any future support needs related to Autodesk Golaem packages.
In the text tutorial below, you can find additional information about how to setup your Golaem Character for physics
SETTING CROWD UNITS
TESTING YOUR CHARACTER'S RAGDOLL
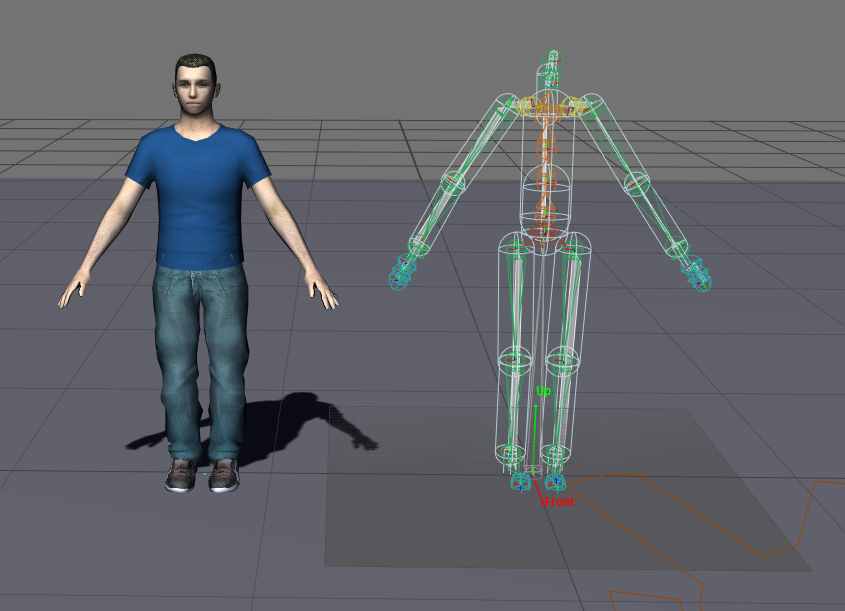
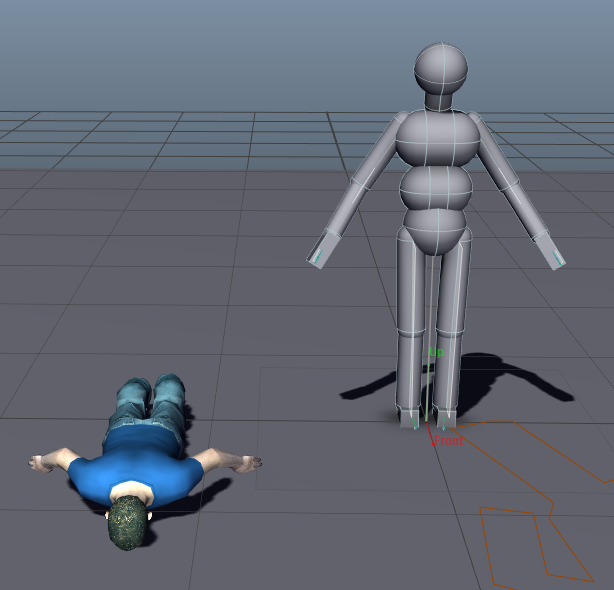
Open your character file (gcha) into the Character Maker. To get a better understanding of what we are doing when fine tuning our character's physical shape and physical properties let's simulate the corresponding Golaem character next to our CharacterMakerLocator.
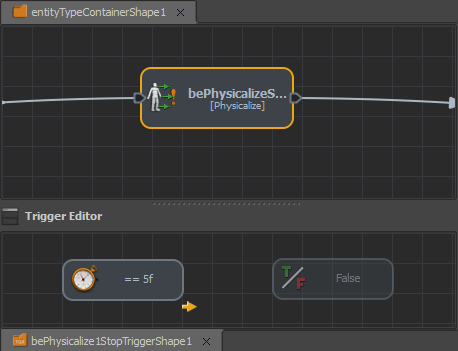
To turn our character into ragdool, go inside the Behavior Editor and drag and drop a Physicalise Behavior on the Behavior Flow and set its Stop Trigger to be activated after 5 frames.
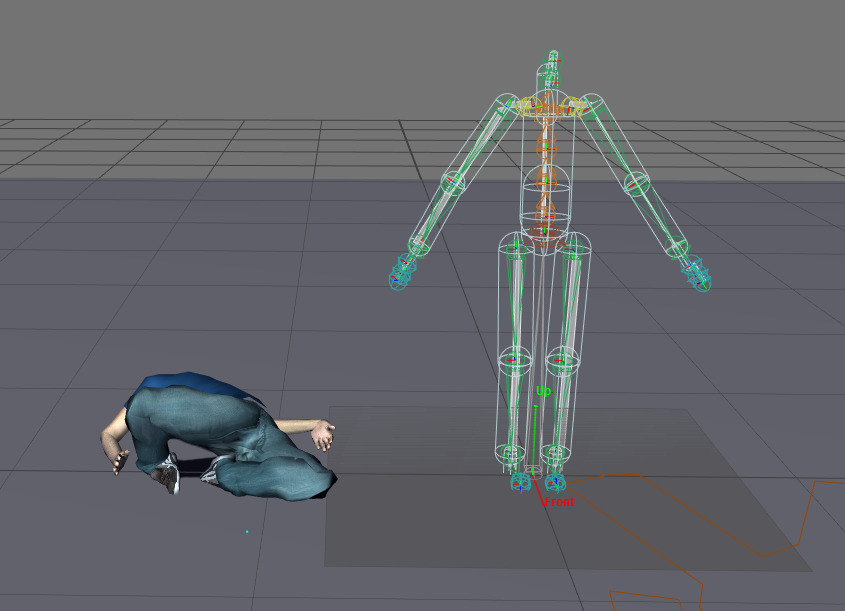
Play your simulation, it's not that bad already (because Golaem automatically set some physics properties for you), but we will improve them in the following sections.
Choosing physicalized bones
You may have noticed the shapes around each bone of the Character. Those shapes are the Physics Shapes used during physics simulation.
We will transform these shapes to fit our character better.
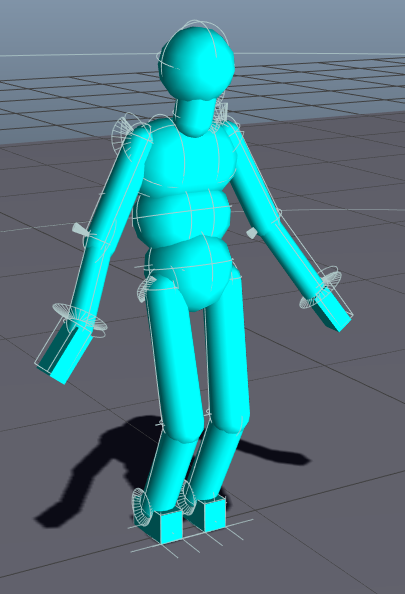
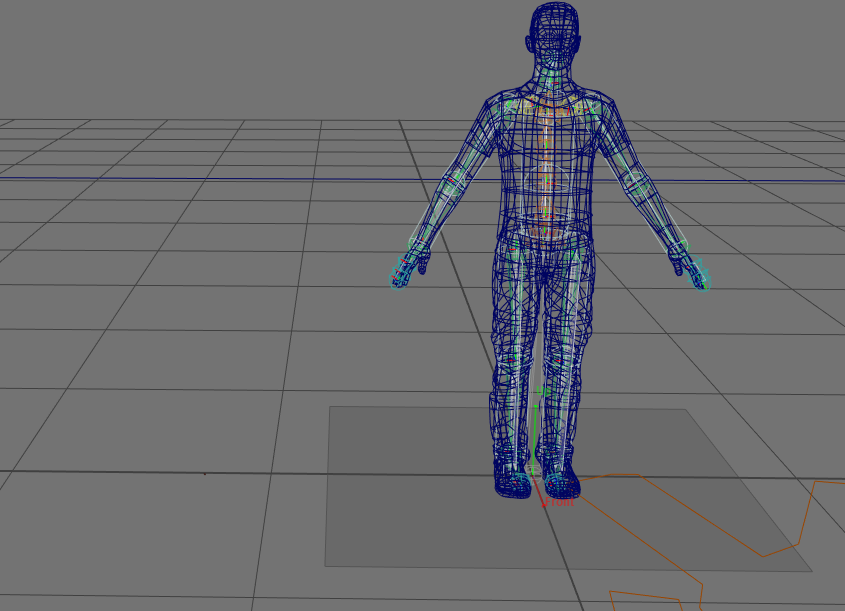
First, you can load your character geometry on top of the characterMaker Locator so that we have a reference for our character shape. It can be a good idea to switch to wireframe to see the Golaem shapes under your character shape.
Before starting to adapt shapes to our character shapes, we will make sure that only important bones are physicalized.
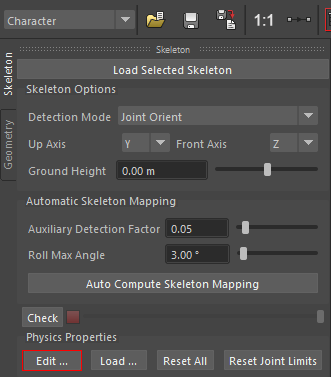
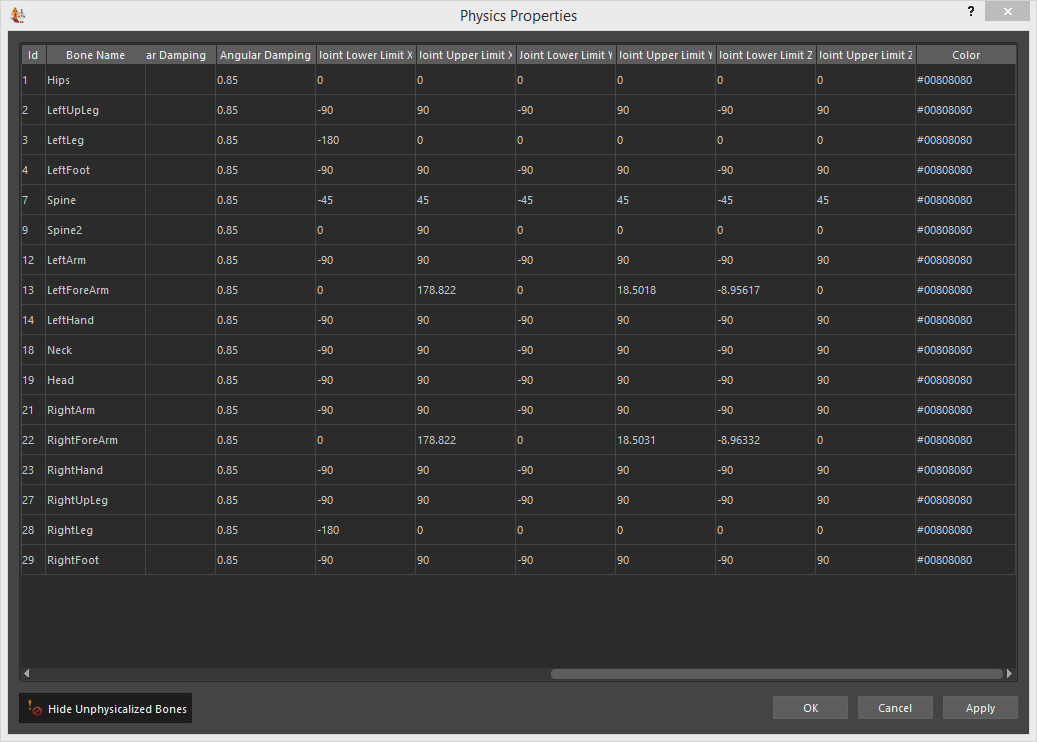
Use the Edit Physics Properties button to load a spreadsheet representing all bones and their physical properties.
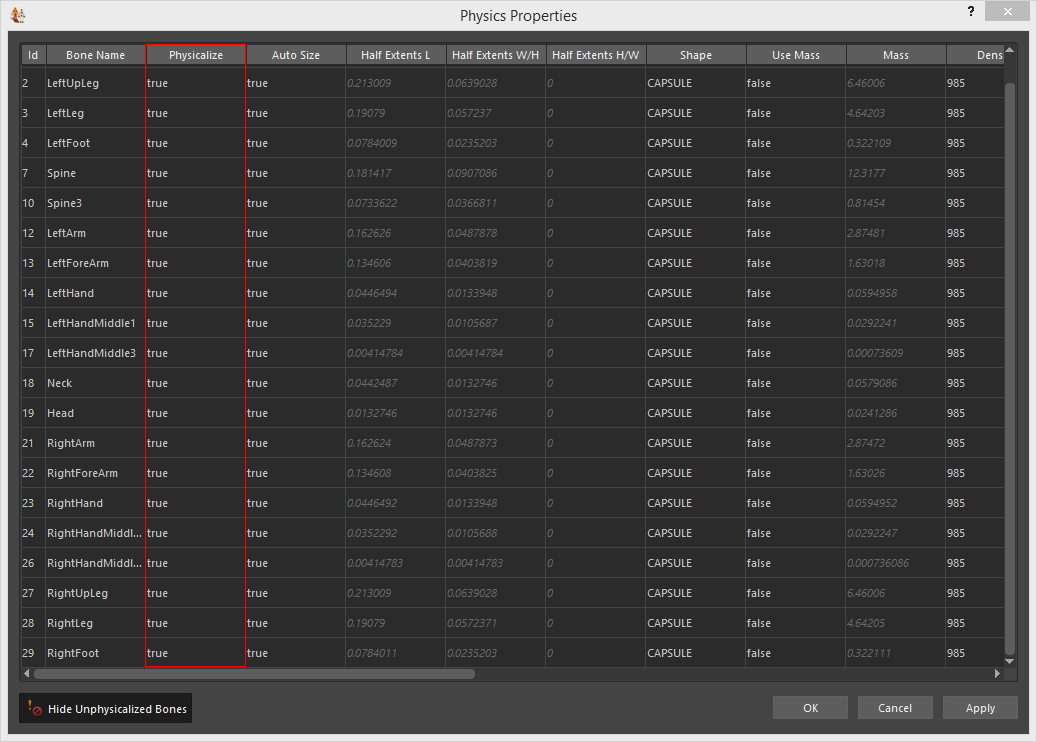
As you can see many bones have been physicalized.
Double click in a cell to edit it. Before being able to edit a bone properties, this bone should be physicalized (physicalize property = true), and to be able to modify its size, the autosize property should be set to false (but let forget about the size at this step, it will be configured later).
See the Reference Guide for Bone Physics Properties for more details about them.
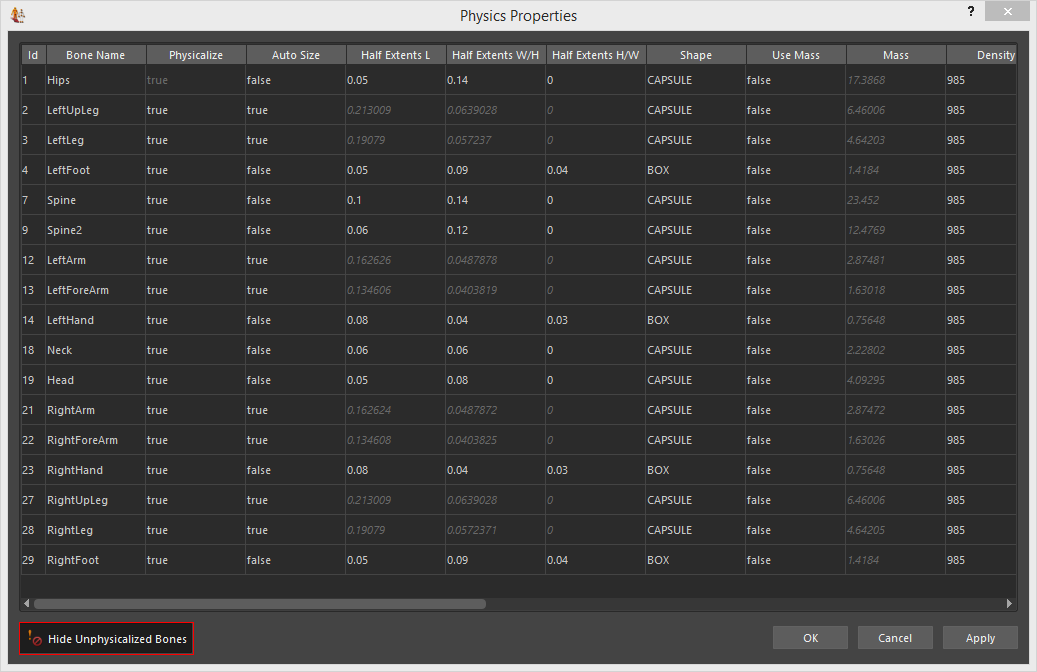
For now let's reduce the number of physicalized bones. For example, in the example below, you can notice that we used a big box on the hand bone representing all fingers. As physics simulation is a computation expensive, it is better and more stable not to physicalize all fingers if it is not needed.
Set the undesired bone Physicalise property to False, click the Apply button. And do not forget to save the .gcha file after.
Note that you can show/hide unphysicalized bones by using the "Hide Unphysicalised Bones" at the bottom left of the dialog.
Things to know:
- Capsules generally yield better results than boxes.
- Root bone needs to be physicalized, but not every bone from the spine. Try the combination of physicalized spine bones which will matches best the shape of your character.
Defining the physics shapes
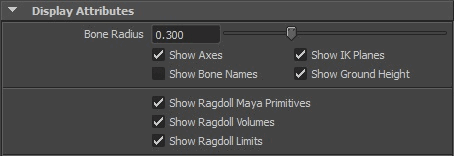
Now that the Physics Shapes are correctly chosen for each bone, let's fine configure the dimensions and positions of each one. Select the Character maker locator, and make sure the "Show Ragdoll Maya Primitives" is set to true:
The physics shapes should now be present as Maya Polygons:
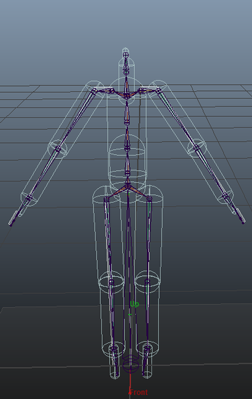
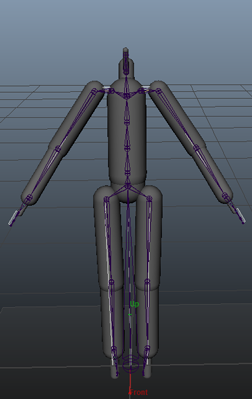
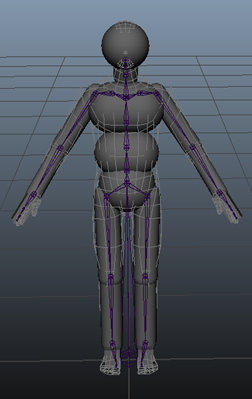
Left: Default Physics Shape Display - Middle: Physics Shape as Maya Primitives - Right: Edited Primitives
You can now directly use the Maya objects to change the properties of the Character Physics Shape, and ensure it fits at best the character's geometry:
![]()
Once once the physics shapes fits the character don't forget to save your Gcha.
Note that although you are totally free on the applied transform, you should follow some best practices:
- Do not move the shape too far away from the joint it is linked to.
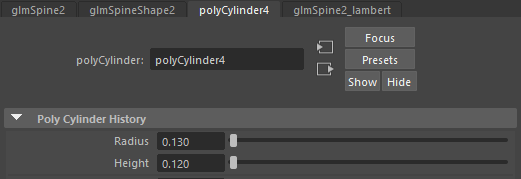
- Instead of scaling the shape, use the Polygon history attributes
- Always make sure that one shape is only colliding/overlapping with its direct neighboors. Collision with a direct neighboor are not taken into account. However if your shape collide with a shape further in the hierarchy (e.g. you have Spine => Neck => Head shapes, and your Spine shape collides with the Head shape), you may have instabilities (or even explosions!) in your physics simulation
If you have several characters sharing the same morphology, you can use the Physics Properties Load button to load the shapes from another gcha file (correspondence can be done by bone id or bone name)

EDIT JOINTS LIMITS
It's now time to give some limits to our character.
Open the Physics Properties table again and select a physicalized bone to see its Angular Limits
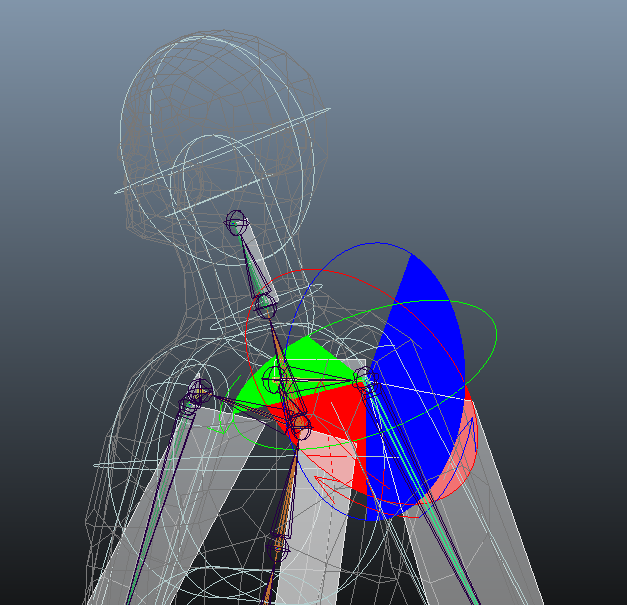
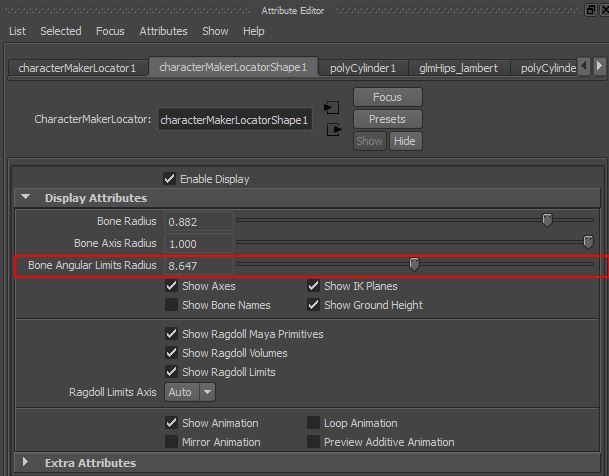
If you do not see the Bone Angular Limits gizmo in the viewport go into the Character Maker Locator's attributes and increase its radius (and also make sure the Show Ragdoll Limits checkbox is checked)
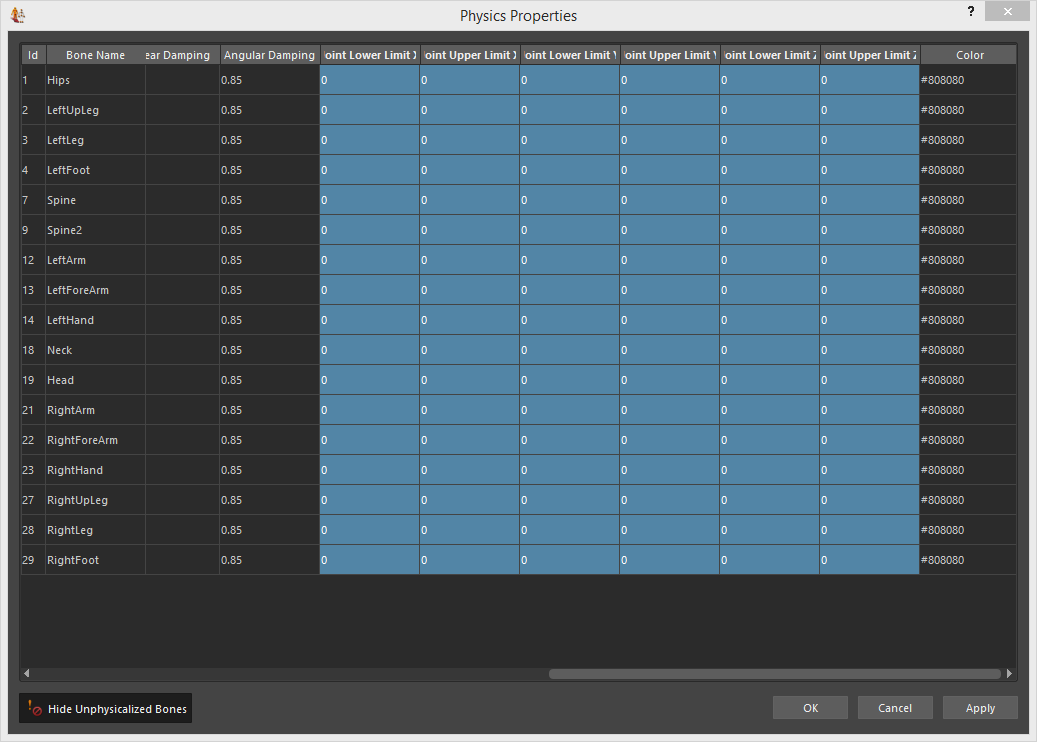
Joint limits properties (you may need to scroll to the right to find them), all set to 0
When you are happy with the results, close the Physics Properties window if open, and click on the Reset Joint Limits button so that Golaem try to determine a few good values for you.

Angular Limits as set by Golaem
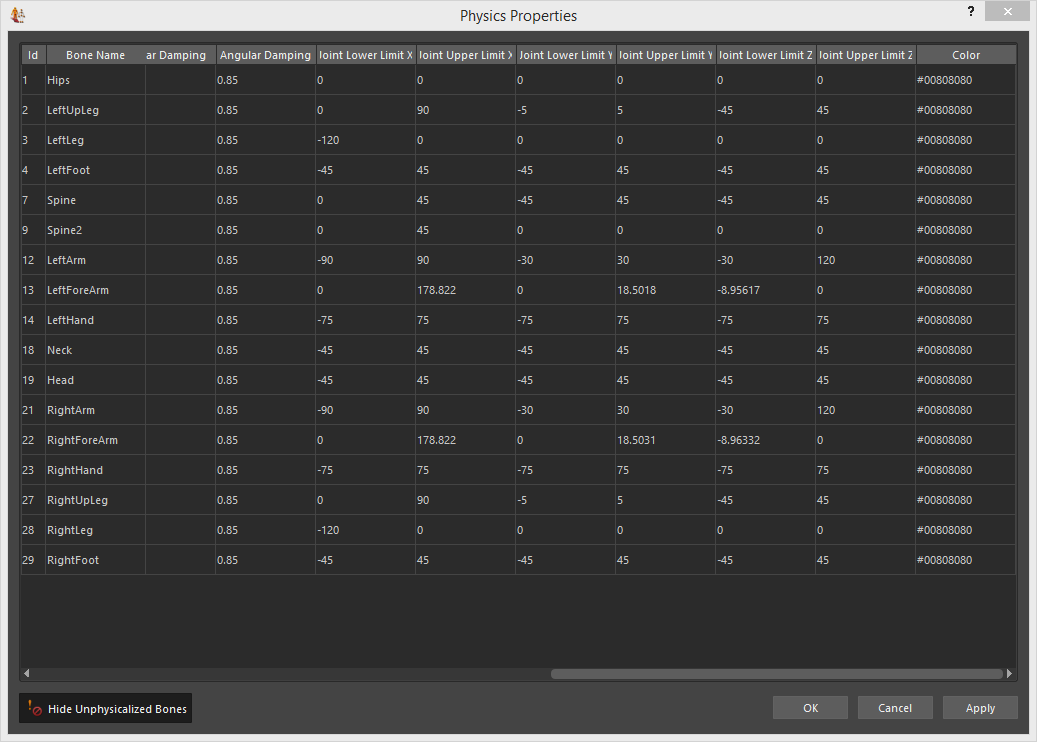
Customized angular limits, they looks like sensible values for any biped with a similar morphology as our CrowdMan Character
- For a clearer view remember to click on "Hide Unphysicalised Bones", and maybe also hide Maya physics shapes
- Root bone values (here Hips) are not taken into account
- When customizing bones from a bone chain values always check if the sum of limits is sensible. For exemple, when customizing bones from a spine. Folding 45 degrees for each can be sensible if you have 2 or 3 bones. But if you have 6 physicalized spine bones (which I admit may be a bit overkill) and set 45 degree for each, you just allowed your character to bend 6*45 degrees = 270 degrees, which is probably not what you want.
When editing the joint limits, depending on how the character skeleton is defined, you will notice that the joint limits can sometimes be displayed with different front angles. You should not worry about this as it has no influence on the values you should use.
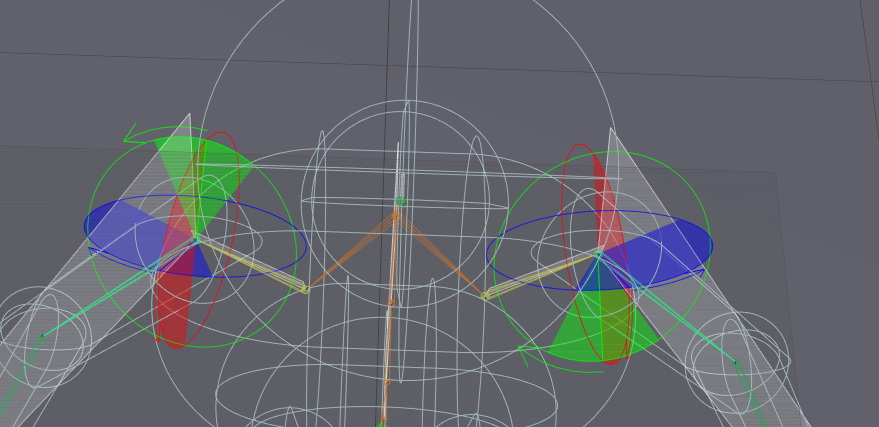
Joint limits are displayed with different front angles on each arms.
You can now try your character in your simulation and it should fall more realistically. He may now be hit by trucks, crushed by a Trex or whatever you like, you sadist. ;)
Editing Physics Shapes color
Every Physics Shape color can be customized to be used later in Physics Collision Trigger
The usual setup is to give a different color to left/right or top/bottom limbs so that you can know if a collision happens on left/right or arms/feet
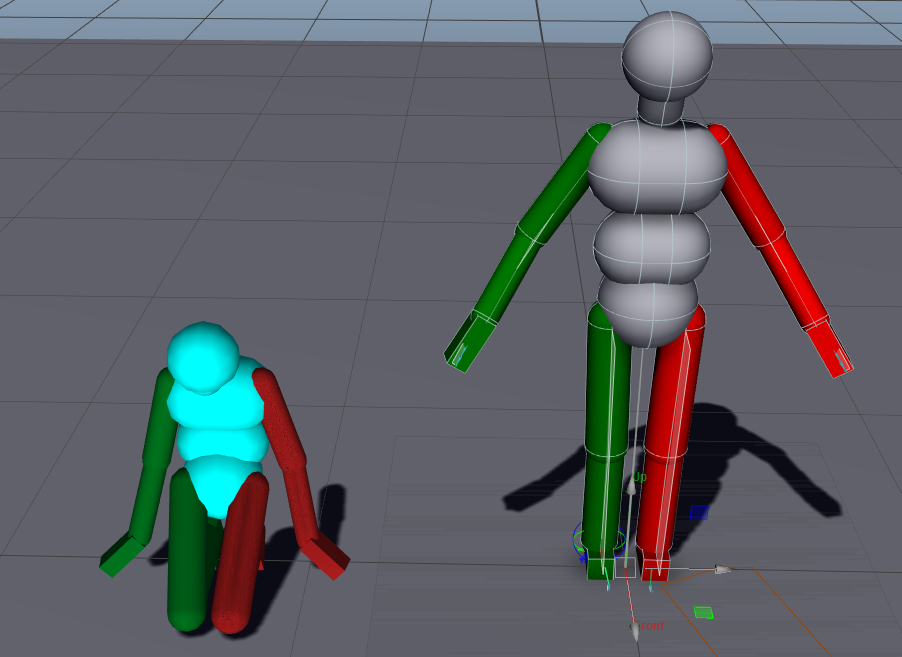
A color setup allowing to discriminate collisions on left or right side of the body
Note that you can customize the display to see these colors or not in the viewport, in the EntityType attributes

If Display Color Weight is 0, then the color is entirely made of the color defined in Physics Properties. If 1, then the color from Physics Properties is ignored.
Debugging the physics properties
If something is wrong when you test your character, the first thing to do is to activate the Collision Physics display on the Physics Locator. It will enable you what is really sent to PhysX.
It is not unusual forgetting to save the .gcha file or linking the wrong character. Using this display you will be able to find out that you are not simulating what you think. You can also be able to detect overlapping on bones which are not neighbours.
Note that you can also activate the Joint Limits and Contact Points display by increasing their scale.
If you notice strange character skinning when simulating physics, you should also set the display mode to Physics Shape in order to check how the simulation is done and if shapes are staying in place.