


Cloth Simulation with nCloth
As of August 5th, 2025, Golaem will no longer provide direct support.
All support for Autodesk Golaem will now be handled exclusively through Autodesk support channels and this website will be deactivated.
Please bookmark the Autodesk Golaem Support section for any future support needs related to Autodesk Golaem packages.
This tutorial aims at creating precise cloth simulation on top of your crowds. If you are looking to replay simple clothes with no collision need (aka flags!) or faster simulation, you should check the overview of the different ways of simulating clothes with Golaem
Here, we’ll describe how you can add cloth simulation to your existing Golaem simulations. To start this tutorials, the basics assets and settings for a Golaem Crowd simulation should already be done and the base concepts of the Crowd simulation should already be fully understood.
Setting up your Asset
To add cloth simulation to any of your asset, the first step is to import its geometry file (fbx or gtg), and then configure cloth on the imported objects using nCloth and nRigid nodes. Please refers to the Maya documentation about the cloth simulation, as Golaem Crowd only duplicates cloth nodes but don't make a simulation of its own.

In this case, the Baniere_01 is going to be configured as a nCloth, constrained on the nRigid Lance_02.
Setting up the Behaviors
Once the cloth simulation is working as expected in Maya with any crowd, it is time to duplicate it on the crowd simulation.
- Open the Behavior Editor for your EntityType and add a Cloth Behavior  . If it's the first cloth behavior in the scene, a Cloth Locator will be created at the same time.
- Configure the Cloth Behavior by adding the nCloth object(s) in the "In Cloth Geometry" list, and the nRigid object(s) in the "In Skinned Colliders" list. The list should at least contain every objects that are used to constraint the objects in the "In Cloth Geometry" list, but other nRigid objects can be added also for collisions purposes.
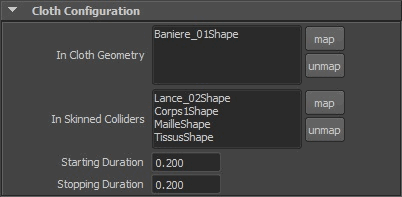
All the meshes listed in the Cloth Geometry must be attached to a nCloth node, while meshes listed in the Skinned Colliders must be attached to a nRigid node. All of them must be listed as Meshes in the Geometry Tab of the relative Character File with the exact same name (beware of namespaces).
Setting up the Simulation
By default, the nucleus solver that will be used for the cloth simulation will be the same than the one connected to the nCloth object. But a separate nucleus solver can be used for the cloth crowd simulation by changing the option in the ClothLocator:
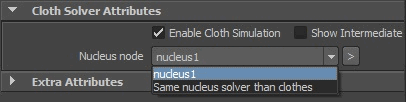
This is particularly useful to disable the cloth simulation on the source cloth objects while enabling it on the Crowd simulation. It also allows to configure the Nucleus solver with settings for better performances (but lower quality). Please refers to the Maya documentation about the nucleus node.
The simulation can now be run like any other Crowd Simulation, and clothes should be visible for both the previsualization and render with nothing else to configure.
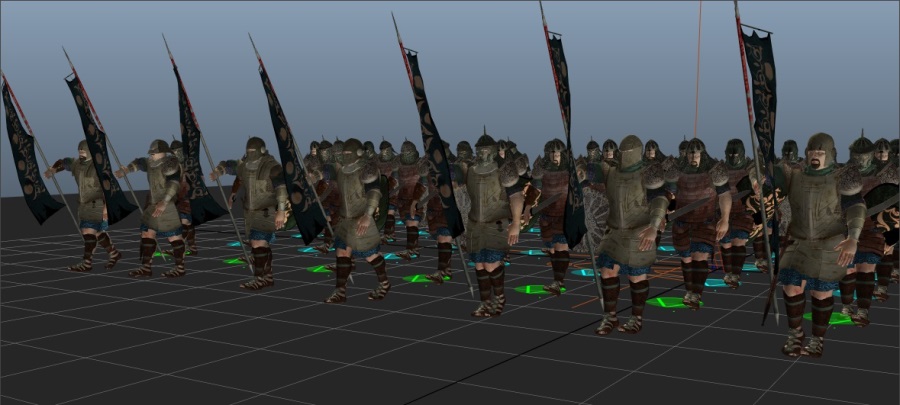
Previsualization
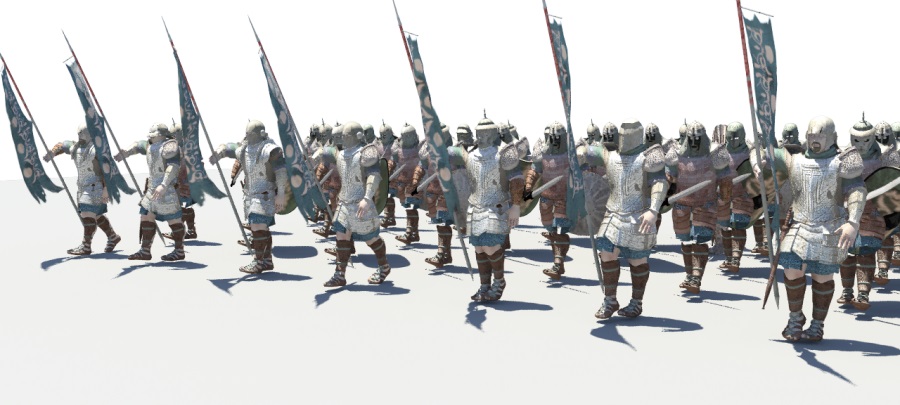
Render
Optimising the nucleus simulation
The Maya nucleus solver can take a lot of time to do the cloth simulation. here are a few hints to help reduce the simulation time:
- use low resolution meshes for clothes and colliders whenever it's possible;
- disable the nCloth collisions whenever it's possible (and when disabling the collision, you might also reduce the Collide Strength: it affects the simulation framerate even if the collision is disabled)
- reduce collision Thickness to the lowest correct value (even when the collision is deactivated)
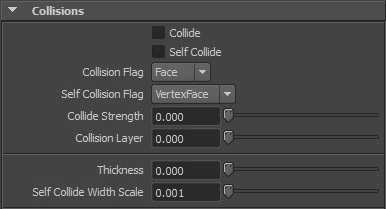
Even with collisions are disabled, the other parameters have influence on the nucleus simulation framerate
And here is the page provided by Autodesk for Optimizing nCloth.