


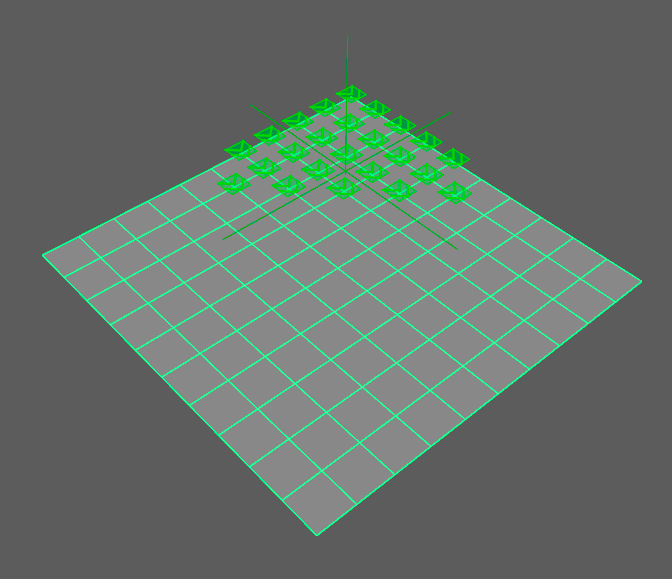
Population Tool Locator
As of August 5th, 2025, Golaem will no longer provide direct support.
All support for Autodesk Golaem will now be handled exclusively through Autodesk support channels and this website will be deactivated soon.
Please bookmark the Autodesk Golaem Support section for any future support needs related to Autodesk Golaem packages.
Creation
- Context: Population Tool Context
- MEL command: glmCreatePopulationTool;
Configuration

| Population Tool Id | Unique id of the Population Tool Locator |
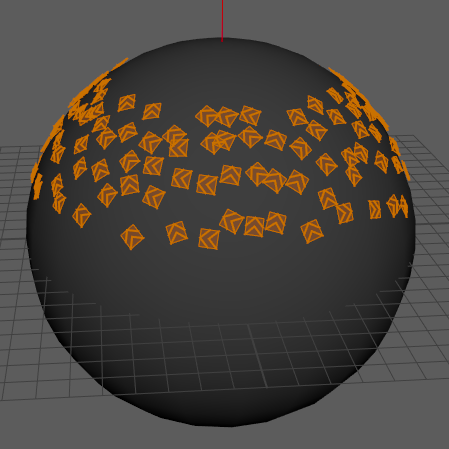
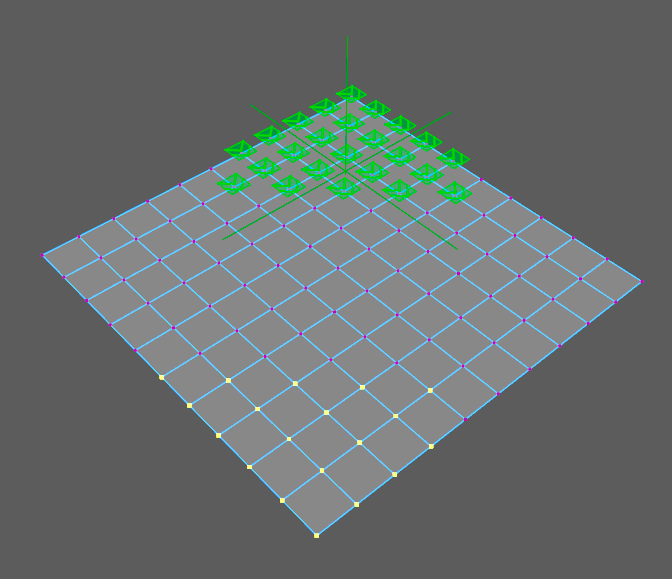
Population Attributes
This panel contains parameters to precisely manage the slot placement in the locator.
The slot size is the bounding box of the Perception Shape, which is defined in the Character Maker and can be overridden with any geometry in the Entity Type node Perception Attributes. Slot size also takes into account the mean scale defined in the Entity Type Character Attributes and the Entities Scale in the connected Crowd Field or in the Crowd Manager Node if the Population Tool is not connected to a Crowd Field.
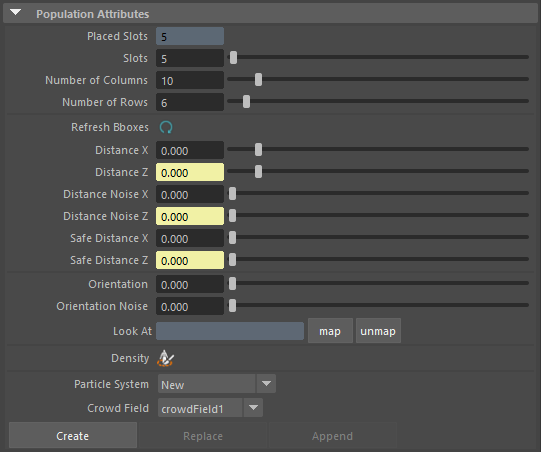
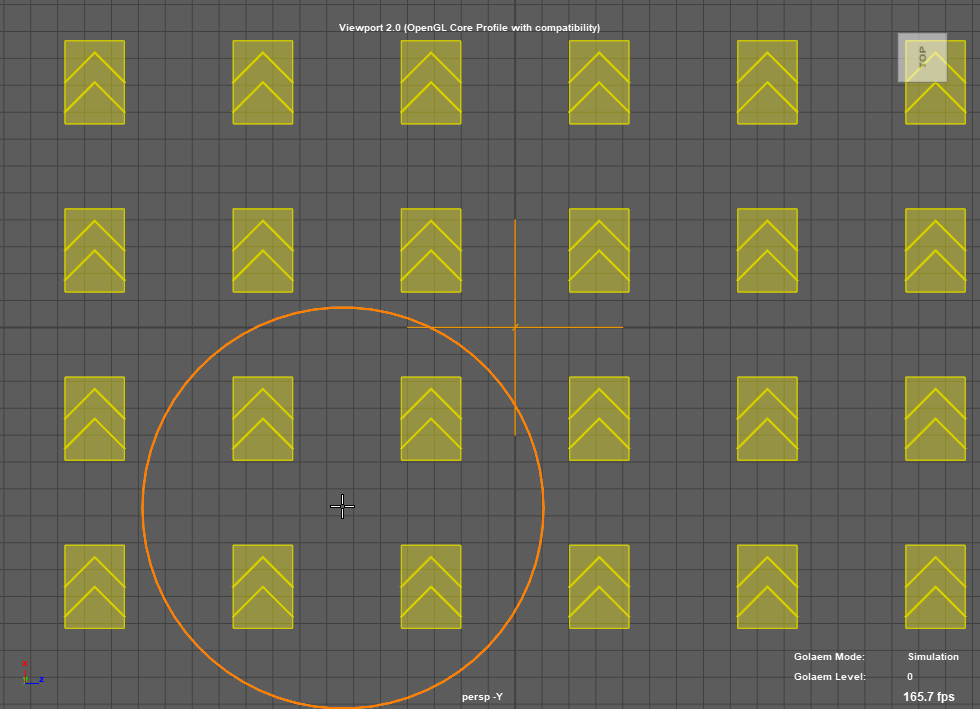
| Placed Slots | Actual number of slots placed in the area. It can be different from the number of slots if a Terrain Node with a NavMesh has been assigned to this locator and there's not enough space to fill the Population requirements (size, distance between slots) |
| Slots | Number of wanted Entities. Notice that if the zone is too small or contains too many obstacles, it is not always possible to generate the wanted number of slots. |
| Number of Columns | Number of columns of the area. This attribute are editable only with the center point shape, by updating the size of the grid. With other shapes, it's an information about the size of the computed grid. |
| Number of Rows | Number of rows of the area. This attribute are editable only with the center point shape, by updating the size of the grid. With other shapes, it's an information about the size of the computed grid. |
| Refresh Bboxes | Trigger a manual refresh of the Perception bounding boxes in all the Population Tools. This is useful when Perception Bounding Box is edited in the Character Maker or the Character file is replaced in the Entity Type. |
| Distance X / Z | Distance between slots. A negative distance brings slots even closer together. |
| Distance Noise X / Z | Position noise of Entities. For curve population tool, will noise X in curve tangent direction, and Z orthogonally. |
| Safe Distance X / Z | Distance to add around the slots to prevent them from getting any closer to other slots. The Safe Distance parameters are in the slot's local coordinate system. |
| Orientation | Orientation of Entities |
| Orientation Noise | Orientation noise of Entities |
| Look At |
Modify the orientation of Entities in order to look at a Locator
|
Density  |
Open the Paint Tool to paint the Population density |
| Particle System |
Choose "New" to create a new Particle System, or select a Particle System from the scene to replace or merge it with current particles. |
| Crowd Field |
Choose "New" to create a new Crowd Field, or select a Crowd Field from the scene to link with the created / replaced particle system. Is it also possible to choose "None" to emit particles which will not be assigned to a Crowd Field. A Crowd Field can also be created afterwards if required (see Crowd Field documentation). |
| Create | When you get the wanted repartition, press this button to create a new Particle System. The Particle System will be fed with an initialization positions, directions, Entity Types and other requested attributes |
| Replace/Append |
Replace or append the Particle System selected in the previous combo box with the new one. Notice that replacing a Particle System will preserve existing connections and expressions. |
| Several Population Tool Locators selection |
When you get the wanted repartition in several Population Tool Locators, select them and press the Create button to create a new Particle System containing relative particles. Replace or append the Particle System previously selected in the Combo Box with particles from the selection.
|


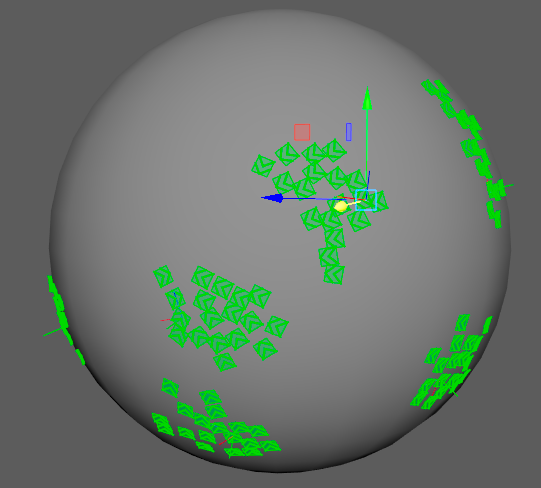
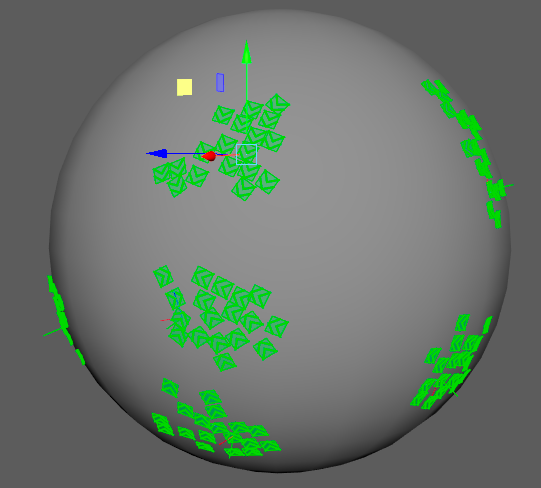
Orientation Attributes
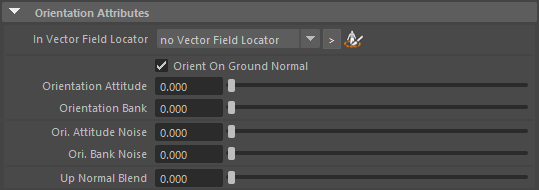
| In Vector Field Locator |
Vector Field attached to this Population Tool. The Vector field will be used to orient the slots. Select the Vector Field with the combo box. Painting in the selected Vector Field will automatically update the slots orientation.
|
| Orient On Ground Normal | The slots up vector is generatedaccording to its support normal |
| Orientation Attitude | Modify the orientation attitude of Entities |
| Orientation Bank | Modify the orientation bank of Entities |
| Orientation Attitude Noise | Adds random noise to attitude |
| Orientation Bank Noise | Adds random noise to bank |
| Up Normal Blend | In some cases, it is preferrable to blend the support normal with the default 'up' vector (grass, trees on a sloppy ground) to get a proper slot normal. |
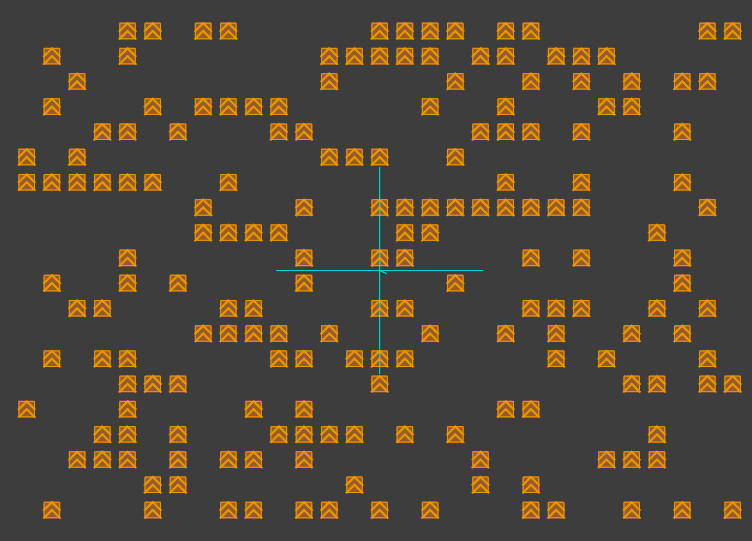
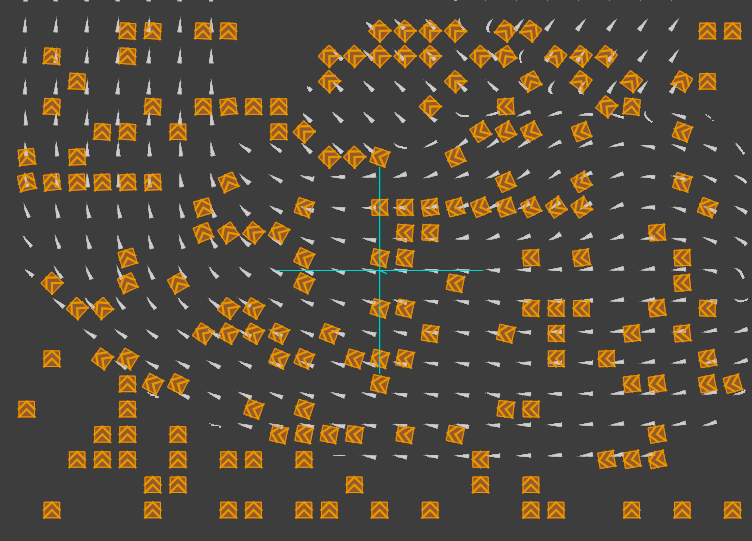
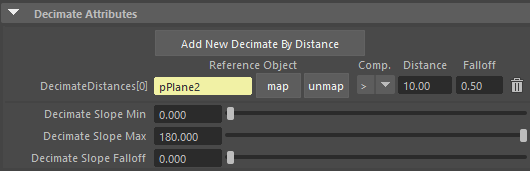
Decimate Attributes
Decimation offers different ways to limit the population slots output, either by distance to an element or a slope criterion.
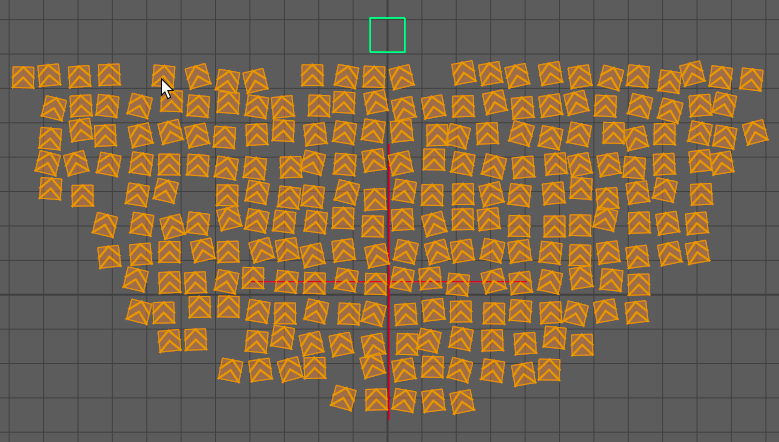
Decimate by distance to the selected plane on top of view, on a grid population tool, for example: the audience of a concert
Decimate by slope: for example, some vegetation only growing at these slopes.
| Add New Decimate By Distance | Adds a new decimate by distance entry |
| Reference Object | Map a VERY low poly mesh (2 triangles plane, simple box, low poly cylinder), then each slot can be decimated based on its distance on the closest triangle of the mesh. Beware that each slot will be tested against each mesh triangle to get its closest distance, thus performance depends greatly on the bound mesh. |
| Comp | Comparison operator: ">" - decimate slots which are farther than the Distance value, "<" - decimate slots which are closer than the Distance value |
| Distance | Distance at with to start decimating |
| Falloff | Adds an additional, linear falloff on the given distance, where slots will not get decimated. The closer the slot is to the limit distance, the greater the chance that it will not be decimated. |
| Decimate Slope Min | Minimum angle with the up axis of kept slots (0-180 degrees). This parameter is only available when Orient On Ground Normal is enabled. |
| Decimate Slope Max | Maximum angle with the up axis of kept slots (0-180 degrees). This parameter is only available when Orient On Ground Normal is enabled. |
| Decimate Slope Fall Off | Adds an additional, linear falloff out of slope bounds, where slots will not get decimated. The closer the slot is to the limit slope (min or max), the greater the chance that it will not be decimated. This parameter is only available when Orient On Ground Normal is enabled. |
Edit Slots
Edit Slots in Free Place mode (left) or in UV Mode (right)
It is possible to edit Population Tool either using the Population Tool Free Place mode or in Maya's UV mode using Maya Translate, Rotate and Scale manipulators.
- To go to the Population Tool Free Place mode, click the Edit in Free Place Mode button
- In Maya UV Mode (F12), select one or more slots in the Population Tool Locator, enable Maya Translate Tool (W), Maya Rotate Tool (E) or Maya Scale Tool (R) and use the gizmo to move, rotate or scale the slots. To reset the slots position to their original positions / orientations, set the Slots count to 0 and reset it at the previous value
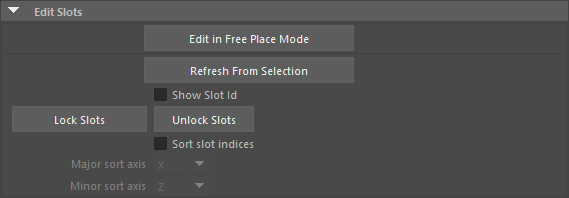
| Edit in Free Place Mode | Open the Population Tool in Free Place mode to edit the Population Tool Locator slots. |
| Refresh From Selection | Refresh positions of Slots that have been created on object components by selecting both the population tool slots and the components and hitting this button
As Maya selection for components of different kinds can be a bit tricky, here is the order of selection that will work:
|
| Show Slot Id | Display the Id of each slot |
| Lock Slots | Lock the selected slots. A locked slot will be displayed with dotted lines 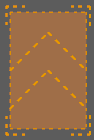 . .A locked slot is not affected by the placement attributes updates, its position and orientation are locked. However if the total number of slots is not sufficient to place this locked slot, it will be removed. |
| Unlock Slots | Unlock the selected slots. Unlocked slots will be displayed with continuous lines 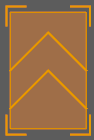 |
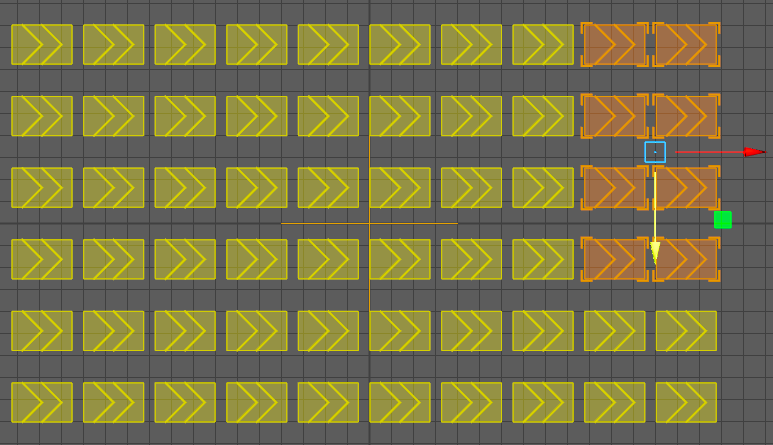
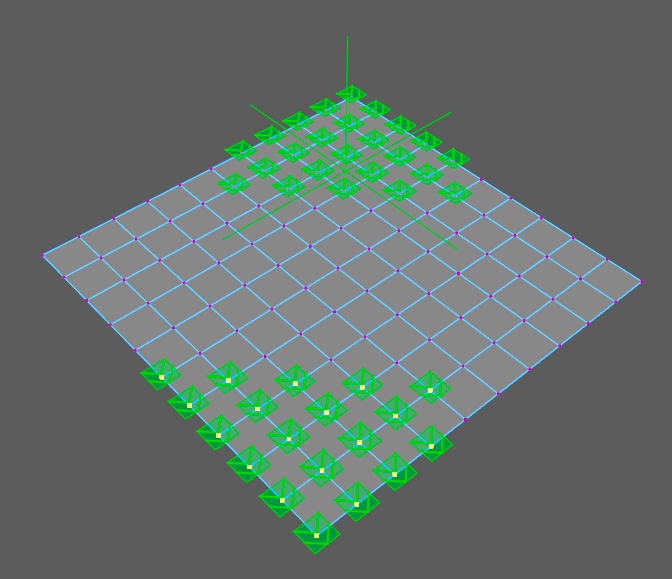
| Sort slot indices | Sorts slot indices according to an axis (useful to allocate targets slots to specific entities) |
| Major sort axis | The slots will first be sorted against this axis |
| Minor sort axis | If several slots share the exact same major axis value, minor axis is used to further order them. |
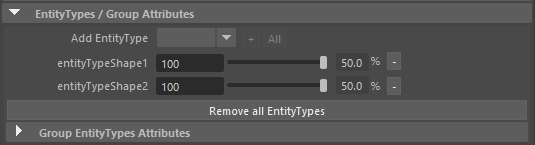
EntityTypes / Group Attributes
 . To remove an Entity Type just click on the related remove button
  . Clean all mapped Entity Types with the remove all button.
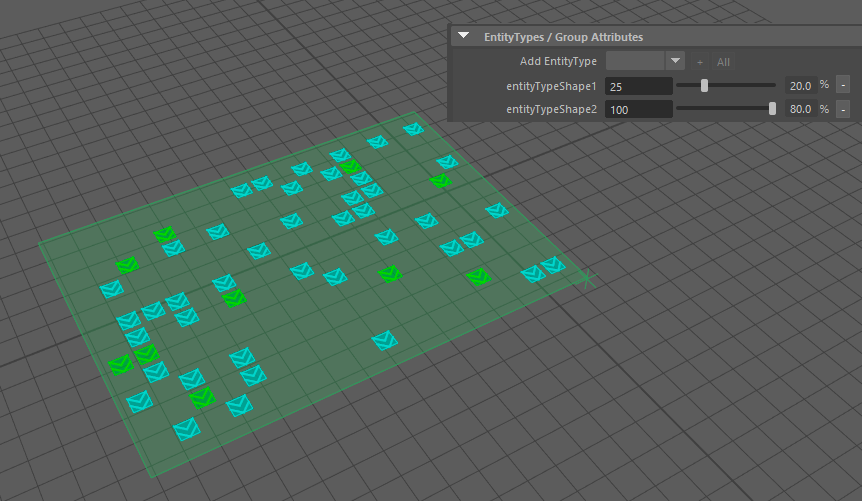
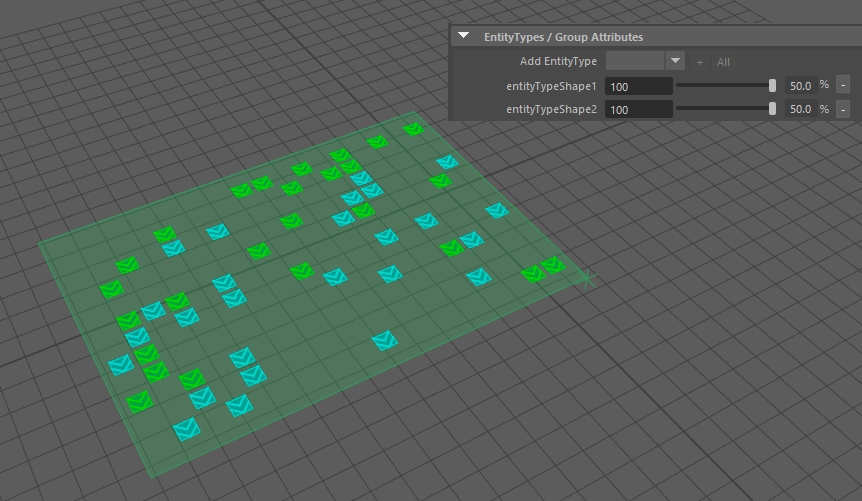
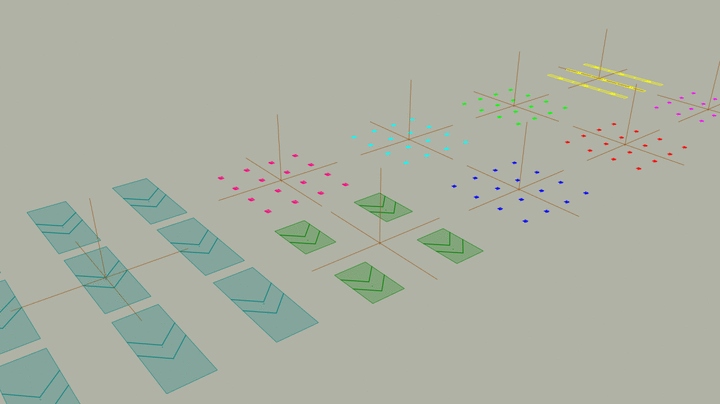
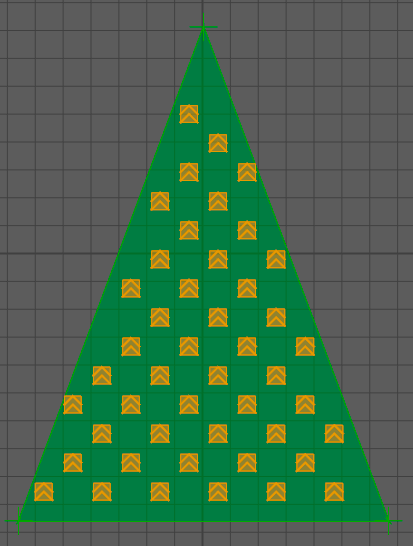
Illustration of the use of Entity Types during the placement step with different weights
Group EntityTypes Attributes
This panel defines which Group Entity Types will be affected to the emitted particles.
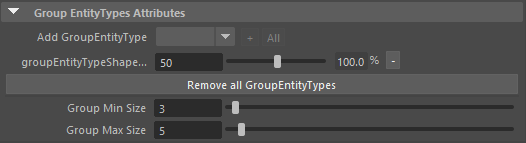
As with EntityTypes, the ratio of Group Entity Types will be affected by changing weight attributes.
Group Size Attributes
| Group Min Size | Entities will be grouped by at least this value |
| Group Max Size | Entities will be grouped by a maximum of this value |
By using these attributes, you will be able to group several Entities inside a Population Tool Locator. The same Group Entity Type will be used by the Entities inside a cluster.
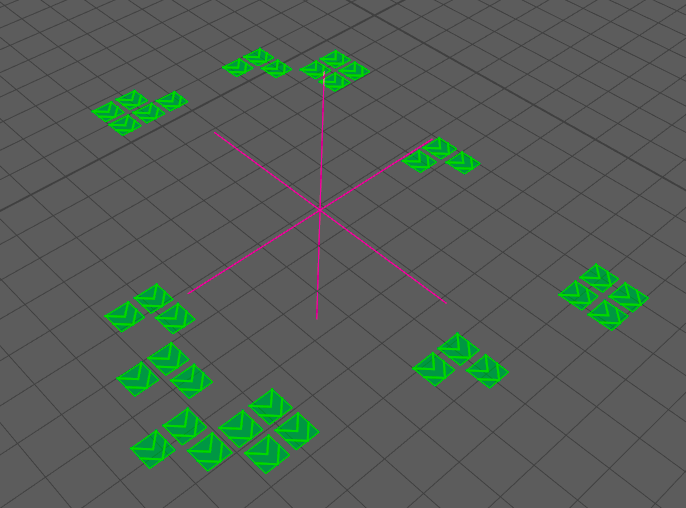
Illustration of Group Size Attributes (min:3 and max:5)
Emitter Attributes
The populationTool can be used as an emitter. In this case, it will emit from the first (active) frame of simulation, at emitter rate, until max count is reached. The generated particles will be configured as defined by the Population Tool: same slots, EntityTypes weights, etc. If the number of population tool slots has been consumed by the previous emitted particles, the emission starts again at first slot.
Emissions can also be achieved via behaviors, see Emit

| Emitter Max Count |
This is the maximum count of particles emitted by this Population Tool. When this number is reached, the Population tool stops emitting particles.
|
| Emitter Rate | The emission rate (in particles / second) of the particles. Notice that this attribute can be keyframed |
Scatter Attributes
Only used with a scatter mode populate on selection ( ). The scatter attributes give the min/max samples picked around a random position before changing it. If min and max are 1, the population is completely generated from the first randomly picked position.

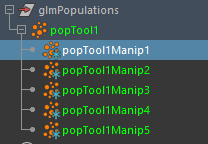
| Scatter Seed Count |
Controls the number of different random seeds (picked randomly on surface), which will generate as much manipulators. The total count of slots will be evenly spread between all seeds. Manipulators can be found under the outliner, parented to PopulationToolLocator :
Seeds manipulators parented under the population tool locator They can be moved to modify the seed location:
|
| Scatter Clustering Min | The minimum number of samples generated via poisson disc method, before changing of random position |
| Scatter Clustering Max | The maximum number of samples generated via poisson disc method, before changing of random position |
Terrain / Collision Attributes
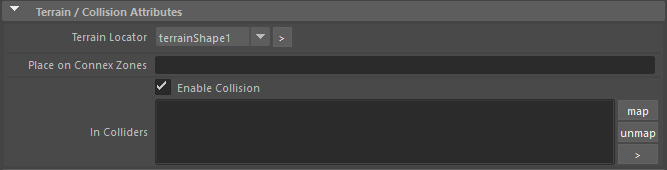
| Terrain Locator |
Terrain Locator attached to this Population Tool. The Terrain locator will be used to make the locator slots adapted to the terrain. Select the Terrain with the combo box. If you don't want the slots to be adapted to the Terrain, just unlink it. 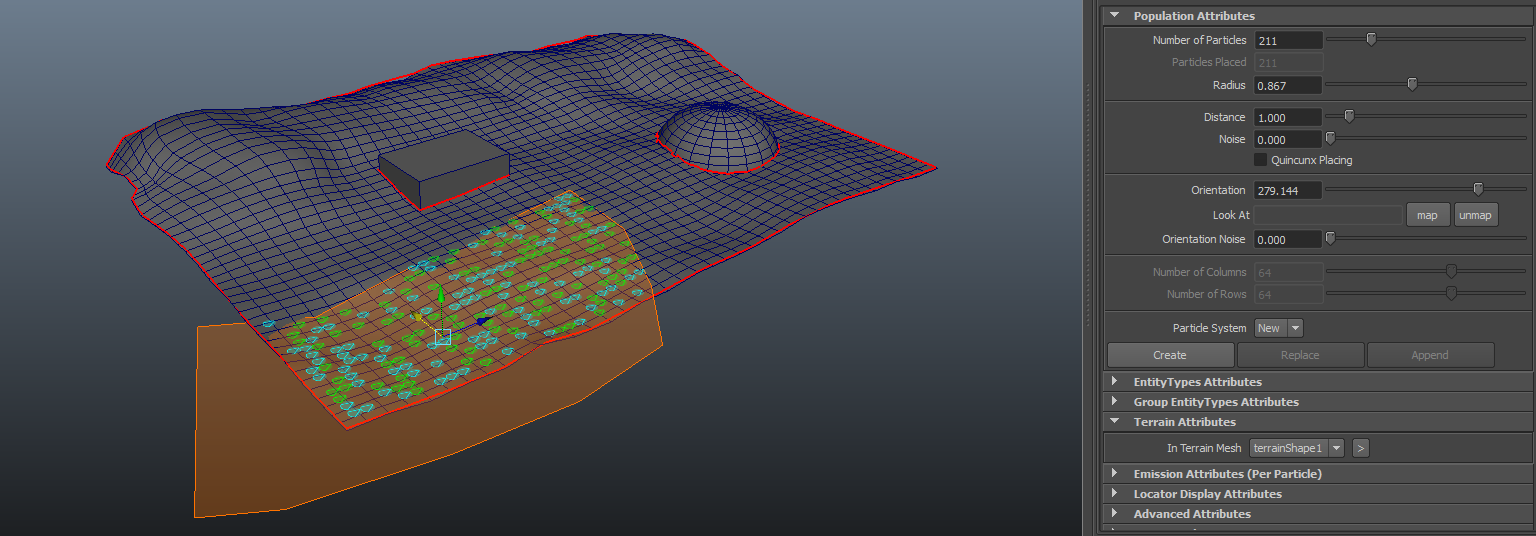 |
| Place on Connex Zones | Slots are only placed on the specified navmesh connex zones. See the Terrain Locator for more information about Connex Zones. |
| Enable Collision | If checked, slots in collision with slots of Population Tools listed in the In Colliders attributes will not be placed |
| In Colliders |
Population Tools to consider slot collisions with. By default, Population Tools sharing the same Terrain Locator will be automatically added as Colliders. |
| Check Self Overlap | When enabled, the Population Tool removes Slots that overlap |
Component Placement
This panel allows to modify a Population Tool created with the populate on selected component tool  .
.

Component Placement
Replace or append population slots into a previously created Population Tool (use CTRL Key to select the Population Tool in the Outliner after performing the selection of components). This action preserves configured attributes.
Append components to a Population Tool Locator
Emission Attributes (Per Particle)
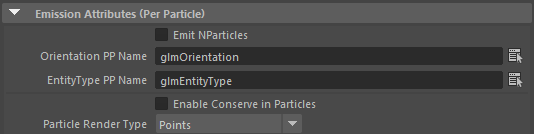
| Emit NParticles | Emit this Population Tool Locator in a nParticle System |
| Orientation PP Name | Name of the vector per-particle attribute in which the orientation of the Entities will be exported. |
| EntityType PP Name | Name of the float per-particle attribute in which the Entity Type of the Entities will be exported. The Id of an Entity Type can be found in the attribute editor of the EntityType |
| Enable Conserve In Particles | Enable or disable the conserve attribute in the wanted particle system |
| Particle Render Type | Select the particle render type of the wanted particle system |
For more explanation about how to use ppAttributes, see ppAttributes Handling.
Paint Attributes
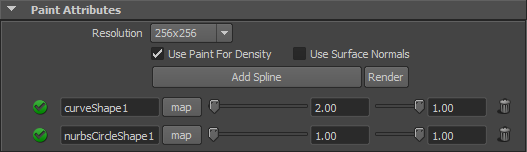
| Resolution | Resolution of the painted map. This goes from 256x256 to 4096x4096. Changing resolution resamples the map. Bigger map takes longer to save and uses more memory. |
| Use Paint For Density | This attribute is activated automatically as soon as the Paint Tool is used to paint slot density on the Population Tool Locator |
| Use Surface Normals | If Use Surface Normals is enabled, a dot-product is made between the surface normal and the vector between the surface point and the closest spline point. |
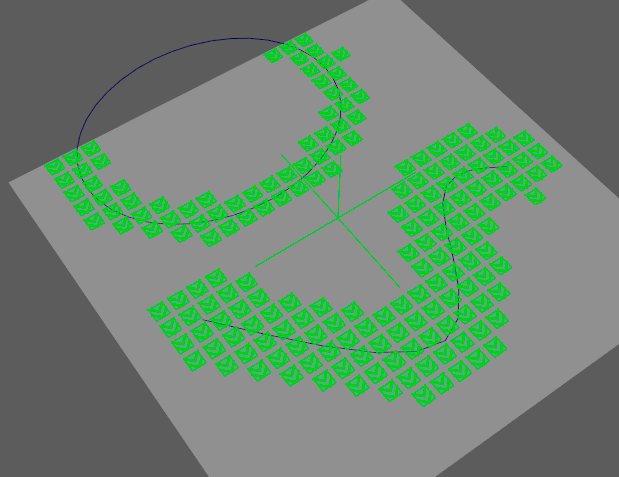
| Add Spline | Add a spline free slot where you can map a spline and specify its rendering attributes |
| Render |
|
| Spline Attributes |
|
Advanced Attributes
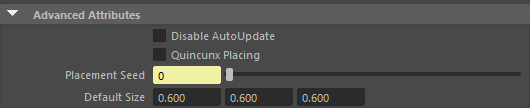
| Disable AutoUpdate | Disable the automatic update of slots, useful when using heavy population tools with decimate or collision attributes which take a lot of time, to save performance while batch-changing attributes. |
| Quincunx placing | Use a quincunx shape for particles placing
  Without quincunx placing (left) and with quincunx placing (right) |
| Placement Seed | Value used to initialize the current Population Tool Locator seed in addition of the Crowd Manager random seed. Changing this value has an influence on the Entities placement, but only in this Population Tool Locator. |
| Default Size | Default size to use for the slots in X, Y and Z axis, when there is no Entity Type or the mapped Entity Type has no character file. |
Callback Attributes
This panel allows to define MEL or Python callbacks which will be called each time a Particle System will be created, replaced or appended by the Population Tool Locator.

| PreEmit Callback |
MEL/Python script command called just before a particle system is created / replaced / appended (using special tag #pt# will be replaced with the Population Tool Locator name) |
| PostEmit Callback |
MEL/Python script command called just after a particle system is created / replaced / appended (using special tag #pt# will be replaced with the Population Tool Locator name and #ps# with the created/replaced/appended particle system name) |
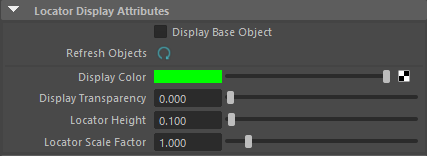
Locator Display Attributes
| Display Base Object |
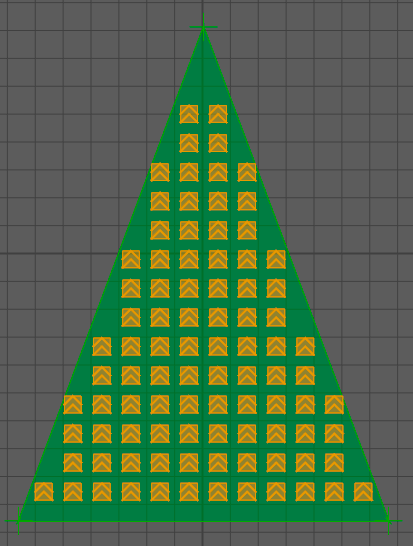
Activate the preview of the chosen entity types in addition of the slots, to have a look and feel feedback. Note that asset repartition and scales of the produced entities may differ. It is only for a quick preview purpose, and only active in the viewport. The crowd field generation IS mandatory to render the entities. 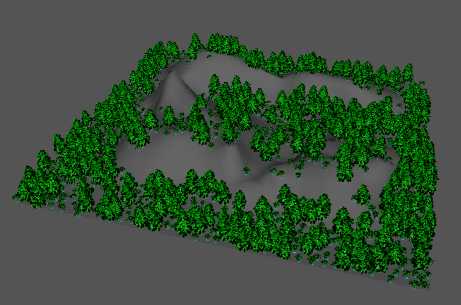 Display of a tree scene populated via scatter + slope decimate, with 'display base object' option active |
| Refresh Objects | If the entity types assets are changed, you may need to use this to refresh the population tool preview. |
| Display Color | Color of the Population Tool. This is also applied in the Outliner |
| Display Transparency | Transparency of the locator |
| Locator Height | Height of the Population Tool Locator for display only. Particles will still be generated on the terrain |
| Locator Scale Factor | Scale factor to apply to the locator display |
Relationship between emitted Particle Systems and the Population Tool Locator
When a particle system is emitted from a Population Tool Locator, a link is created between the two objects. This link can be used to retrieve which Population Tool Locator has been used to emit one particle system.
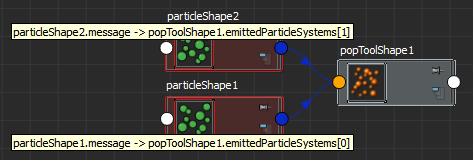
Relationship between emitted particle systems and their Population Tool Locator
When a particle system is emitted from a Population Tool Locator, some special Per-Particle Attributes are created and set automatically. If some of those Attributes do not exist, Golaem uses default values. The created Per-Particle Attributes are the following:
Created Per-Particle Attributes
| glmEntityId | Unique id of each Entity. The value of this PPAttribute is set every time a simulation starts. When emitted from the Population Tool, it is set to -1. |
| glmEntityType | Entity Type Id to which the Entity belongs to. It corresponds to the same id stored in the Entity Type nodes. If not existing, the first Entity Type created will be assigned to the Entity. |
| glmRenderingType | Rendering Type Id for the current Entity. |
| glmScale | Scale of the current Entity. The actual scale of the Entity is the scale defined by glmScale, multiplied by the Entities Scale attribute in the Crowd Field node and the Entities Scale attribute in the Crowd Manager node. The value of this PP atribute is computed randomly betwwen the Entity Type Scale Min and Scale Max attributes. |
| glmOrientation | Euler angle representing the orientation of the Entity. If not existing, Entities will be initialized X-front |
| glmPopulationTool | Population Tool Id from which the Entity has been emitted. It corresponds to the same id stored in the Population Tool Locators. This attribute is not required at simulation time, it can just be used to retrieve emitter information |
| groupEntityType | Group Entity Type Id to which the Entity belongs to. It corresponds to the same id stored in the Group Entity Type nodes. This attribute is only required when using Group Entity Types |
| populationGroupId | Population Group Id to which the Entity belongs to. This attribute is only required when using Group Entity Type |
Overwritten Per-Particle Attributes
| position | Position of the Entity. It corresponds to the position of the slot |
| rgbPP | Display color of the Entity. It corresponds to the color of the slot. |
| lifespan | Lifespan of the Entity. It is set to the maximum value possible to make sure Entities don't get deleted during the simulation |
For more explanation about how to use ppAttributes, see ppAttributes Handling.