Adding Flags
As of August 5th, 2025, Golaem will no longer provide direct support.
All support for Autodesk Golaem will now be handled exclusively through Autodesk support channels and this website will be deactivated soon.
Please bookmark the Autodesk Golaem Support section for any future support needs related to Autodesk Golaem packages.
- To learn more about other cloth simulations methods see the FX tutorials
- To learn how to simulate your own clothes with Apex, see the Nvidia Apex tutorial
Using the Character Pack Pre-Configured Flag
The Character Pack CrowdMan and CrowdWoman characters comes with a flag asset, pre-configured to be ready-to-use with the Apex Cloth behavior.
However the default RenderingType does not contains the flag. To use it, the "_Flag" RenderingType needs to be explicitely selected (see below).
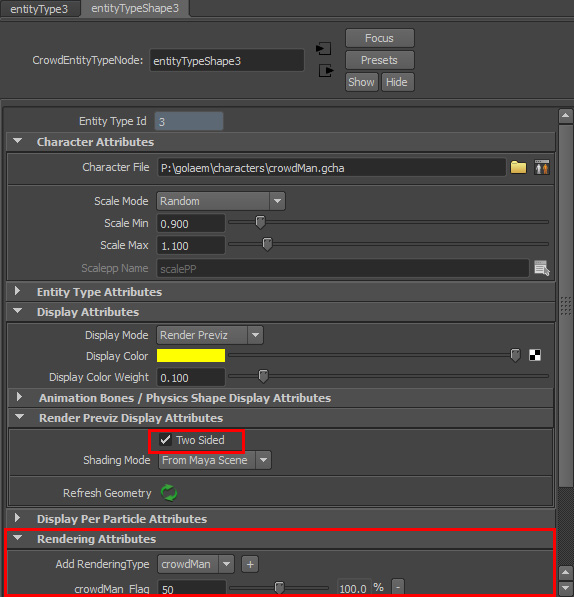
1. Create a new EntityType for people with flags, browse to find the Character Pack CrowdMan .gcha file
2. In the Attribute Editor, find the Rendering Attributes panel.
- Click on the - button next to the crowdMan RenderingType to remove it
- Select the crowdMan_Flag RenderingType in the select box above, and click on the + button to add it
- As the flag is a simple plane, in order to avoid visibility problems when the normal is not facing you, expand the Render Previz Display Attributes panel and check "Two Sided"
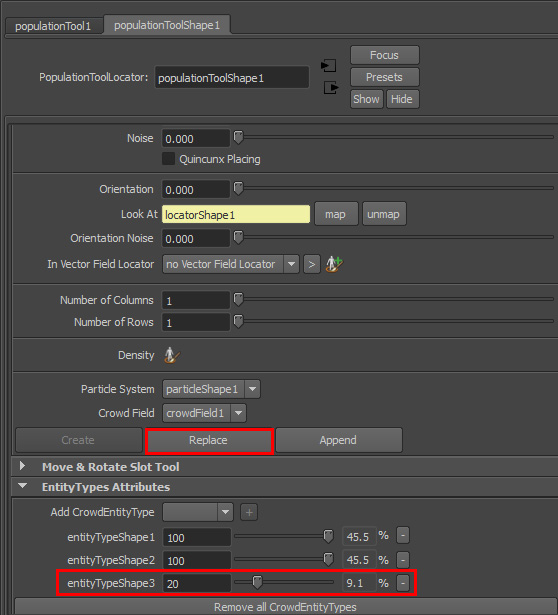
3. Place a few of these people as usual using the Population Tool  . If you are dealing with an existing scene, add the created type in the EntityType in the EntityType Attributes list of your Population Tool, modify the weight if needed, and click on the Replace button
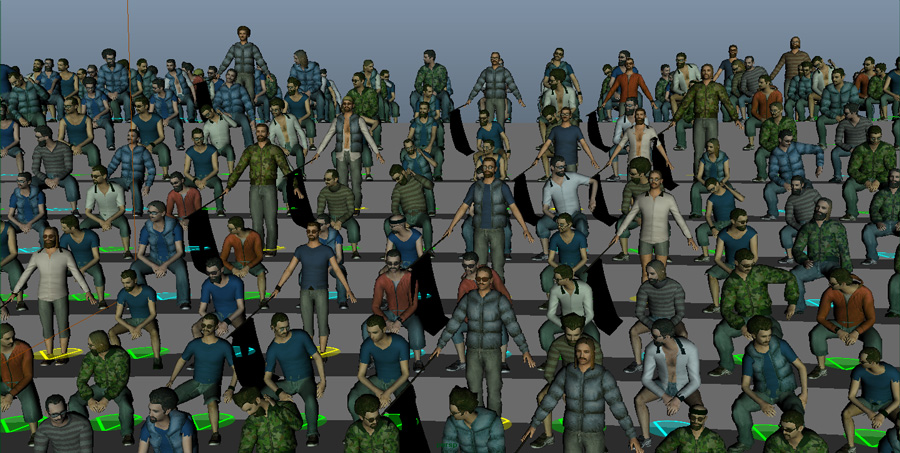
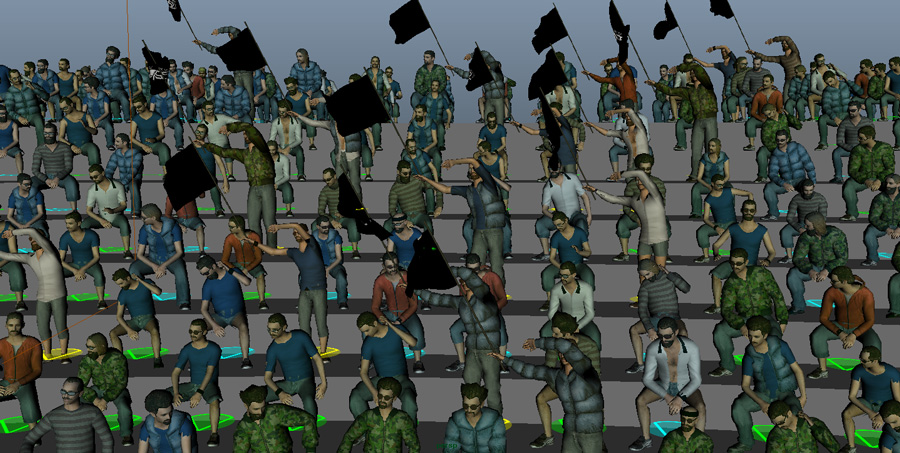
4. Play the simulation. You should now notice a few people holding flags in your crowd.

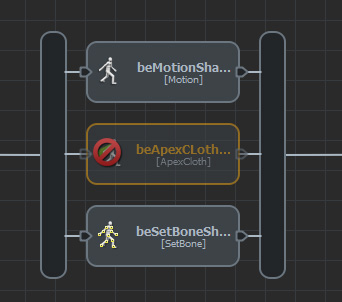
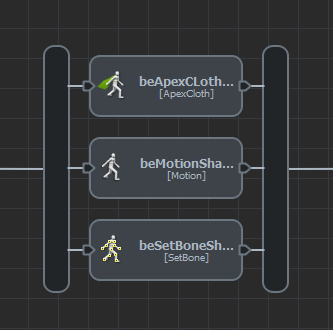
5.Let's add cloth simulation on top of the flag. Open the Behavior editor and drag and drop an Apex Cloth Behavior  .
.
In this tutorial, we will use the .apx file provided with the Golaem Character Pack. For your reference, the link between .apx files and a mesh is specified in the Golaem Character Maker.
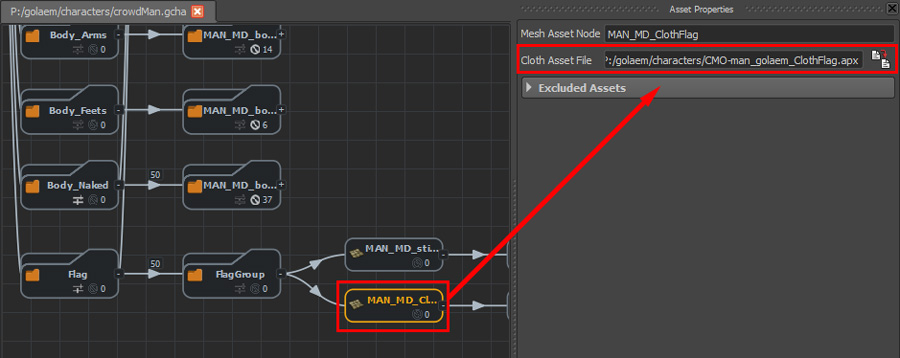
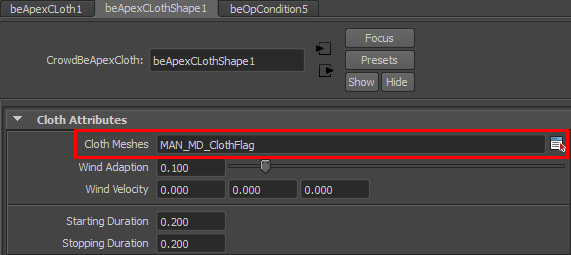
Apex setup for the flag on the CrowdMan character. NB: it is already done in the provided characters, the image is just here as an illustration for your reference
Click on the helper at the right-hand side of the Cloth Meshes attribute of the Apex Behavior. Select the MAN_MD_ClothFlag in order to specify that this behavior will control the cloth simulation on this mesh.
6. Play the simulation. There should be cloth simulation on the flag, however it is just falling thanks to gravity.
Driving Cloth Simulation with Animation
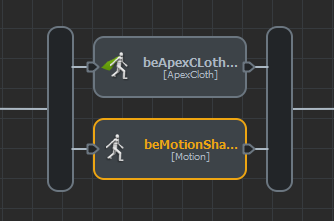
7. Now let's wave this flag! Drag'n drop a Motion Behavior  on top of the Apex Behavior to create a Parrallel Operator
  containing both.
Double-click on the added Motion Behavior and load the CMAN_StandRaisingArms_1.gmo motion from the golaem\motions\Audience\Loop of the Character Pack
8. Play the simulation. Now the characters are waving their arms and the cloth simulation follows their motions.
Tweaking the animation
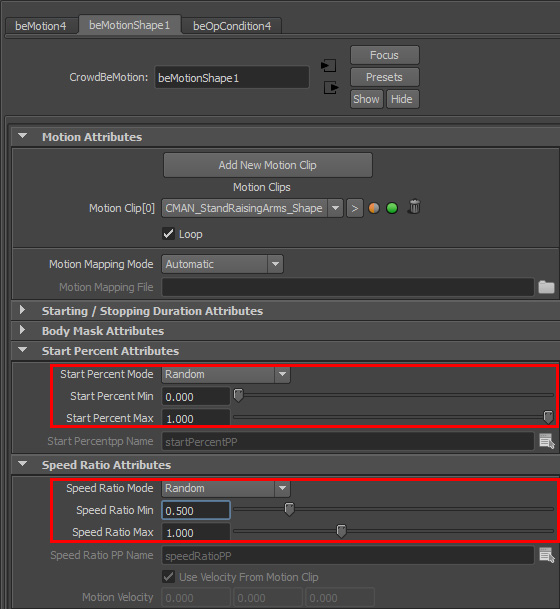
9. You can notice that all the characters are synchronized. Let's modify a few parameters in the Motion Behavior in order to randomize the animation start percent timing and speed.
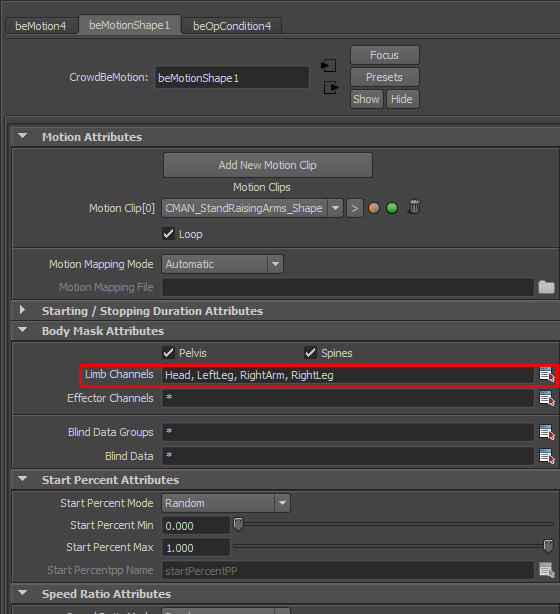
10. As the Raising Arm motion is made for concert crowd characters, the characters are also waving the left arm. We can cancel that by using the Body Masks on the Motion Behavior so that it does not play any motion on the left arm.
Open the Body Mask Attributes panel, use the helper at the right-hand side of the Limb Channels and select everything except the LeftArm
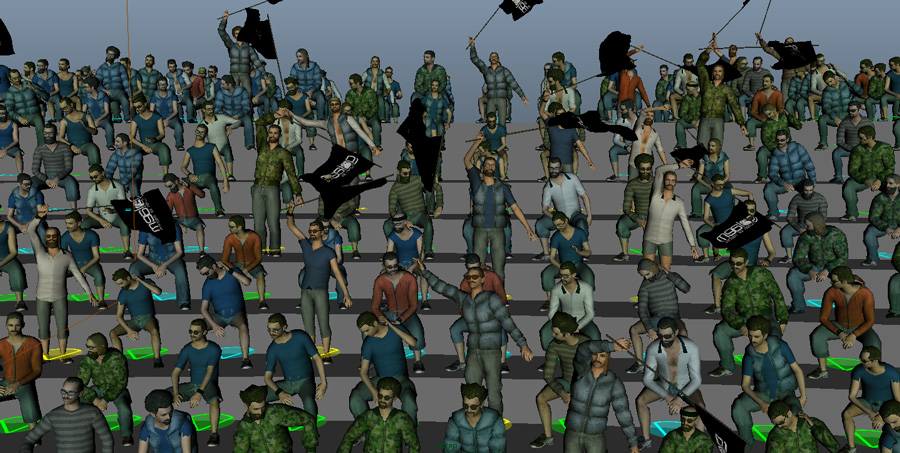
11. Play the simulation. We are happy now, but the left arm does not seem very natural as it is keeping its orientation from A-pose. The amplitude of the flag waving motion is also too high.
12. We will fix these problems with a SetBone Behavior which enables to procedurally modify the animation of the characters.
Drag'n drop a SetBone Behavior in the Parrallel Operator
Then click on the "Add New Bone Expression" button to add the following bone expressions. You can use the Bone Name helper below to inspect the character bone names and get a name ready to be copy/pasted in your expression.
Pay attention to channel (.rz or .rx) as well as the operator ( = or *= )
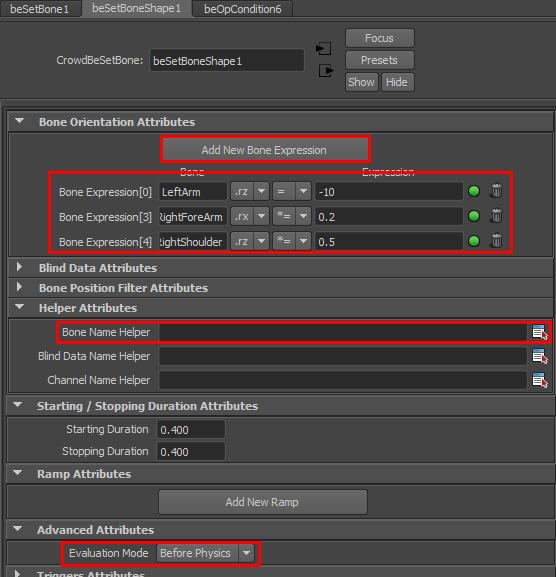
The SetBone behavior will be doing the following
- LeftArm.rz = 0 => cancel the A-pose on the Left Arm and keep it closer to the body
- RightForeArm.rx *= 0.2 and RightShoulder.rz *= 0.5, multiplying the rotation by a value smaller than 1 reduces the amplitude of the motion
Note that these values were found by trial and error, do not hesitate to experiment with them