


Channel Operator Stopping Army
As of August 5th, 2025, Golaem will no longer provide direct support.
All support for Autodesk Golaem will now be handled exclusively through Autodesk support channels and this website will be deactivated soon.
Please bookmark the Autodesk Golaem Support section for any future support needs related to Autodesk Golaem packages.
This tutorial will teach you how to use the Channel Operators to build an army that moves forward and stops in unison.
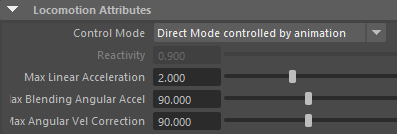
An army moving forward and stopping at a given location
Starting from a simple scene already populated with no behavior, here are the steps that will be covered by this tutorial:
Basic startup
The starting point for this tutorial is a populated scene with entity(s), and a Terrain. Check the Quick Start Tutorial if needed.
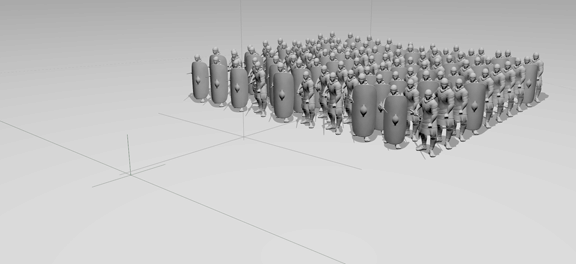
1. Start by adding a Locomotion behavior. Add locomotion animations and configure its Control Mode in Direct Mode controlled by animation:
The standing army
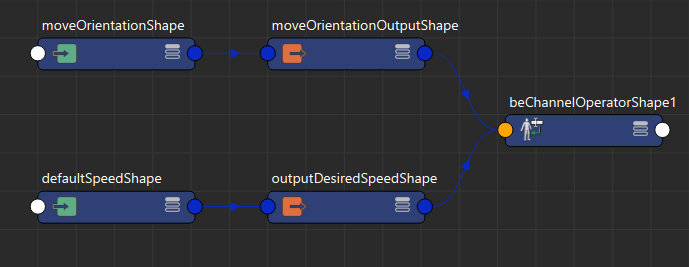
Graph of Channel Operators that set a moving orientation and speed for the Locomotion behavior to follow
 on the entity type, select the Channel Operator Behavior and Add a New Output Channel
3. Select the newly created output channel  and configure the Output Channel to output the to Entity Desired Move Orientation, and rename it "moveOrientationOutput"
4. Select the "moveOrientationOutput" node, and add a previous ChOpInput 
This input node will be the orientation in which the army should be moving.
Configure the Expression to "0" to have them move in the X direction, "180" to have them move in the opposite direction, or any value of your choice to choose the moving orientation. Rename the node "moveOrientation".
5. Select the Channel Operator Behavior again, and Add a New Output Channel
6. Select the newly created output channel and configure the Output Channel to output the to Entity Desired Speed, and rename it "outputDesiredSpeed"
7. Select the "outputDesiredSpeed" node, and add a previous ChOpInput
This input node will be the default navigation speed. Configure the Expression to "1.2" (or any other value depending on the scale of your entities) and rename it "defaultSpeed".
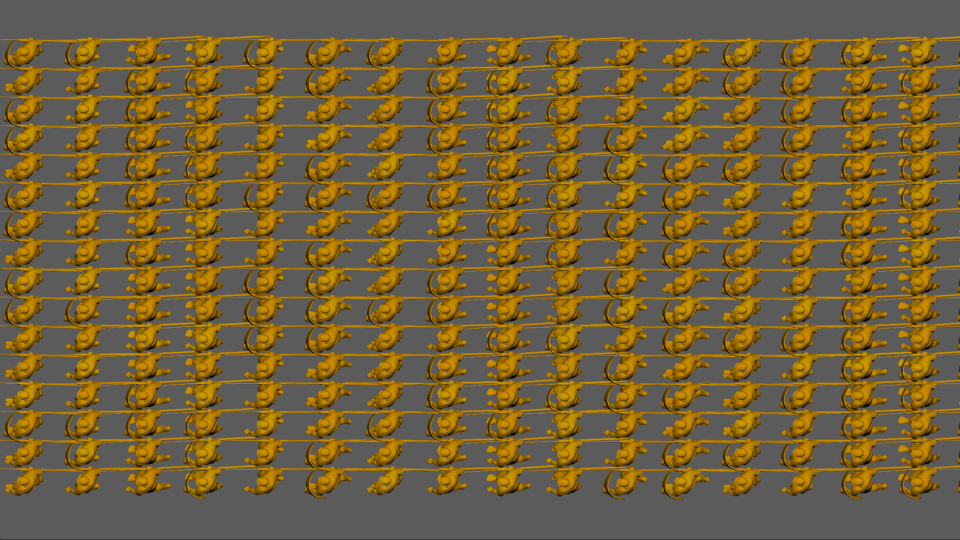
The infinite army
Stopping at the desired distance
This part of the tutorial will replace the "defaultSpeed" by a sub-graph of Channel Operators that will change the speed to zero when the X coordinate of the entity reach a given locator in the scene.
1. Create a locator in your scene (Menu Create->Locator), position it in your scene at the stop point of your army, and rename it "stopLine"
Now back in the Maya Node Editor, we'll build the part of the graph that allows entities to stop at the "stopLine" position.
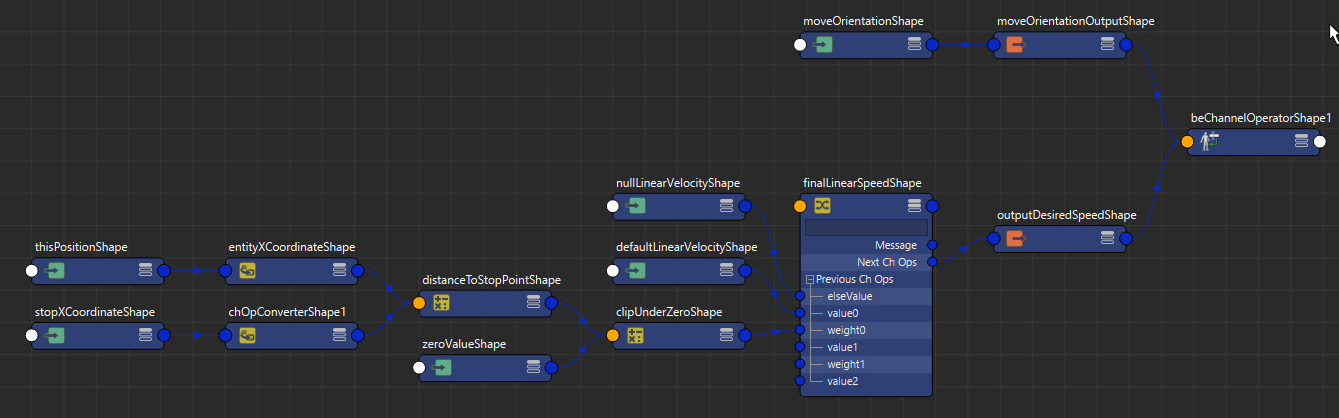
The graph of Channel Operators that allows entities to stop in front of the locator.
2. Delete the "defaultSpeed" node that was created in the previous part
3. Select the "outputDesiredSpeed" node, and add a previous ChOpMultiplexer 
This node will interpolate the default navigation speed to slow down when needed.
As the input weight will be a distance (ie. not between 0 and 1), the Multiplexer has to be set in Interpolate With Normalized Weights (otherwize, the default speed would be multiplied by something greater than 1 as soon as the distance with the stop locator is greater than 1).
Rename it "finalLinearSpeed".
4. When the "finalLinearSpeed" node was created, it should have create a ChOpInput connected to the PreviousChOps[0] (this plug has an alias, it appears in the UI as elseValue) plug (if not, then create one).
This input node will be the zero speed. Configure the Expression to "0" and rename it "nullSpeed".
5. Select the "finalLinearSpeed" node again, and add a previous ChOpInput
This input node will be the default navigation speed. Configure the Expression to "1.2" (or any other value depending on the scale of your entities) and rename it "defaultLinearVelocity".
The weight of the "defaultLinearVelocity"should be 0 when the distance between the entity and the locator is 0. This will be done by using the difference between the X coordinate of the entity and the X coordinate of the "stopLine", and clipping to avoid negative values.
6. Select the "finalLinearSpeed" node, and add a previous ChOpOperation 
This node will be the clipped result. Set the Operator to "max" and rename it "clipUnderZero".
7. Select the "clipUnderZero" node, and add a previous ChOpInput
This input node will be the clip value (0).
Configure the Expression to "0" and rename it "zeroValue".
8. Select the "clipUnderZero" node again, and add a previous ChOpOperation
This node will be the subtraction between the X coordinates of the entity and the "stopLine" locator.
Configure the Operator to "-" and rename it "distanceToStopPointShape".
9. Select the "distanceToStopPointShape" node, and add a previous ChOpConverter 
This node will be the X coordinate of the entity.
Configure the Convert Mode to "Vector X Component" and rename it "entityXCoordinate".
10. Select the "entityXCoordinate" node, and add a previous ChOpInput
This node will be the full coordinates of the entity.
Configure the Expression to "this.position" and rename it "thisPosition".
11. Select the "distanceToStopPointShape" node again, and add a previous ChOpConverter
This node will be the X coordinate of the "stopLine" locator.
Configure the Convert Mode to "Vector X Component" and rename it "locatorXCoordinate".
12. Select the "locatorXCoordinate" node, and add a previous ChOpInput
This node will be the full coordinates of the "stopLine" locator.
Configure the Expression to "getAttr ("stopLine.translate");" and rename it "stopCoordinateShape".
Stopping behind another entity
Stopping behind another entity requires the use of sensor to detect other entities. The sensor will then be used in the graph of Channel Operators to change the speed to 0 when needed.
Adding sensors
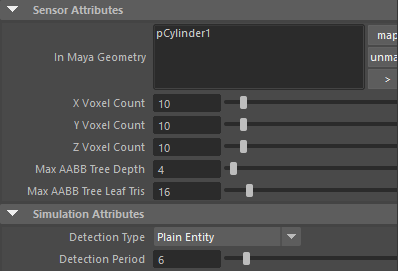
1. Create a Maya cylinder polygon, and set its radius to the distance at which you want your entities to be aware of obstacles (let's say 2 maya units)
2. Select the cylinder and create a Sensor Locator by clicking on the  icon in the Golaem Shelf
This creates a Sensor Locator that allows entities to perceive the obstacles in the simulation. Obstacles can be either entities, or navigation obstacles (NavMesh file loaded in the Terrain locator).
Sensor Locators to detect entities
3. Sensor Locator needs to be activated on the entities. This is done by adding an Activate Sensor Behavior for the sensor:
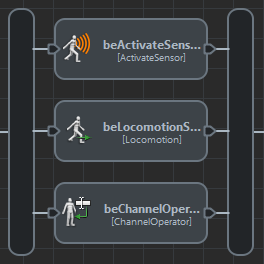
Activate Sensor behaviors in parallel with the Channel Operator and the Locomotion behaviors
Configure the Activate Sensor behaviors to activate the sensor.
If you run the simulation at this point and select an entity, you should be able to see the sensor in action in the Visual Feedback:
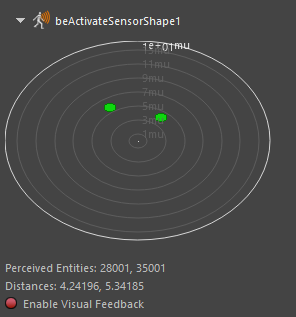
Sensor in action in the Visual Feedback, displaying perceived entities (in green)
Using Sensors
The final part of this tutorial will set the Sensor Input Channel Operator that allows the entity to stop behind another entity when it's perceived. As there already is a multiplexer node that handle the linear speed, we'll make use of it to add another input that slow down the entity when there is something in front of it.
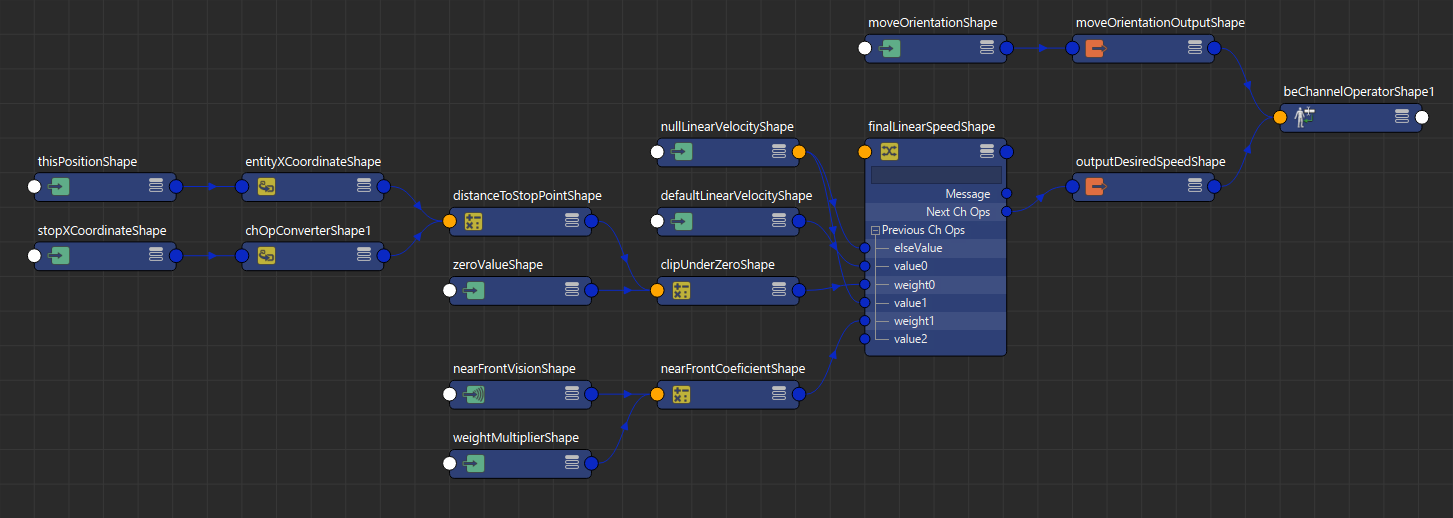
The final graph of Channel Operators for the stopping army.
1. Connect the next available PreviousChOps plug of the "finalLinearSpeed" node (the plugs of the multiplexor nodes uses aliases, so it should be called value1 in the node editor) to the NextChOps available plug of the "nullLinearVelocity" (hold middle click on the nullLinearVelocity.NextChOps plug, and release it on the finalLinearSpeed.value1 plug)
At this point, we could directly connect the weight1 plug to the vision, but if you try, you will realize that even if entities slow down behind other, they won't stop moving before reaching the stop line.
The reason is that the "finalLinearSpeed" interpolator also interpolate with the distance to the stop line that is connected onto value0 and weight0, and it add a bit of speed as long as the distance to the sopt line is not 0. To ensure the sensor input vision is taken into account with more weight than the distance to the stop line, we'll simply multiply its value by an arbitrary value.
2. Select the "finalLinearSpeed" node, and add a previous ChOpOperation . It should connect itself to the next available plug, which should be weight1.
Set the Operator to "x" (multiplication) and rename it "nearFrontWeighted".
3. Select the "nearFrontWeighted" node, and add a previous  ChOpSensorInput
Configure the Depth with the distance at which you want your entities to stop behind others (for instance ours is configured to [0; 0.5]), and the Angle to something narrow enough to not stop due to entities on the side (let's say [-30; -5; 5; 30]).
Rename it into "nearFrontVision"
4. Select the "nearFrontWeighted" node again, and add a previous ChOpInput
Configure the Expression to "1000" (you can try different values, as it's an arbitrary one), and rename it into "weightMultiplier"
And that's it, you should now witness an army stopping in unison in front of your locator.
An army moving forward and stopping at a given location