


Adding Color Variation
As of August 5th, 2025, Golaem will no longer provide direct support.
All support for Autodesk Golaem will now be handled exclusively through Autodesk support channels and this website will be deactivated soon.
Please bookmark the Autodesk Golaem Support section for any future support needs related to Autodesk Golaem packages.
Here is a basic workflow about how to use the HSL Shader to give your crowds some Hue variation.
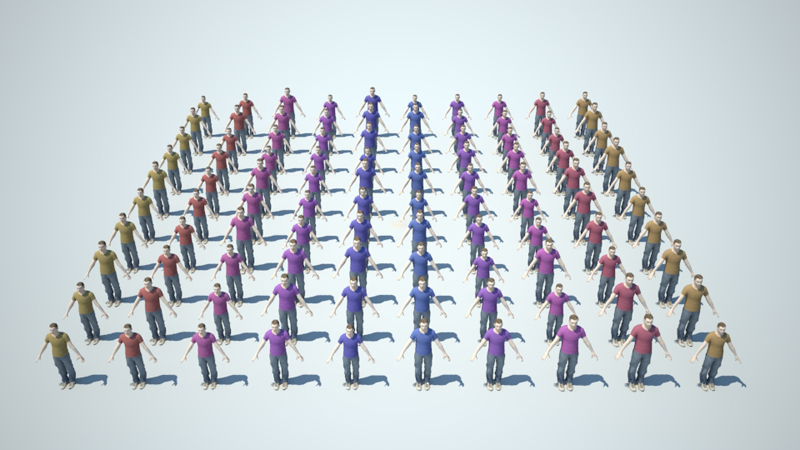
BASIC WORKFLOW
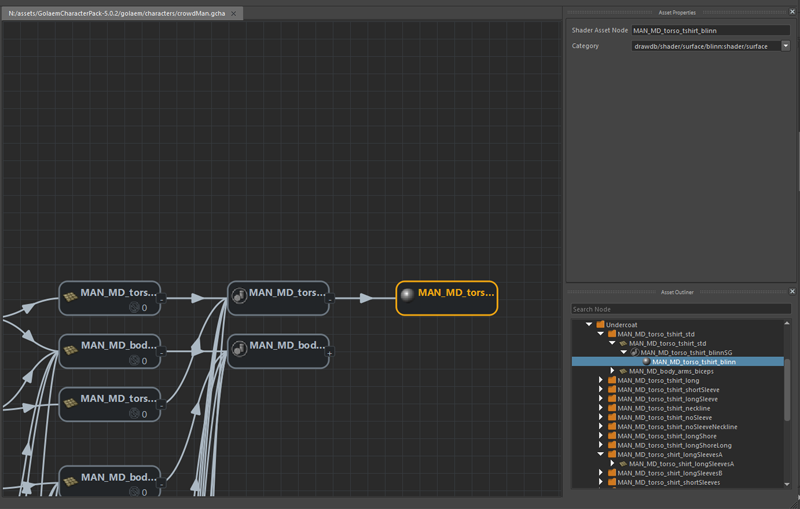
CONFIGURE THE GCHA
- In the Golaem Character maker  Geometry tab select the piece of geometry on which you want to assign the hue variation and select its Shader.
- Drag and drop a Shader Attribute node and link it to the desired shader node, rename it shirtHueVariation and give it a range of values (-1; 1).
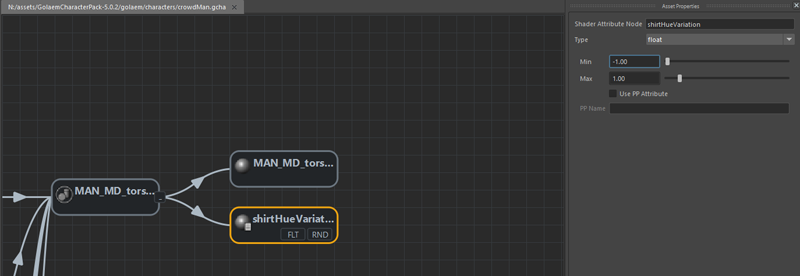
- Don't forget to save your gcha!
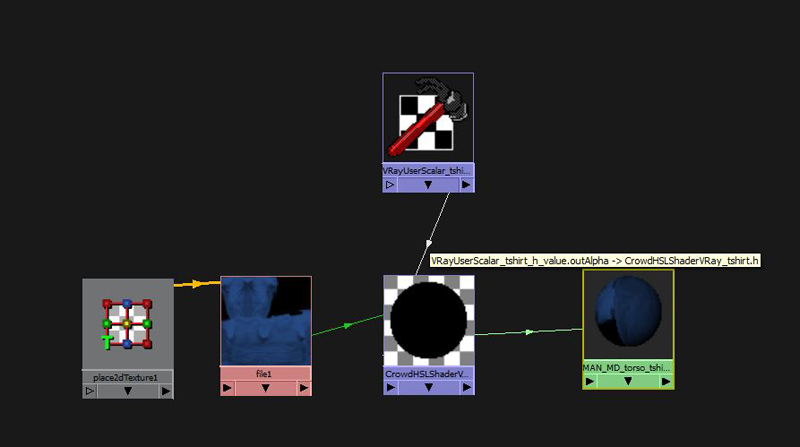
SHADING GRAPH INTEGRATION
| Renderer | Node to feed the HSL |
| Vray | VrayUserScalar |
| Arnold | aiUserData |
| Redshift | |
| Renderman Studio | PxrAttribute |
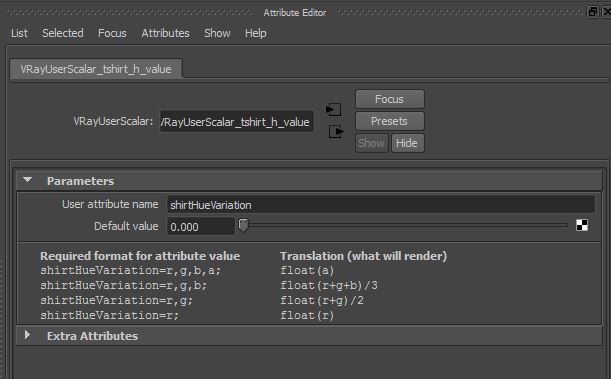
- In the feeder node (VRayUserScalar for example), query the value name shirtHueVariation.
FEEDING THE HSL SHADER WITH PP ATTRIBUTES
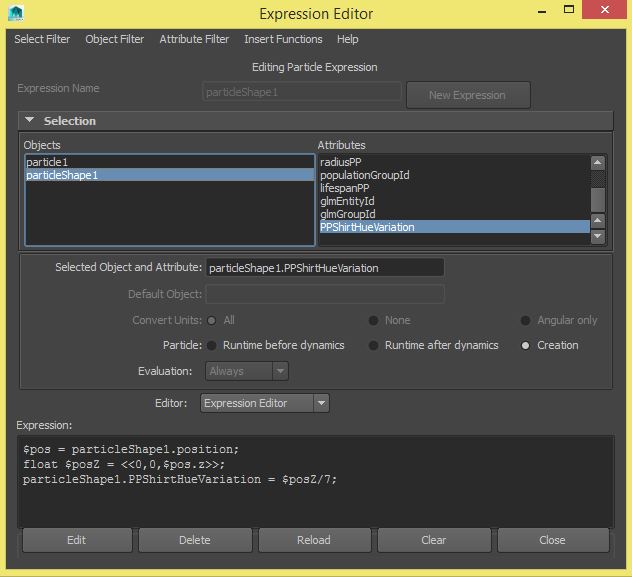
CREATE THE PP ATTRIBUTE

CONFIGURE THE GCHA
Geometry tab and select the previously created Shader Attribute Node. 
EXPORT THE SIMULATION
 (in the Addition Per Particle Attributes To Export section)
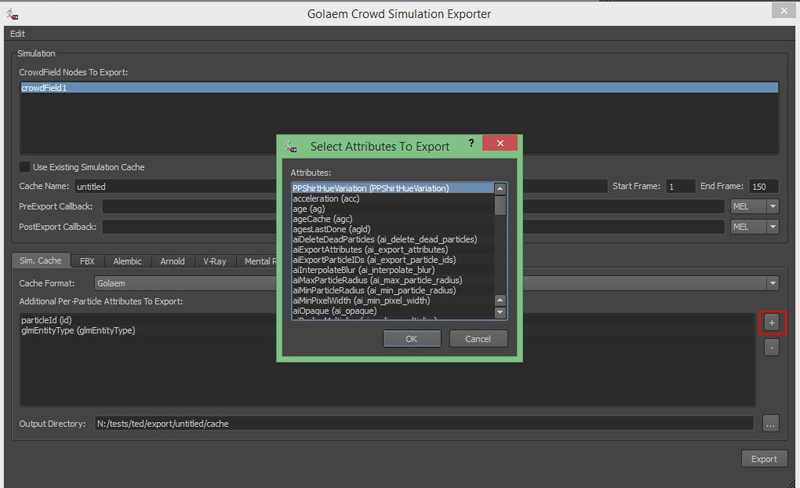
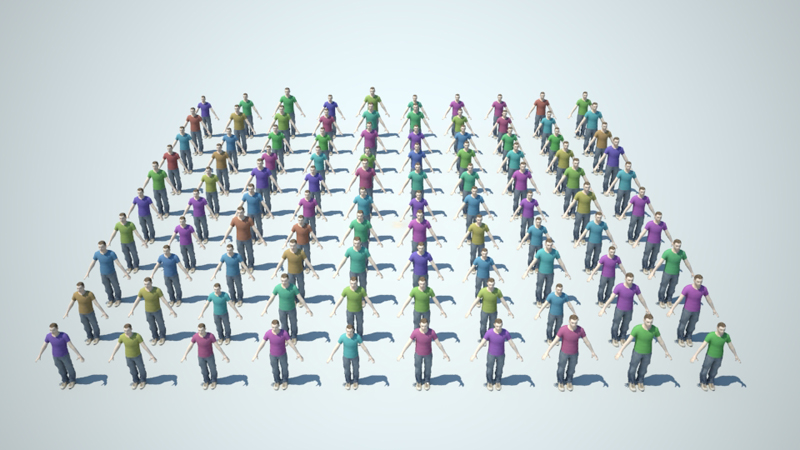
hue controlled by PP attribute
Same process goes to control the Saturation and Lightness of your texture; just plug the feeder node into the corresponding channel (h: hue, s: saturation, or l: lightness) of the HSL shader.