Basic Workflow
Filling a stadium with Golaem Crowd is very easy and can be done in a few minutes. In this tutorial, we will go through the basics of stadium filling and learn a few tips & tricks along the way.
Initial Setup
We'll start with an empty stadium stand, subdivided so that a face is more a less the size of a character.
It is only one of the multiple ways to create your stadium so that you can populate it with Golaem Crowd. You can check Stadium Placement for alternative setups.
![]()
Creating EntityTypes
We will also need to create two EntityTypes, which skeleton and skeleton mapping will be the one provided in the sample files. See the Quickstart for more details about how to create an EntityType.
Creating A Default Terrain
 to create a default terrain, in order to adapt character position to the stand height.
Placement
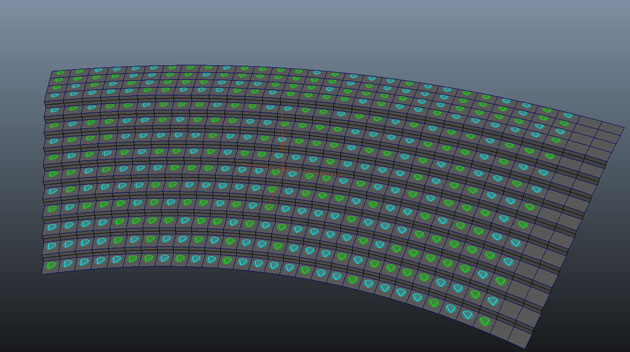
First, set the "Select faces component" selection mode.

Select the stand once, and then select the faces on which you want to place some characters. Note that your selection does not have to be contiguous, you can just select any set of faces you want.
In the following example we want the right-hand side of the stand to be empty in order to create a stair.
![]()
NB: To make sure you will not select the vertical faces while populating, the stadium has been built using two different polysurfaces and the vertical faces one has its Drawing Overrides / Display Type set to "Reference" (see Attribute Editor) in order to make it not selectable.
Then click on the Golaem Crowd population tool creator  , and select the "Selected object or component" mode
  in the Tool Settings panel.
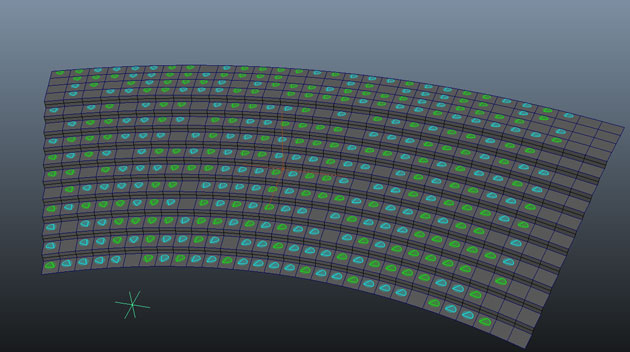
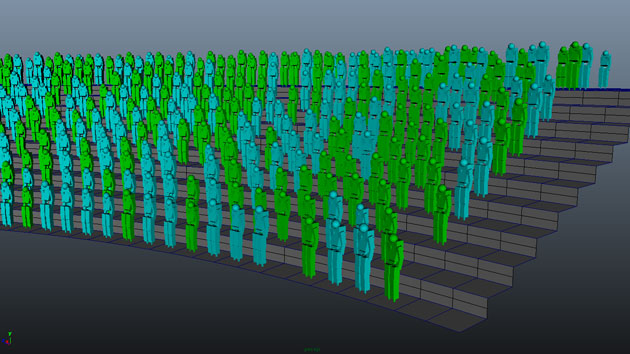
A population tool is created, with one character per face. Notice that no character has been placed on the faces we did not select.
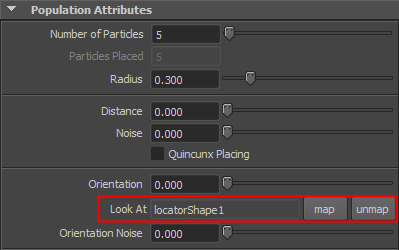
Obviously you can customize the number of particles, the number of characters per face, or even their orientation. E.g in the following picture, we removed a few characters and mapped a locator in the LookAt attribute of the Population Tool Locator. This is very useful to make all people in the stadium look at same point of interest (optionally with a bit of noise).
Generating Supporters
Click on the Create button at the bottom of the Population Tool attributes editor panel.

Select the generated particle system, and click on the CrowdField button  .
.
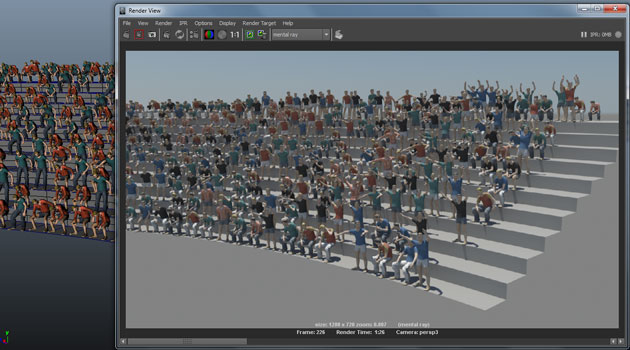
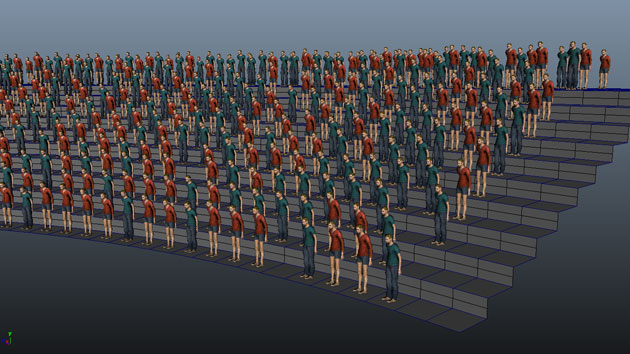
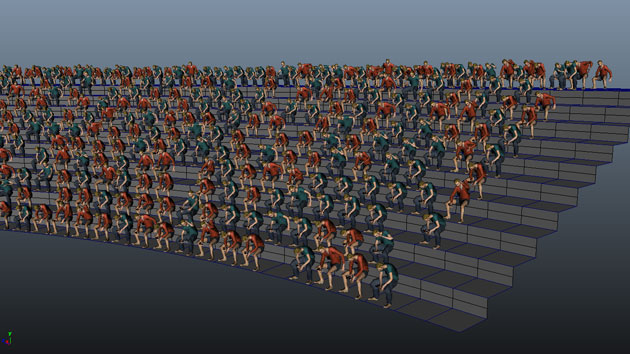
Hit play to see your characters appear.
It is possible to get a better character preview by using the Render Previz mode in your EntityTypes.
Creating Ambiance In The Stadium
It is simple to create an ambiance in a stadium using a few looping motions started randomly.
Open the Behavior Editor, and double click on your first EntityType. A tab appear, corresponding to the behavior of the characters from this EntityType.
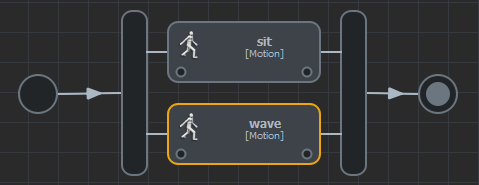
Drag and drop a MotionBehavior on the Behavior Life arrow.

Select it and check your attribute editor. The main attribute is a list of motions that should be played. Just click folder icon and browse to a looping motion.
You also need to select a Motion Mapping File, or to set a different Motion Mapping Mode (depending on your character and motions, see Motion Mapping)
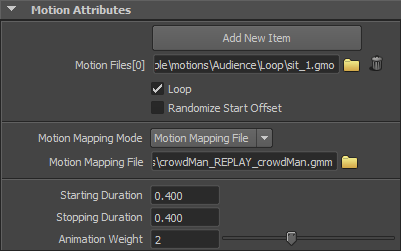
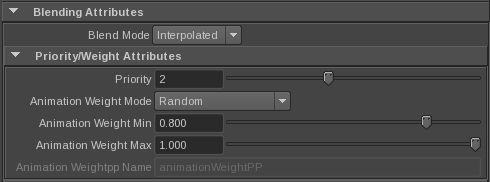
This motion list typically contains only one motion, which is the motion you would like the characters to play. However if you add more motions by clicking the "Add New Item" button. One motion will be randomly chosen each time the behavior start. It can help you to easily add animation diversity to your stadium.
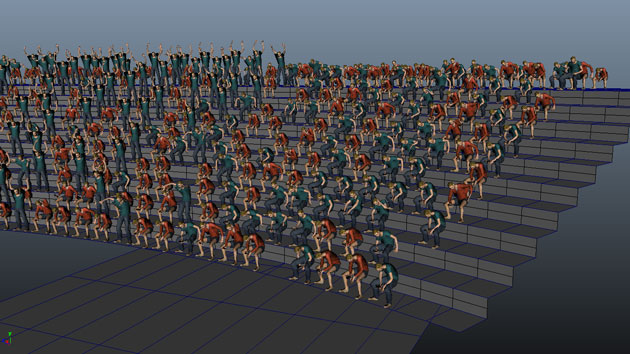
Repeat the same operation with the second EntityType and run the simulation.
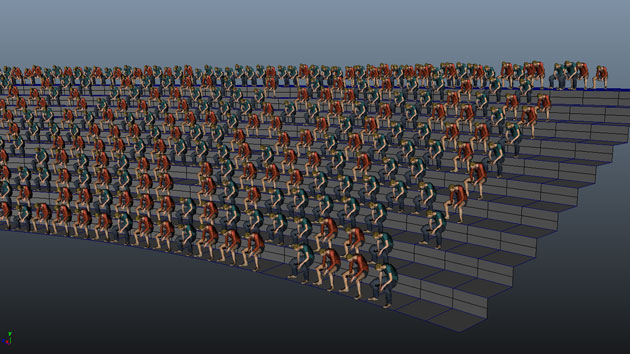
As we used only one motion and the characters all start at the same time, there is no animation diversity at all. Just go back to the Motion Behavior attributes and check "Randomize Start Offset".
Creating A Wave In The Stadium
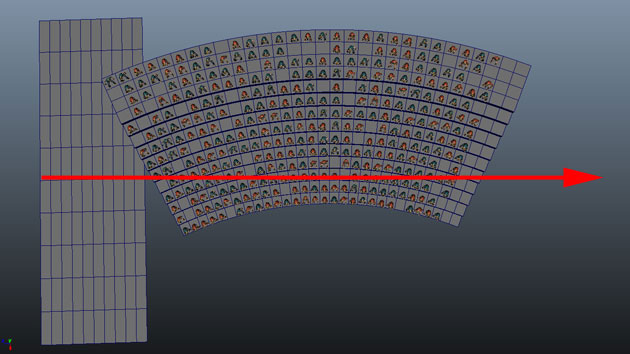
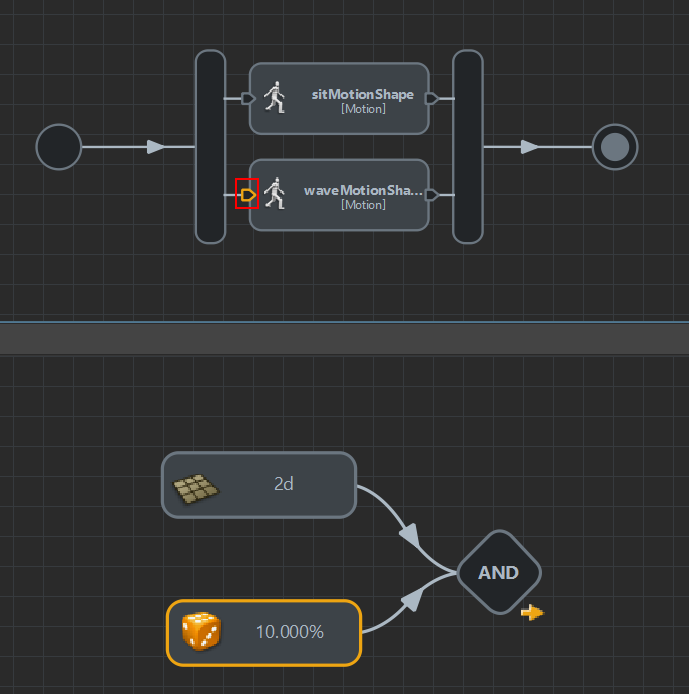
Wave Behavior StartTrigger
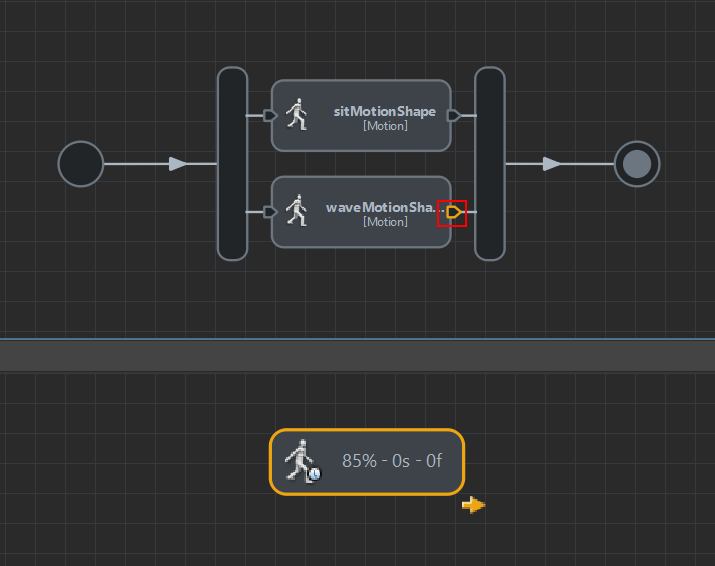
Wave Behavior Stop Trigger
Rendering
See Using The Sample Files to know how to automatically configure the sample for rendering.
For more details, check the Rendering section.