


Rendering From Katana
Setup Simulation in Maya
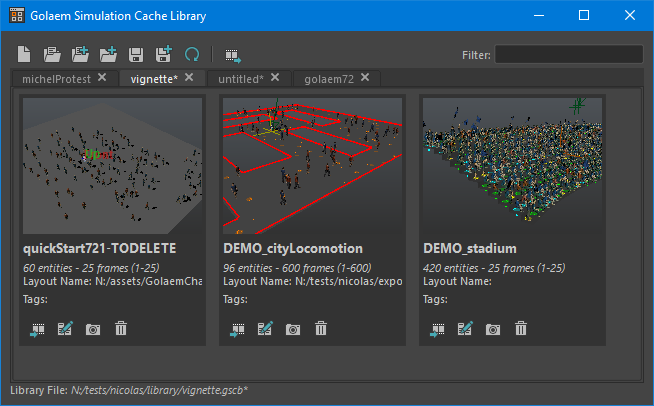
Create your Crowd Simulation within Maya using Golaem Crowd. In our example we will use the stadium scene from the Golaem Crowd Samples. Once the simulation is done, open the Simulation Exporter to export the Simulation Cache. Once the Simulation Cache will be exported, a Simulation Cache Proxy and a Crowd Render Proxy node will be created and Golaem will be switched in Cache Replay Mode.
Once in Cache Replay Mode, you can add the Simulation Cache as a Vignette in the Simulation Cache Library Tool.
Rendering a Simulation in Katana
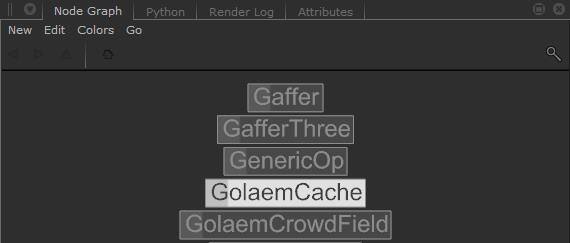
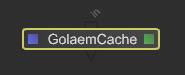
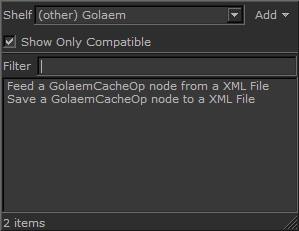
A GolaemCache op node is a Katana GeolibOp node which handles the display and the rendering of a Golaem Crowd simulation in Katana. It can be created either by using the Simulation Cache Library Tool (see video above) from the Node Graph panel by pressing the TAB key.
Using the Simulation Cache Library Tool will fill all the values of a node with the values from Maya. If creating the node manually, you'll need to set all attributes manually too.
They attributes an be edited to change the rendering results (motion blur properties, subdivision attributes...). The GolaemCache node attributes are the same than the Maya Crowd Render Proxy.
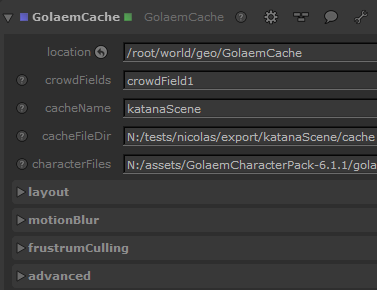
Once set, a GolaemCache node defines the following locations:
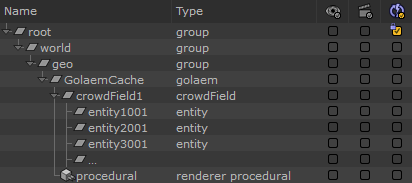
- golaem: the GolaemCache op node
- crowdField: the GolaemCrowdField op node which handles the display of a Golaem Crowd simulation in Katana
- entity: the GolaemEntity op node which is not used for now
- renderer procedural: the node which handles the rendering of a Golaem Crowd simulation in Katana at render time
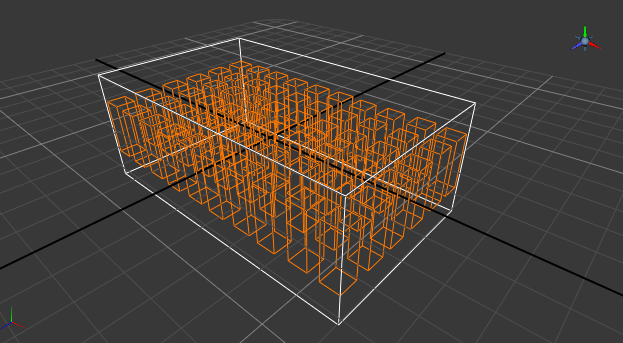
When the crowdField location is expanded, each crowdField will display the Crowd Entities as bounding boxes within the Katana viewport (notice that frames 0 and 1 are not exported and nothing will be displayed for those):
When you're happy with everything, render with Katana and you're done!
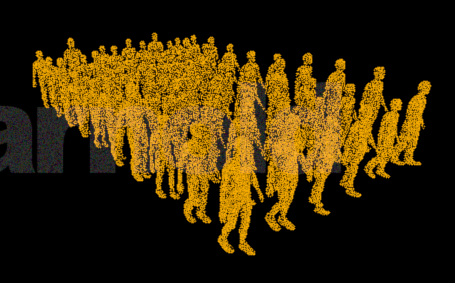
Notice that this method has the same properties than rendering inside of Maya. It means that it supports 3d motion blur, displacement, frustum culling, subdivision surfaces, shading variation, render passes... More here.
Assigning Katana Materials with Arnold
Assigning Katana Materials with Renderman
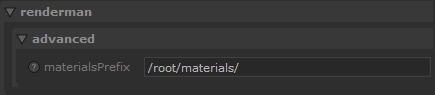
In Renderman For Katana, you just have to create your Materials in the scene graph location specified in the materialsPrefix attribute of the GolaemCache node (root/materials per default) and name them the same way than in the Character File within the Character Maker in Maya.
Assigning Katana Materials with Redshift
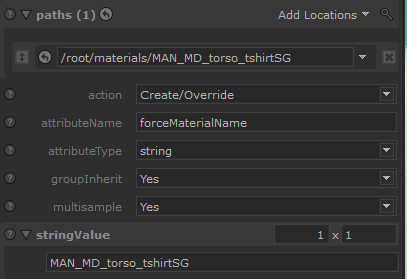
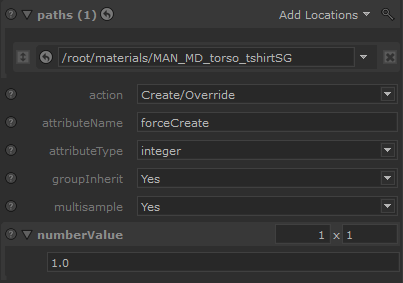
In Redshift For Katana, to force your Materials to be exported with a specific name, you need to set two attributes on them using the AttributeSet node:
- forceMaterialName [string]: to specify the name of the Material when exported (it should match the name of the Shading Group set in the Character File within the Character Maker in Maya
- forceCreate [int]: to force the Material to be exported in the final scene even if it is not assigned to a geometry
Editing the Simulation
Simulation results (character positions, orientations, postures) and Assets repartition or shading assignment (shader, shader attributes...) can be edited using the Simulation Layout Tool in Maya or Katana. You can see the results once saving the Layout File with these edits and using the Refresh Layout button in the Golaem Cache node in Katana.
Assets repartition or shading assignment (shader, shader attributes...) can also be edited using the Character Maker in Maya. When done, you just need to save the changes in the Character File. Reexporting the library file is not required.
The actual transformation and scale of the node in the Katana scene is taken into account.
If you'd like to change any Crowd Shader properties (texture, color, displacement, multi matte IDs...), it can be done on the assigned Materials in Katana (see above).