


Navmesh Creator
As of August 5th, 2025, Golaem will no longer provide direct support.
All support for Autodesk Golaem will now be handled exclusively through Autodesk support channels and this website will be deactivated.
Please bookmark the Autodesk Golaem Support section for any future support needs related to Autodesk Golaem packages.
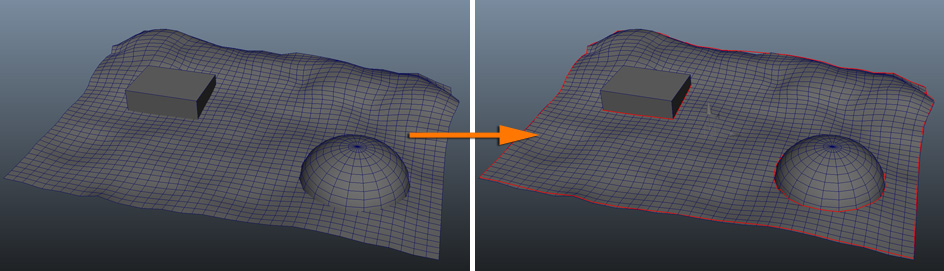
The NavMesh Creator allows to convert any Maya based geometry into a Golaem NavMesh (i.e. navigable zones available to the Crowd Entities) and saves it in the Golaem file format (.gse). Loaded in a Terrain Locator, this NavMesh can be used for Navigation and Pathfinding, as well as placing Entities while avoiding obstacles.
LAUNCH
- Golaem Shelf:

- Golaem Menu: NavMesh Creator
- MEL command: glmNavMeshCreatorCmd;
Geometry Prerequisites
Configuration
Generation Mode Dropdown
When creating a Navigation Mesh from maya Meshes, two choices are possible :
Generate Navmesh from Voxels
The first, used by default, computes voxels and accessibilty links between them to determine valid navigable areas. It can be finely tweaked and is the most effective for usual grounds, those not meant to be used as a globe/mini-planet-like ground. Its main limitation is that it is Y-Up locked and cannot handle navigation around 3D objects.
Generate Navmesh from MayaMesh triangulated faces
When the need of a planet-like ground is required, then the right choice is to use this mode. It is less optimized, and is basically a brute force preparation of the navigation graph, linking all neighbor faces in the navigation graph if there is no obstacle in the way. If a face edge is navigable, each of its edges will hold a waypoint, placed as far as possible from the closest obstacle (or in the middle if no obstacle is found). The obstacles in this mode are limited to the mesh geometry inner/outer borders, there is no computation of clearance, steps, or slopes, only the radius is checked against obstacles. Its limitations is therefore a less optimized navigation graph, and no management of slopes / clearance /etc. It should only be used when navigation all around the object is required (to the opposite of Y-up locked first mode). Using this mode with a large mesh (> 20 000 vertices) will issue a warning.
Subdivision Type
The used subdivison technique creates a voxel mold that approximates the input geometry. The voxels are then used to extract contours around obstacles and around the edges of the world, which in turn are used to create the NavMesh (navigation mesh). The process uses the Recast library (see http://code.google.com/p/recastnavigation/).
This technique is very fast on most environments, especially when increasing the voxel size. On the other hand, the computed NavMesh is only a loose approximation of the input geometry (depending on the voxel size), and some details like steps will not be preserved. The computation time mostly depends on the size of the environment, and it is not influenced by the topological complexity of it (like the number of triangles, of obstacles, holes, slopes, etc.).
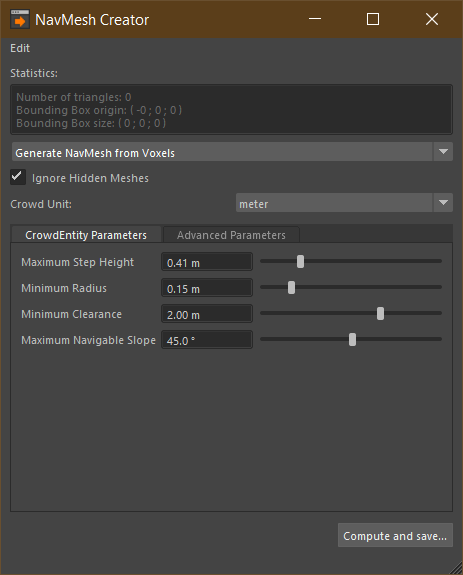
Statistics
Ignore Hidden Meshes
When checked (default), the NavMesh Creator will not take into account the meshes that are hidden in Maya.
Crowd Unit
Crowd Entity Parameters
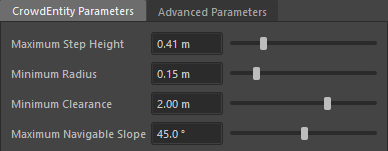
| Maximum Step Height | the maximum navigable step height for the simulated Entities (in Golaem meters). An object with a height exceeding this parameter will be considered an obstacle and Entities will navigate around it. This parameter cannot exceed the minimum clearance (see below). |
| Minimum Radius | the minimum radius of the simulated Entities (in Golaem meters). |
| Minimum Clearance | the minimum height of the simulated Entities (in Golaem meters). This parameter cannot be smaller than the maximum step height (see above). |
| Maximum Navigable Slope | the maximum angle (in °) of a slope on which Entities will navigate on the computed NavMesh. Slopes with a higher angle will be considered obstacles. |
By default, those parameters are set for regular human characters.
Advanced Parameters
Notice that the default advanced parameters are suitable for most cases. This tab contains the advanced parameters of the voxel subdivision. They are divided into 3 categories: Rasterization, Regions and Contours.
Rasterization Parameters
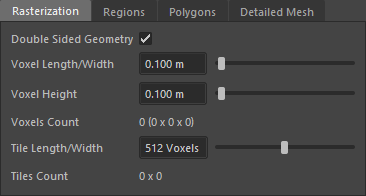
| Double Sided Geometry | Voxel based subdivision is sensitive to the orientation of the input triangles. Triangles facing down will not be taken into account unless this option is checked. |
| Voxel Length/Width | Width and length of a voxel (in Golaem meters). Using bigger voxels reduces computing time but the computed Navmesh will also be less precise. |
| Voxel Height | Height of a voxel (in Golaem meters). Using bigger voxels reduces computing time but the computed Navmesh will also be less precise. |
| Voxel Count | Total number of voxels that will be generated from the input geometry, and also the number of voxels along each axis (x, y and z). The voxels count is updated when the voxel length/width, height, or input geometry change. |
| Tile Length/Width | Large environments are divided into square tiles that can be computed individually, thus reducing the memory footprint of the computation. This parameter defines the length and width of each tile, in voxels. |
| Tiles Count | Number of tiles along the x and the z axis. The tiles count is updated then the voxel length/width, the tile length/width or the input geometry change. |
Regions Parameters
The walkable voxels are grouped together into regions, based on the obstacles detected in the environment.
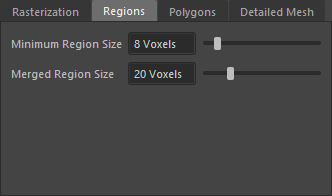
| Minimum Region Size | This parameter defines the minimum number of interconnected voxels that are allowed to form isolated areas. |
| Merged Region Size | Regions with a voxel count smaller than this parameter will be merged with other regions if possible. |
Polygons Parameters

| Maximum Edge Length | This parameter sets the maximum length of an edge along the borders of the NavMesh. Edges longer than this value will be split into several edges as needed. |
| Maximum Edge Error | Raw contours are computed as limits between voxels of different regions. These contours are then simplified to reduce the number of edges in the NavMesh. This parameter sets the maximum distance a simplified contour's borders should deviate from the original raw contour. |
| Maximum Vertices Per Poly | The maximum number of vertices allowed for polygons generated during the subdivision process. |
| Erosion | The distance to erode/shrink the walkable area away from obstacles. |
Detailed Mesh Parameters
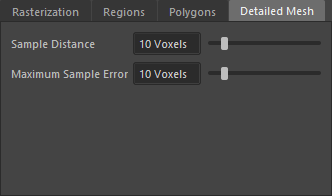
| Sample Distance | The sampling distance to use when generating the detail mesh |
| Maximum Sample Error | The maximum distance the detail mesh surface should deviate from heightfield data |
Greatest Zone
Additionally you can configure if you want to keep the greatest navigable zone only, or minimum surface size to keep.

Decreasing Tile Length/Width (and Voxel Length/Width if tiles are still too large) will give a more refined Roadmap, which can be helpful in case of large flat environments, when characters need to pass closer to obstacles in the NavMesh.
Export
If the total voxel count is too big, the NavMesh creator will display a warning that the computation may take a long time. In this case, please check the Crowd Unit or increase the voxel size.