


Simulating Traffic
As of August 5th, 2025, Golaem will no longer provide direct support.
All support for Autodesk Golaem will now be handled exclusively through Autodesk support channels and this website will be deactivated soon.
Please bookmark the Autodesk Golaem Support section for any future support needs related to Autodesk Golaem packages.
Since Golaem 6, you can simulate traffic in cities.
You can take a look at the following video showing how to setup traffic simulation in a small part of a city and creating a car crash using physics, or read the tutorial below
The traffic system uses 4 specific Golaem objects, and Maya curves (Bezier or Nurb Curves).
- The Maya curves will define the road system.
- Plugging them to the Traffic Locator, in addition to some curve configuration, will display the lanes.
- The Traffic Crossing Locators are automatically computed, and can be configured (position, lights status, etc).
- Finally, all cars driving on the traffic roads must use a Traffic Behavior and a Traffic Goto Behavior.
Prerequisites
The reader has already sufficient knowledge about the conversions to Golaem assets, Entity Type understanding and entities placement (you can see the Quick Start tutorial).
The vehicle asset must be correctly configured to face the configured front axis in the Character Maker. Its skeleton could just be a 1 bone skeleton. Note that the "pelvis" bone will be its rotation pivot, thus it is better to set it on the center of the vehicle for most use cases.
Initial Setup
In this example, we use a few curves to define some roads. As the crossings are detected where curves are connected, we will make their ends match by snapping them to each other (you could use the snap vertex tool). If you want to skip this part, a traffic01.ma scene is available in the Character Pack for this purpose.
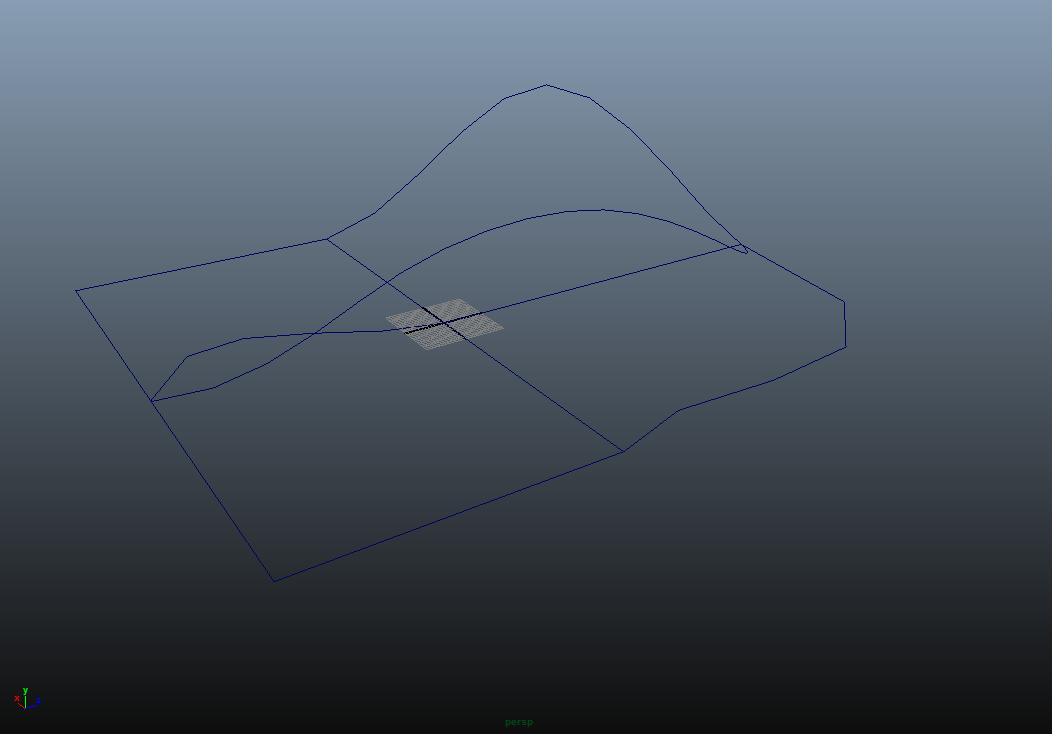
Curves representing the road graph
The graph can be either 2D or 3D, but keep in mind that the cars won't be able to climb totally vertical slopes (some simulation parts rely on up-projected coordinates). Sharp turning curves could also produce near impossible lanes, especially with high number of lanes per curve.
Adding A Traffic Locator
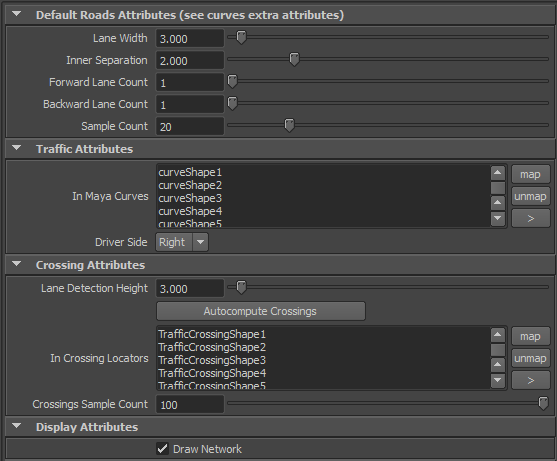
Traffic Locator Attributes
Create a Traffic Locator from the Golaem menu. You can configure default values for the curves attributes here : lane width, each side lane count, inner separation and sample count (more samples gives smoother orientations on lanes).
Select the curves, then the traffic locator, and map them via Traffic Attributes. Once bound to the Traffic Locator, Maya curves acquire new extra attributes.
The lane width, count, separation and sample count can be set per curve from their Extra Attributes. The default values found in the Traffic Locator are only used at curves first binding time. The meaning of forward / backward refers to the order in which the curve has been drawn, but the simplest way is to play with the parameters, as their effect is directly visible. Depending on your location, you may use a left or right driver side.
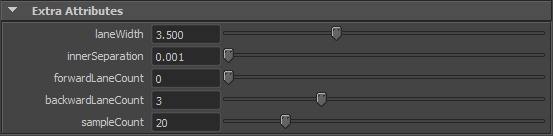
Curves Extra Attributes added by Traffic Locator
You now have a road graph to map entities to :
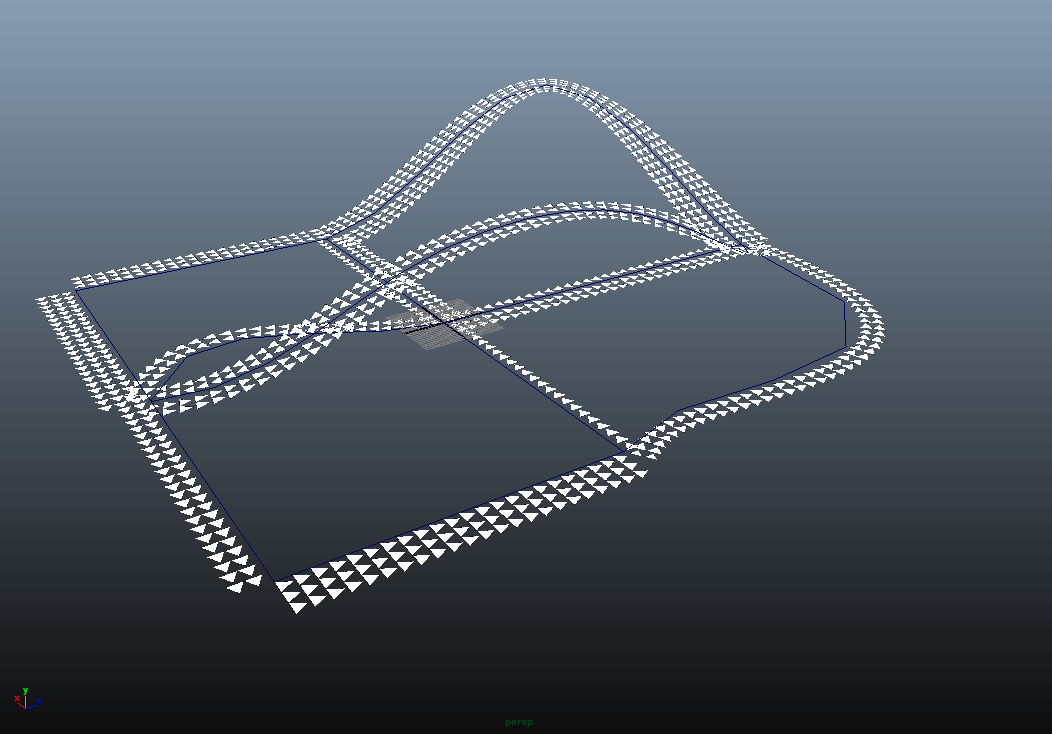
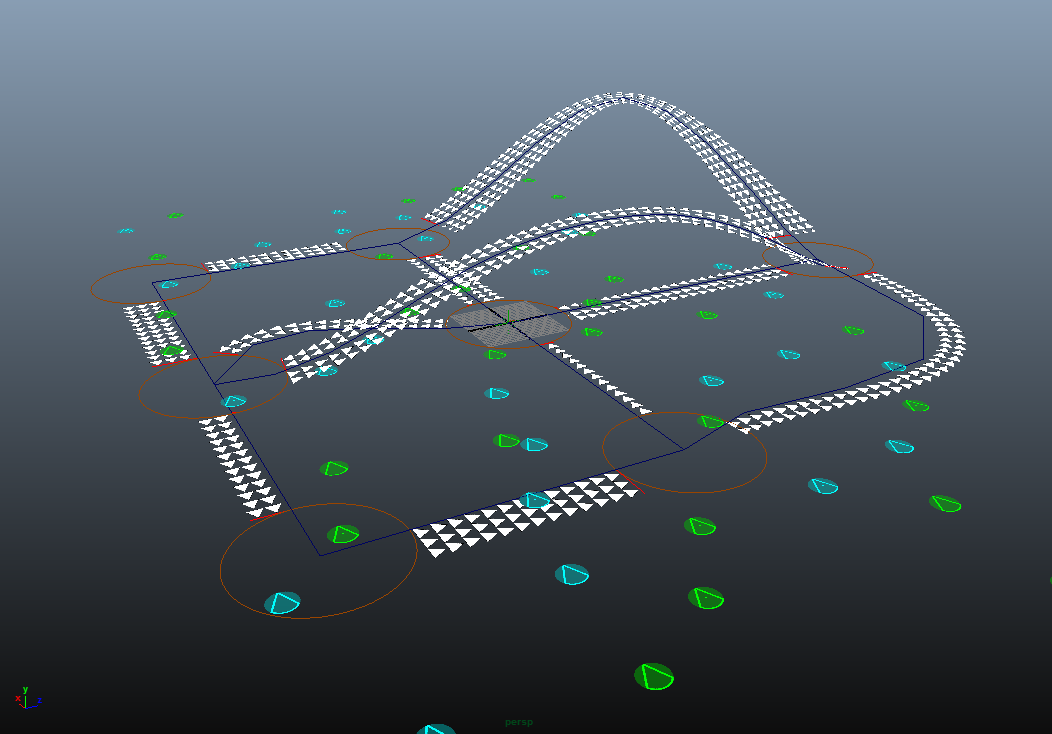
Curves bound to Traffic Locator show lanes
Detecting Crossings
Once the main traffic graph is correct, crossings can be generated.
The Traffic Locator "Autocompute Crossings" button process iterates over each road end, and check if a crossing already exists at this location (the crossing radius must include the lane end). If there is no crossing matching this criterion, one will be created.
The lanes are detected only if their vertical distance to crossing does not exceed the "lane detection height", allowing to have two crossings at different heights of the same position. Crossings are parented to the traffic locator for easier access.
Crossing Locator Attributes
At this point, the crossings will use some default lights timings, you can previsualize this by hitting play.
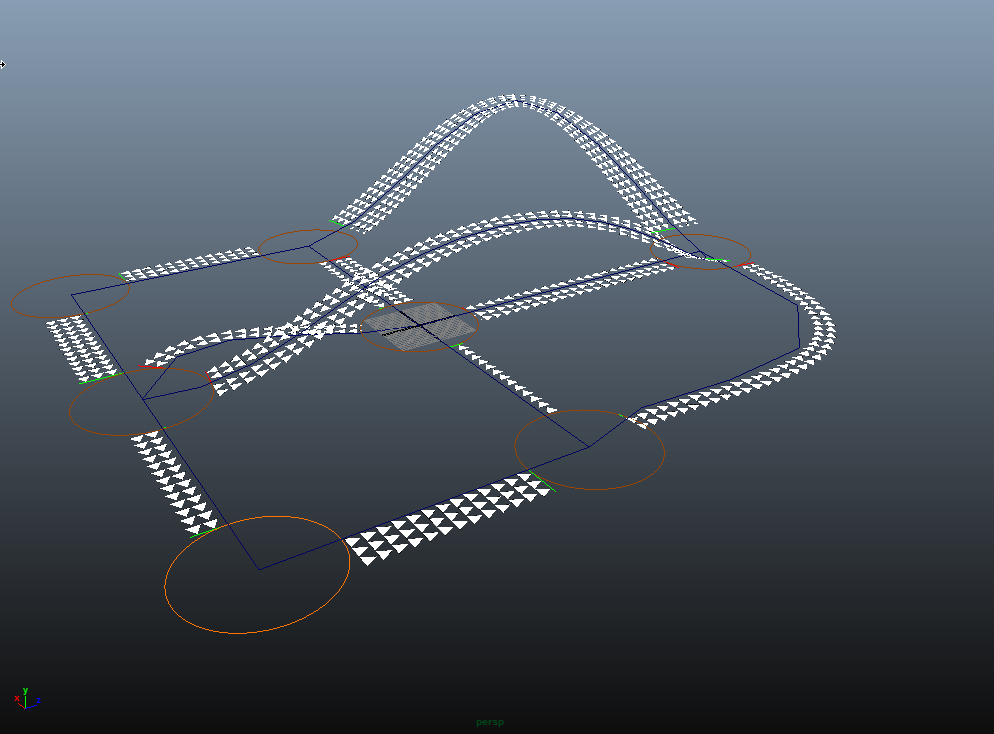
Traffic Locator with crossings and traffic lights
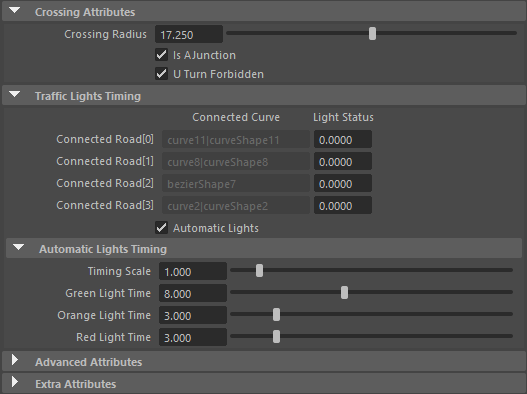
Crossing Attributes
The lights can either be automatic, or user can get control over it.
If automatic, the lights will be paired, preferably if they are aligned, and for each pair at once the lights will go from green, to orange, then red, according to timings configuration (then next pair is picked and it continues).
Crossing can also behave as a junction, with all the lights constantly green (useful to make split or merge branching crossing).
Finally, a fine control can be achieved over the lights status of each lane by key-framing Light Status values, using 0 (or less) for red and 1 (or more) for green. If so, please uncheck "Automatic Lights" to avoid conflicts.
One can also prevent the cars to make U turns on some crossings. By default, the cars may make U turn if this is the only possible solution to get out of the crossing, or if a planned path found it as the shortest path.
Adding Cars On The Roads
Traffic Behavior Setup
We will need to create an EntityType (using the EntityType icon  ). See the Quick Start for more details about how to create an EntityType. A ready-to-use car asset is available in the Character Pack, so let's use it : select the car.gcha file (and skip shaders scene opening for this tutorial).
Note that default Entity Type has a random scale picked between 0.9 and 1.1, but as the cars will have same size, you should set the scale of the EntityType random min & max to 1.0.
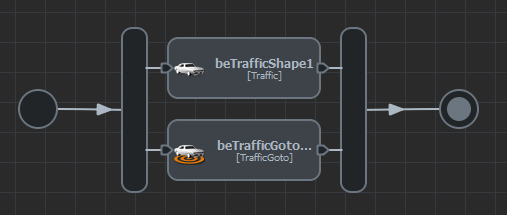
Once this is done, open the Behavior Editor using the Behavior Editor icon, then double-click on the EntityType, and add a Traffic Behavior to the behavior graph, then a TrafficGoto Behavior on top of it. It will build a Parallel Operator holding these two behaviors.
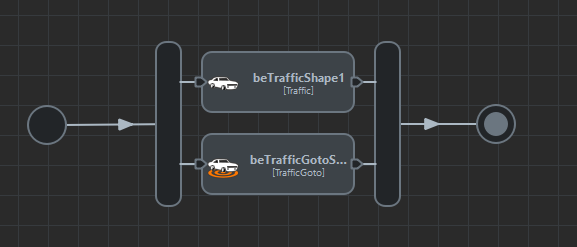
BeTraffic and BeTrafficGoto added to the behavior graph of the Entity Type
The BeTraffic Behavior positions the car on the traffic lanes, while the BeTrafficGoto makes it follow lanes, crossings and stop according to obstacles. By default, a car will try to reach its maximum speed, but some parameters such as the road speed limit, the road turning angle, the detection of other cars or obstacles, or being around a crossing, will slow it down.
You can configure some properties of the car in the BeTraffic attributes: length & width in meters, maximum speed and speed when turning, maximum acceleration and deceleration. Some standard values would be around 6 meters length, 2.x meters width, acceleration and deceleration around 5 or 10 m.s-2. You can also limit the rotation speed of the cars via a maximum angular speed (in degrees per second). A ratio can be set for speeds in order to randomize the speeds and accelerations in the given range (default is a random ratio between 0.8 and 1.2).
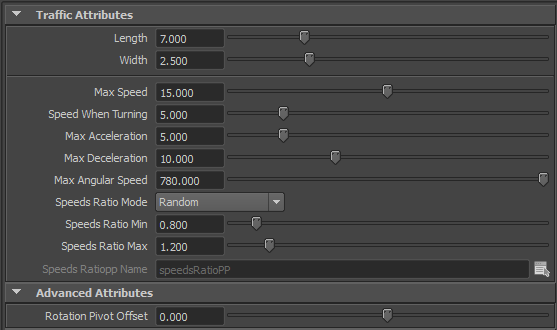
BeTraffic Attributes
You may have built a vehicle asset with the "pelvis" skeleton bone not centered on your meshes, because you want it to rotate around its location. If so, you will need to adjust the advanced attribute "rotation pivot offset".
By default, the length of the car spans evenly in front and back directions of the car, from the pelvis. If you have a root near the back of the vehicle, you will need to raise this value above 0, to the distance between the car center and the position of pelvis. If the root is near the front of the car, do the same with negative values. You can have a look at the "troubleshooting" section below, to view the actual size of the vehicle in the simulation, and to be able to adjust it.
Terrain adaptation
You can adapt the cars to the ground by dropping a TerrainLocator in the scene, and use some Maya meshes to define the ground, then, adding an AdaptGround behavior in particle mode, and setting its advance attribute "orient pelvis on ground normal" to true. You can also tweak the "max pelvis ori speed" to damp the orientation change.
Placement
Whereas the cars placement can be achieved by any Population Tool way, it is better to select the traffic curves, then create a population tool, and use the populate on curves method. Thus the population tool will read the curves traffic attributes defining the lanes and direction, to place and span the cars in a suitable way. In all the cases, the cars will be bound to the closest lane they can find in the traffic as soon as we add a BeTraffic.
Same scene after adding a Population Tool (two cars entity types here)
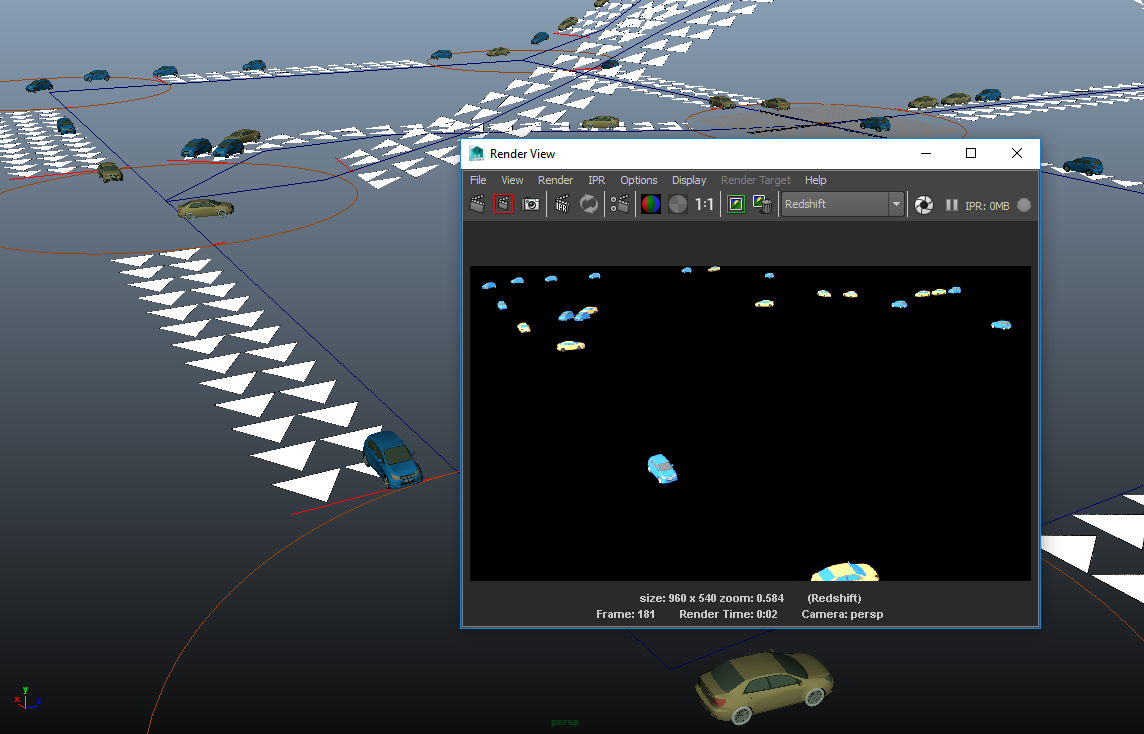
Running the simulation at this time should now produce a good looking traffic :
Traffic Simulation (Population Tool hidden)
Target Setup
If you re unsatisfied with the random path planning of the cars, you can make one or several Entity Types heading to different locations.
Open the Behavior Editor, and select the TrafficGoto Behavior.
a Traffic Behavior and TrafficGoto Behavior running in parallel
You can tweak the goto mode from 'random target in environment' to any suitable way you like. As for the traffic car binding, the behavior will compute the closest lane position to the targets provided and use it.

TrafficGoto Behavior Attributes
The cars will go to the requested target and stop at the closest location, until a queue of cars will progressively be formed. If you want to prevent U Turns in computed path, you can choose it there.
Stopping the Goto behavior releases the cars from this location.
A rendered traffic scene
Best practices
To avoid erratic behaviors, here are some best practices :
- never let different road lanes overlapping : when cars drive on lanes, they ignore other lanes & roads (for example, an opposite lane car must not be avoided). If two roads overlap, the cars on both road will not avoid, or collide with, each other. Even if the traffic lights prevent the lanes to be used at the same time, congestion may lead to cars still on a lane while the other is released.
- car trajectories on the crossings are Bezier curves, from the incoming normal (at stop line), to the exit normal at exit line (virtual, matching the opposite stop line). Please consider this when dealing with cars making strange 270 degrees turn instead of 90° : in and out lanes are probably too close to have a nice Bezier curve, this can be checked with helpers (see troubleshooting)
- cars compute avoidance for their current lane, next crossing and next lane. If two crossings are very close, a car going out of the first crossing may not have the time to evaluate the next crossing and brake early enough. In those cases, it is better to design a bigger (merged) crossing instead of two smaller, and remove the in between road curve. As the curves end point may end anywhere in the crossing, the stop lines can be adjusted by moving the curves end points in the bigger crossing.
- When designing a dense traffic, it is better to avoid spawning cars on the crossings. I the other case, it may happen that on first frames, the cars collide at crossing exit. Cars spawned in a crossing are attached to the closest lane (incoming or outgoing). If they are bound the the outgoing lane, they are unknown by the crossing, and thus are not avoided properly until the reach the exit of the crossing.
Troubleshooting
Some helpers are available to ease the setup process.
Note : They are only displayed while a simulation is running, so they won't be of any help while using an exported cache.
To be able to easily pick an entity, you must have declared a decent radius in population tool. You can also have a look at your EntityType >EntityTypeAttributes>RadiusToHeighRatio to modify the picking cylinder to pick entities more easily (usually, for a car, a radius of 2 and a radiusToHeightRatio of 0.5 is fine). If entity picking is an issue, you can check the cylinder in EntityType > DisplayAttributes and set it as Cylinder, you will see the pickable volume. Finally you need to be in object mode (F8) for picking to work while in simulation.
In the CrowdManager, under the section "Viewport Visual Feedback Attributes", you will find three options to display information about the picked entity :
- the traffic box will show a blue rectangle around the car. This can helps troubleshooting the width / length / rotation pivot offset configuration.
- the traffic obstacle is a red line showing the detected obstacle if any (another car, a red light, etc), giving the reason of a car deceleration.
- the traffic trajectory is a blue curve starting at the car, showing the followed path. The detection of the cars and obstacles is done on this trajectory, which varies according to the car speed. This can also helps troubleshooting if a crossing needs more samples.

Traffic specific attributes in Viewport Visual Feedback Attributes
On the Traffic Locator node, there is a "draw network" option under "Display Attributes". This will display some red lines, showing all the virtual lanes produced from the lanes configuration. This can helps troubleshooting where some additional lane sampling is required.
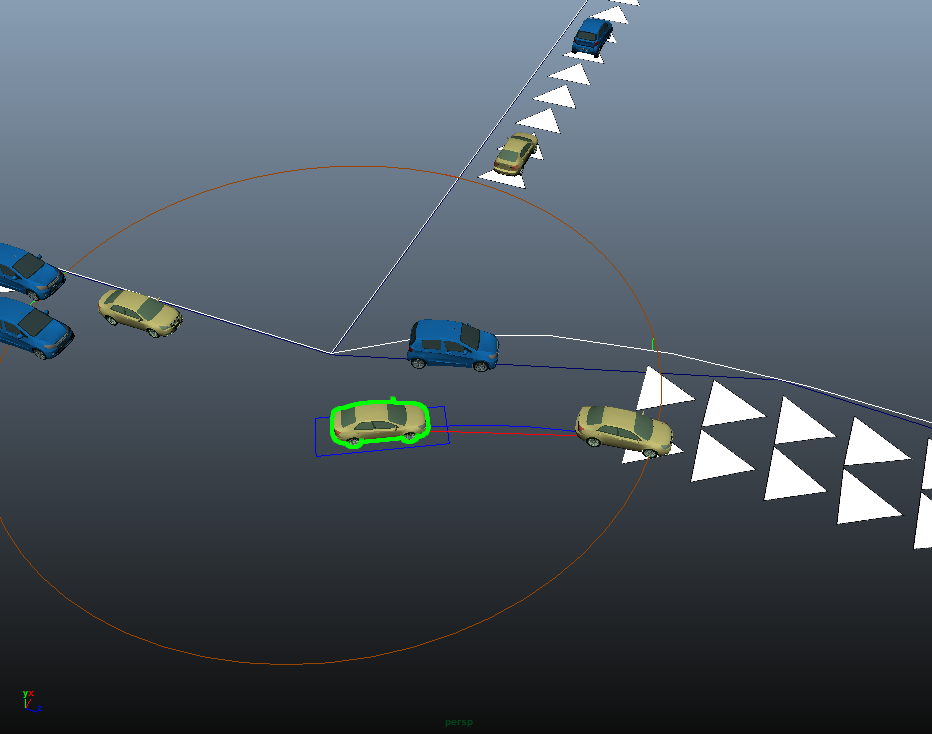
Traffic debug information, when picking an entity during simulation