Simulating a bowl of falling pasta
As of August 5th, 2025, Golaem will no longer provide direct support.
All support for Autodesk Golaem will now be handled exclusively through Autodesk support channels and this website will be deactivated soon.
Please bookmark the Autodesk Golaem Support section for any future support needs related to Autodesk Golaem packages.
Golaem is efficient at animating crowds of multiped characters but it can also be useful for animating and simulating a wide range of deformable objects. This tutorial gives a quick overview of how to setup a scene including physics simulation by simulating falling spaghettis.
For more details about how to use physics simulation with Golaem see the Physics Tutorials
Assets preparation
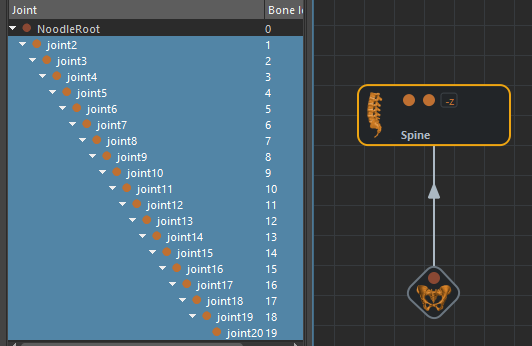
The spaghetti asset is a 20 bones hierarchy of same lengthed bones. The mesh is a cylinder with splits on the Y axis so the skinning will be smoothed enough.
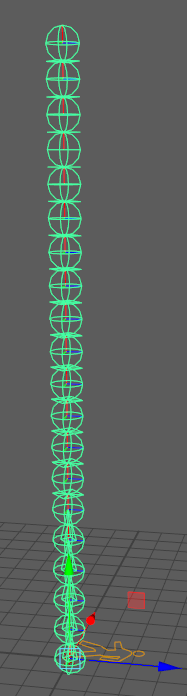
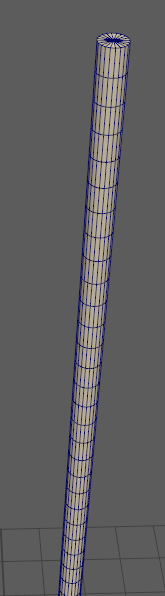
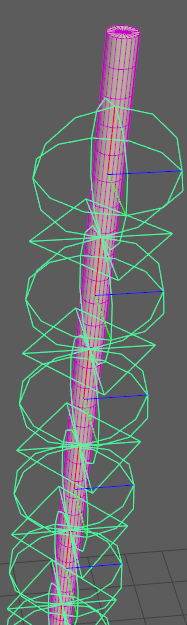
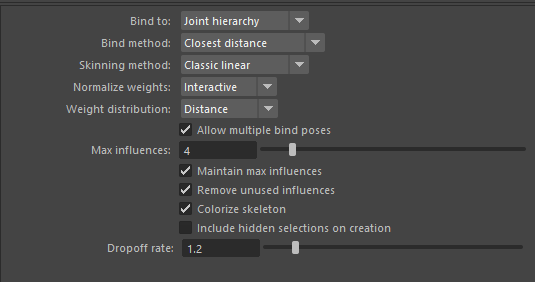
Select the mesh and the bones then bind a skin. Lower the Dropoff rate so the skin weight will be more smooth along the bone hierarchy.
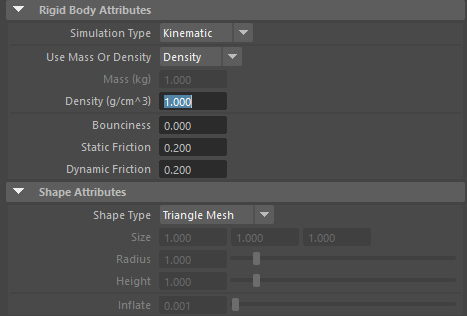
Add a container in the scene like a bowl mesh then click on Crowd Rigid Body shelf button 
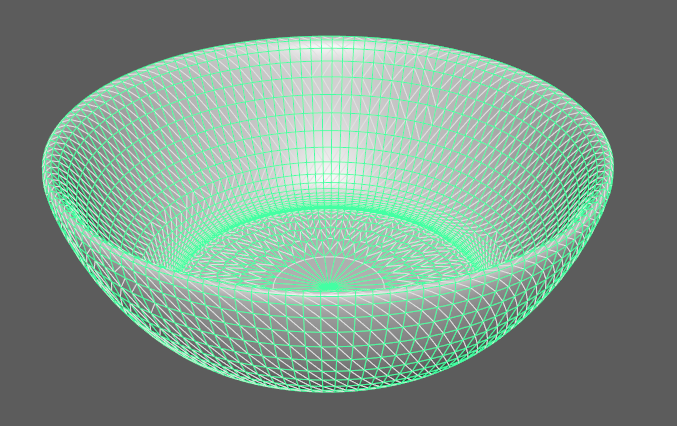
Set the bowl rigid body as a Kinematic Triangle Mesh.
Character and Physics setup
Now we have the skeleton and the geometry, it's time to create the mapping for Golaem animation engine.
For more details about how to convert a character to Golaem, see Assets Conversion Tutorials
The spaghetti is simple enough to not use limbs and effectors. The pelvis is mandatory and mapped with the first bone. The rest of the hierarchy is mapped in a spine.
Only one asset group and mesh is needed.

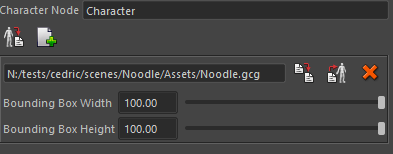
Export the Character geometry as a gcg file with a big enough bounding box so it will contain the spaghetti regardless its deformation.
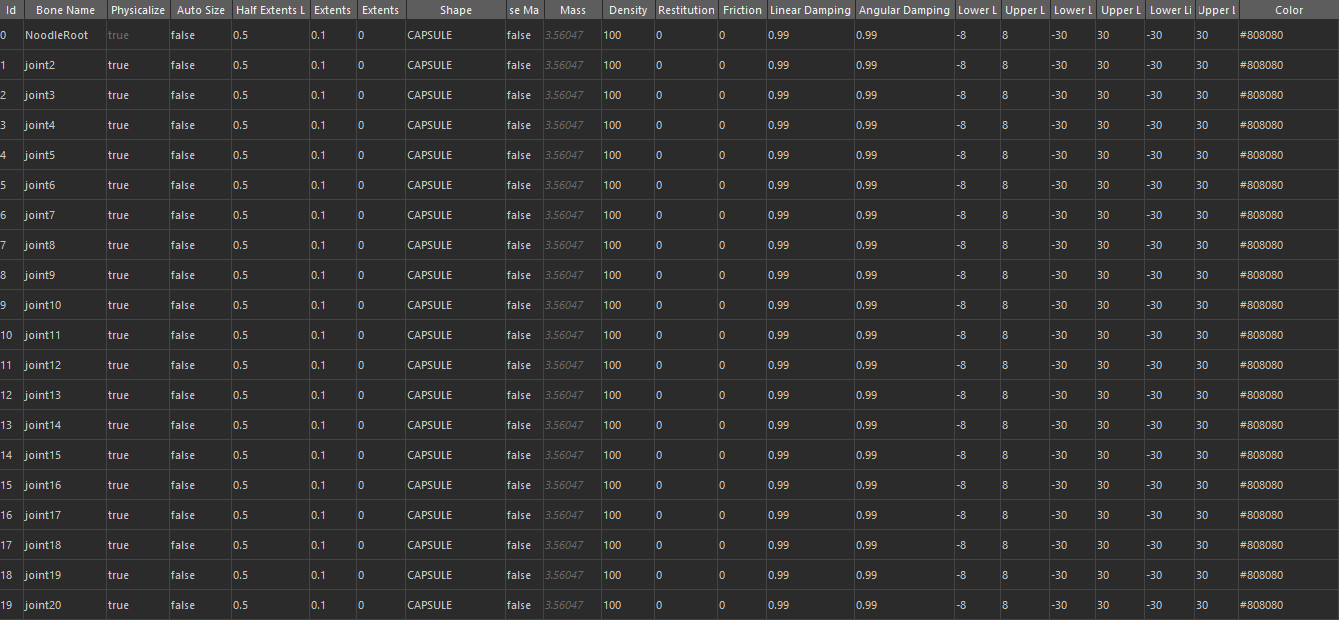
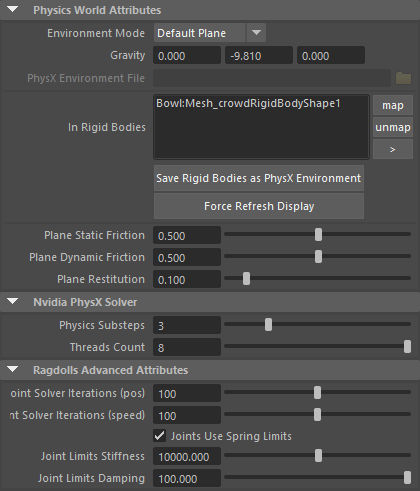
Let's set the spaghetti physics parameters.

Most important parameters are angular limits. Damping are increased and friction lowered. Adjust the parameters so the character is simulated at your needs.
Scene and simulation
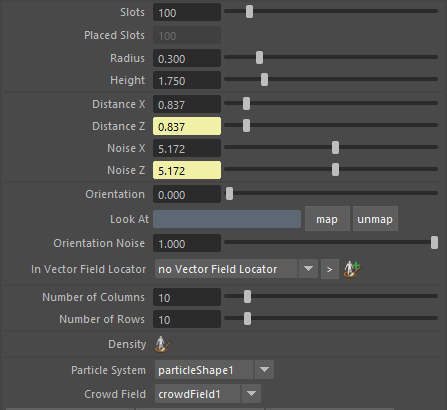
Create a PopulationTool above the bowl. Set the spaghetti count. Click on Create when you are done.
Increase the iteration count and modify the Joint Limits Stiffness/Damping until you have a stable enough simulation. The physics solver has a lot of joints to compute with a lot of constraints this can lead to instability when not given enough iterations.
The behavior is a simple Physicalize. The ragdoll creation process is performed when the behavior stops.
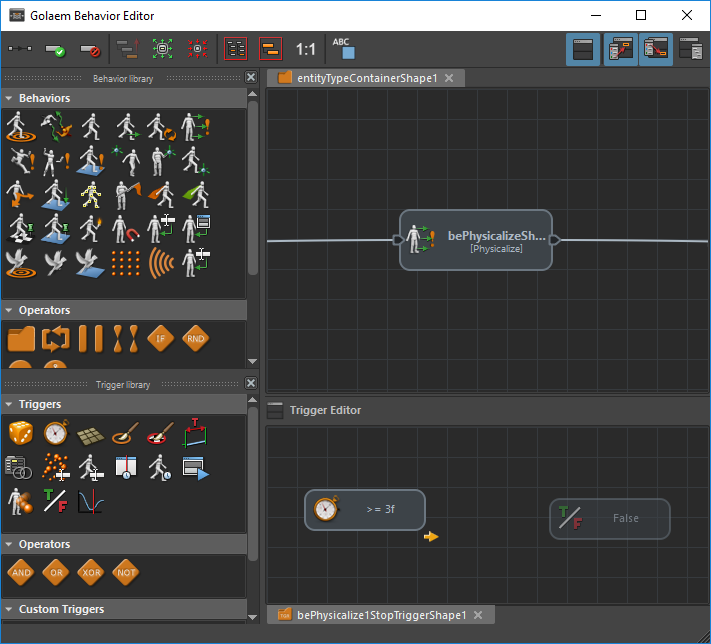
A Frame trigger is set as the root stop trigger for the behavior. When frame is 3, the ragdoll will be created and the physic simulation will start for all spaghettis.

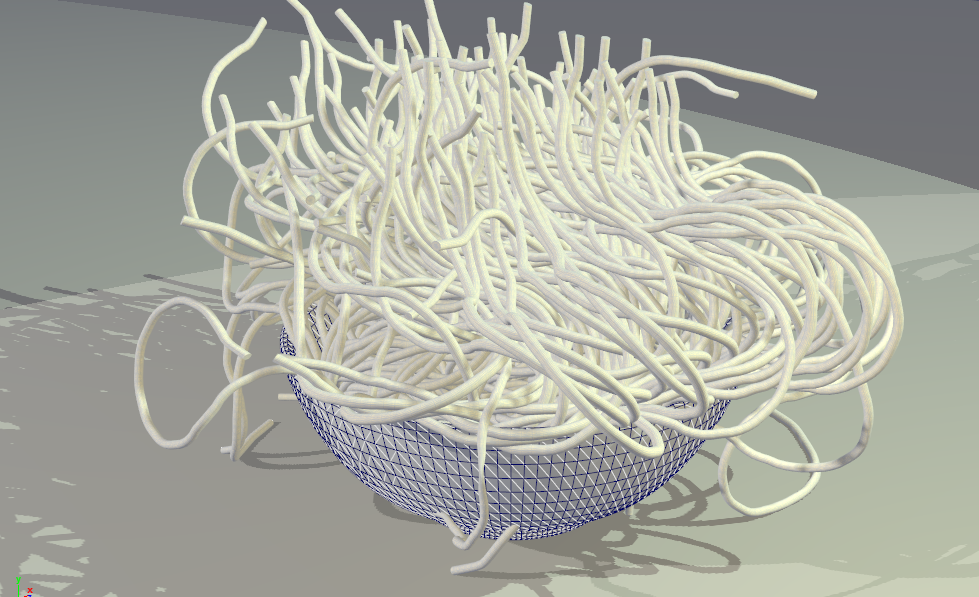
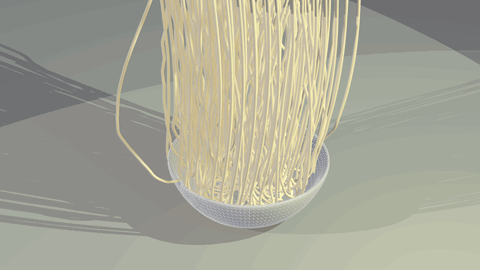
Here is the result:
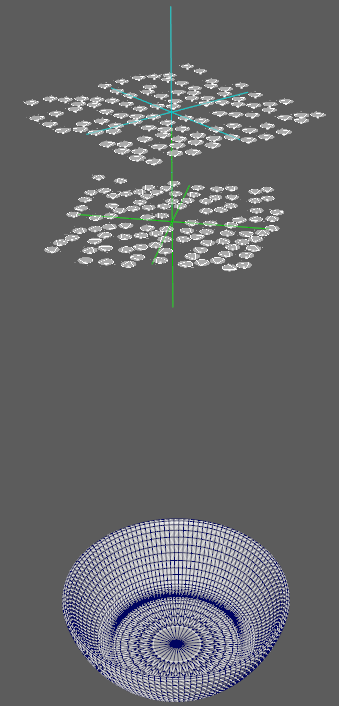
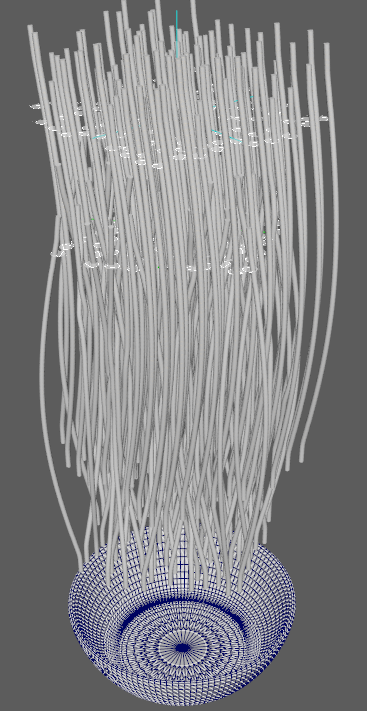
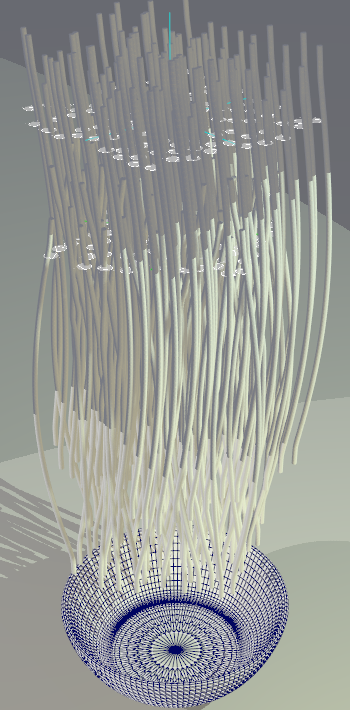
From left to right: simulation at frame 1, simulation after a few second, same frame with spot lights on and shadows.
Lighting and playblast
Add one or multiple spot light to improve readibility and depth of you scene.
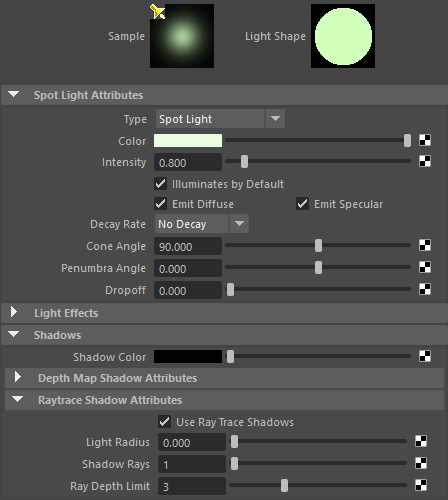
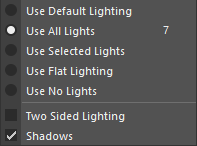
Enable viewport 2.0 lighting in the view Lighting menu.
You are done! Enjoy falling pasta!