


Golaem Cache Node
As of August 5th, 2025, Golaem will no longer provide direct support.
All support for Autodesk Golaem will now be handled exclusively through Autodesk support channels and this website will be deactivated soon.
Please bookmark the Autodesk Golaem Support section for any future support needs related to Autodesk Golaem packages.
The Golaem Cache Node allows to replay exported Simulation Caches generated with Golaem For Maya using the Simulation Exporter. The advantage of this method is that it avoids baking out geometry and handles both geometry and shading variation. Thus it allows to order to render high quality crowds with Unreal Engine.
Setup in Maya
Setup the Simulation In Maya
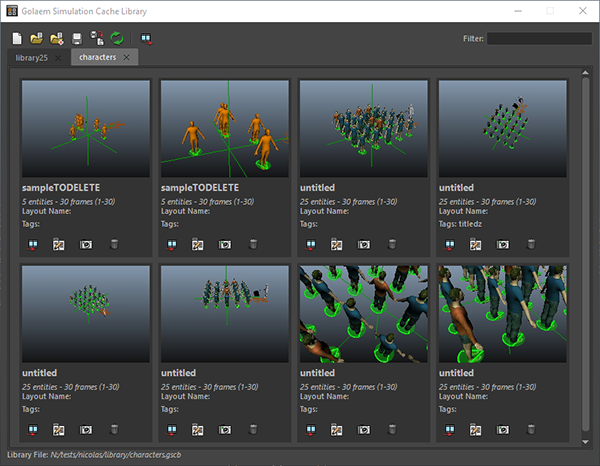
Create your Crowd Simulation within Maya using Golaem. In our example we will use the locomotion scene from the Golaem Crowd Samples. Once the simulation is done, open the Simulation Exporter to export the Simulation Cache. Once the Simulation Cache will be exported, a Simulation Cache Library File (.gscb) will be created in the same directory than the Simulation Cache. It is also possible to add the exported simulation to an existing Simulation Cache Library File using the Library Tool.
The Simulation Cache Library File contains the useful information about exported simulations such as the export directory, the Character Files used...
Dirmapping files
You can take advantage of the dirmap mecanism when importing a scene (ie. when the library scenes have been prepared for another OS, and point to another OS typed path). To be able to use the dirmap rules for Unreal, an environment variable named "GLM_DIRMAP" must be declared with a sequence of path pairs, separated by semi column ';'. The first element of the pair is the path to replace, the second one is the replacement path. setting a sequence of mutiple path pairs is possible.
For example on windows, one could declare the variable with something such as :
set GLM_DIRMAP=C:/path/to/replace;C:/replacement/path
Replaying / Rendering a Simulation
Editing the cache
Cache entities properties (character positions, orientations, postures) and Assets repartition or shading assignment (shader, shader attributes...) can be edited using the Simulation Cache Layout Tool in Maya or Unreal. You can see the results once saving the Layout File with these edits and using the Refresh Layout button in the Golaem Cache node in Unreal Engine.
Assets repartition or shading assignment (shader, shader attributes...) can also be edited using the Character Maker in Maya. When done, you just need to save the changes in the Character File. Reexporting the library file is not required.
The actual transformation and scale of the node in the Unreal Engine scene is taken into account.
If you'd like to change any Crowd Shader properties (texture, color, displacement, multi matte IDs...), it can be done on the assigned Materials in Unreal Engine (see above).
Exporting and using a terrain from Unreal
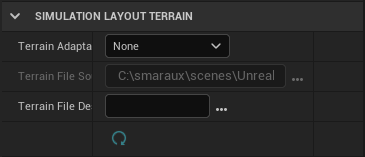
If you want to snap your simulated cache to a different terrain, as the one the cache is imported from, and if a source terrain exists for this cache, you can use the Simulation Layout Terrain for adaptation.
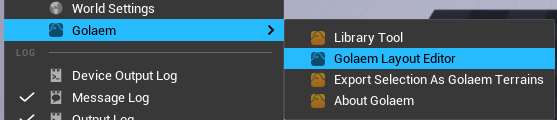
A terrain can be exported from Unreal objects, such as Meshes and Landscapes, via the "Export Selection As Golaem Terrain" found in the Window/Golaem menu. It will produce a gtg file which is the relevent format to provide a terrain to the simulation cache.
Once this is done, you can add this terrain as the destination terrain in the Golaem Cache node attributes, under Simulation Layout Terrain section
Rendering the cache
The common way to render a Golaem Cache is by using the sequencer :
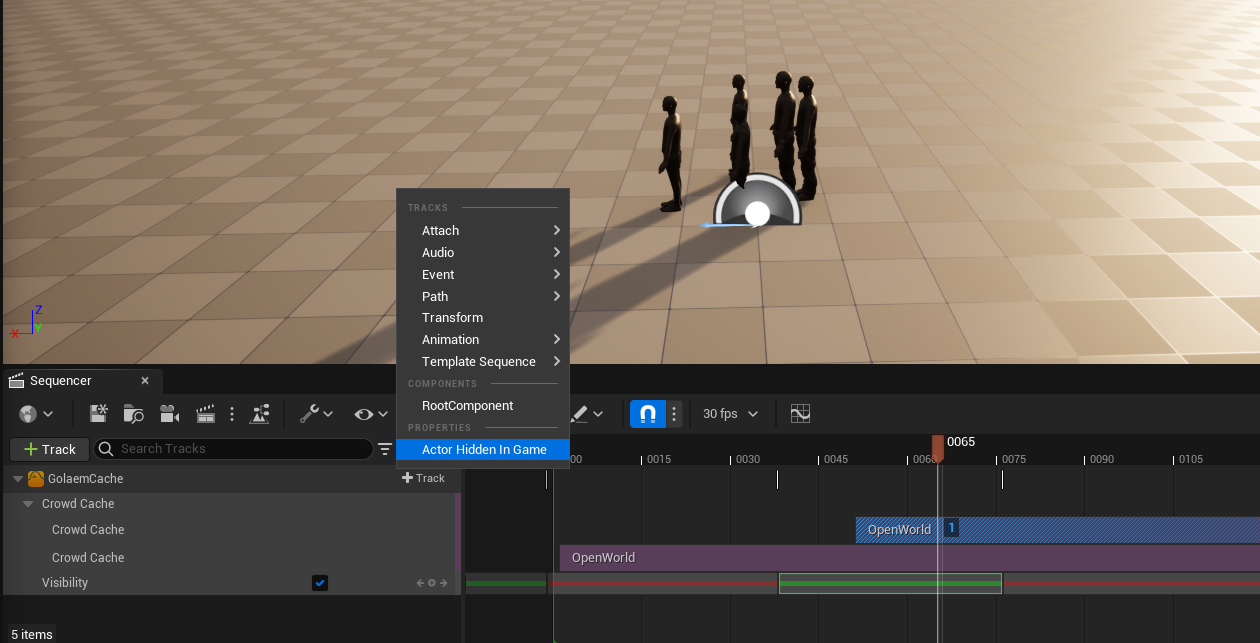
- Add a track "Actor To Sequencer" for the GolaemCache Node.
- On this Golaem Cache track, press the [+Track] button, and add an animation > Golaem Cache Track
- You can also control the cache visibility, by pressing the Golaem Cache [+Track] button, and select "Actor Hidden In Game", which will add a keyframe-able visibility track.
The Golaem Cache Track can be time-edited, duplicated, cropped, etc.