Adding a Mosaic Tifo
Here is how to add a general texture on the multiples signboards to form a picture.
This tutorial assumes that your entities already contains a signboard if not please refer to the How To Add Props tutorial in order to understand how to add some new geometry to your Golaem Character. (doing so do not forget to correctly tile your UVs! ;)
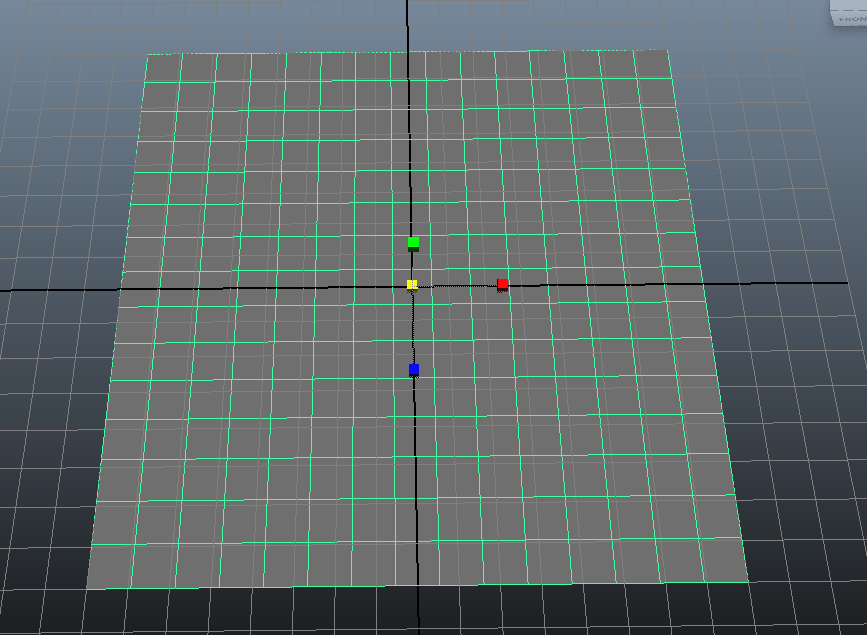
1. Create a basic geometry to generate your crowds on. Assuming that the entities are going to be generated inside each faces keep in mind the number of rows and columns.
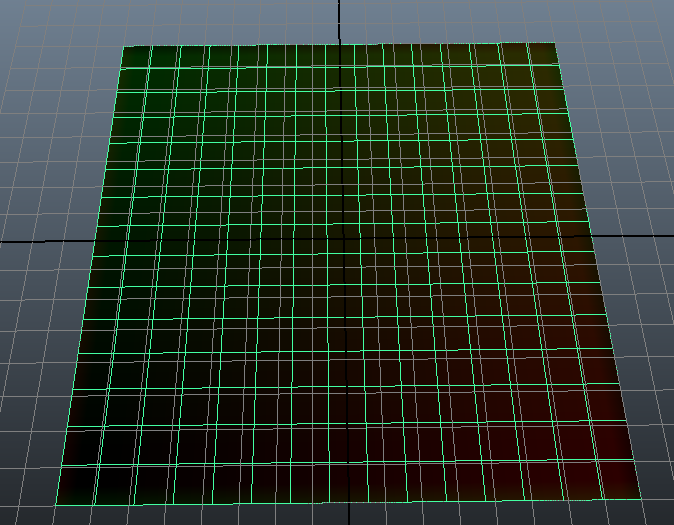
2. Create a UV offset texture based on the length and width of your grid placement.
Here is mel script to do so:
//examplewritePpmUvFile("C:/test15.ppm", 15, 15);// 15, 15 being the values of length and width you may change it to your will// codeglobal proc writePpmUvFile(string $filePath, int $length, int $width){if ($length > 256 || $width > 256) { error("Too big!!"); return; }string $fileContent;// header$fileContent += "P3\n"; // magic word$fileContent += ($length + " " + $width + "\n"); // length / height$fileContent += "255\n"; // max value// contentint $colorIndex=0;for ($iL=$length-1; $iL>=0; $iL--){for ($iW=0; $iW<$width; $iW++){int $r = $iW;int $g = $iL;int $b = 0;$fileContent += ($r + " " + $g + " " + $b + " ");$colorIndex++;}$fileContent += "\n";}// write file content$fileId = `fopen $filePath "w"`;fprint $fileId ($fileContent);fclose $fileId ;};
3. Once this .ppm texture is created , convert it in png for example into your favorite image editor.
4. Load the texture in your scene by selecting your placement geometry and creating a Paint Trigger Zone  .
.
.
5. Place the crowd by selecting the faces and using the Population Tool  option "Create particles on selected component" .
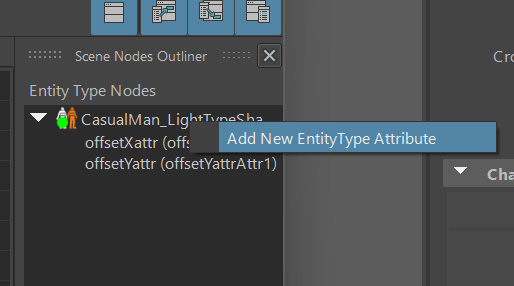
option "Create particles on selected component" .6. To store the Id of your particles to offset the picture in your signboards create 2 Golaem Attributes and name them "offsetXattr" and "offsetYattr".
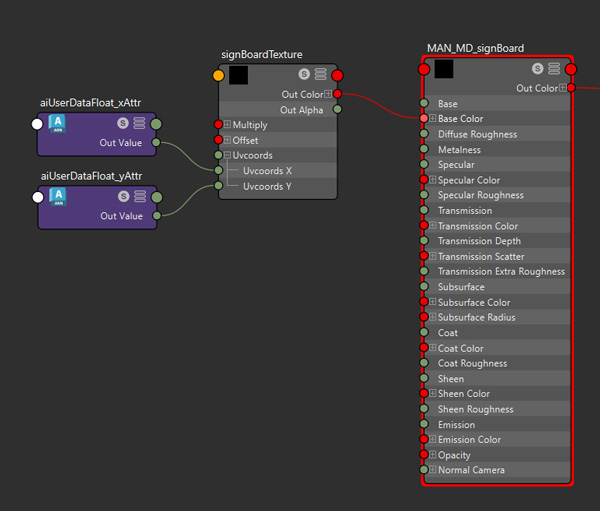
7. In your shader scene create a shader for the signboards, using a 2d file texture connected to the shader color attribute. Be sure to map this shader to your Golaem character by going in the Character Maker geometry tab and clicking the reset shader button (save your gcha).
Notice: the placement of the texture depends on the UVs of your signboard, check the UVs and adjust the placement
8. Add two aiUserDatafloat shaders and link them to the UV coord x & y components. This will enable you to control the U & V offset of the texture applied to a particular tile with the offsetX and offsetY attributes. See this tutorial to learn how to feed the getUserData shader with attributes values. The images in this tutorial are using Arnold, but you can easily adjust it for other renderers.
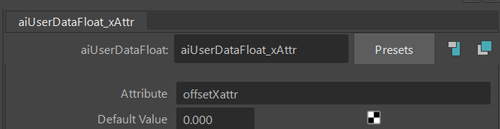
9. Go to the Geometry Tab in the Character Maker, find the shader assigned to your signboard and add two float Shader attributes to allow it to perform the uv offset: offsetXattr and offsetYattr. You can also use the Reset Shaders button  after selecting the signboard Mesh Asset node. This will add the Shader Attribute nodes automatically. Change the sahderAttribute mode to Attribute and fill in each attribute's name.
after selecting the signboard Mesh Asset node. This will add the Shader Attribute nodes automatically. Change the sahderAttribute mode to Attribute and fill in each attribute's name.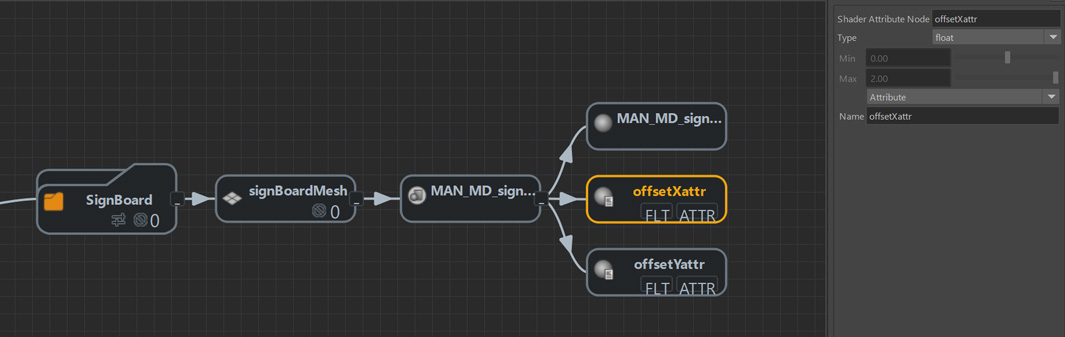
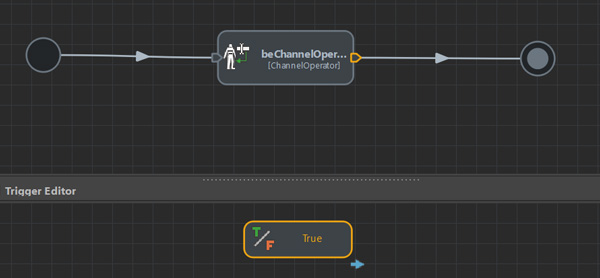
10. In the Behavior editor, drag and drop a ChannelOperator Behavior into the Behavior Graph of your entities.
11. Edit its Stop Trigger to True for your entities to pass through it and run the other behaviors we may add behind it.
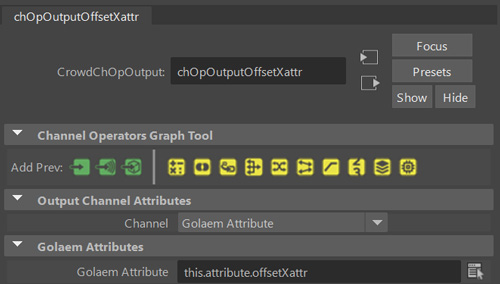
12. From the Channel Operator Attribute Editor, add two Channel Output which you will set as Golaem Attribute, for offsetXPP and offsetYPP
13. In the Channel Operator Editor, add two ChannelOperatorInput to set their value
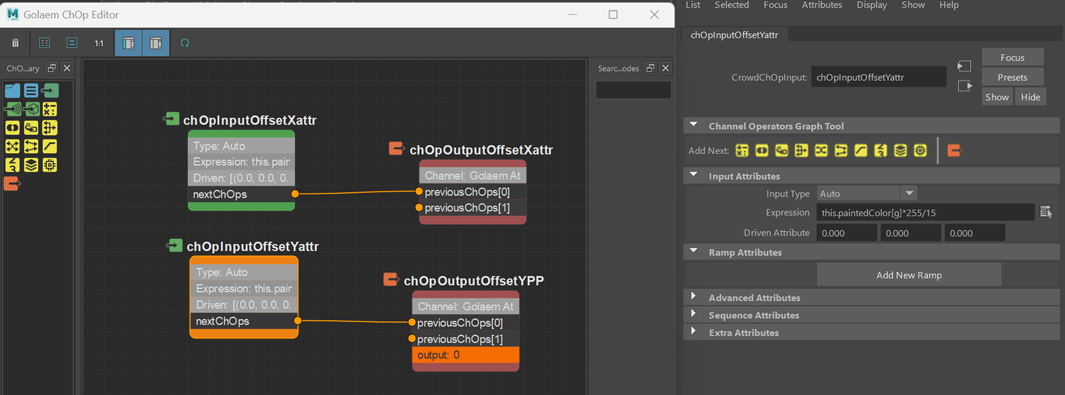
For offsetXattr
this.paintedColor[r]*255/15
and for offsetYattr
this.paintedColor[g]*255/15
We are working on a texture of 255 different color value for each component, yet we want to divide it to the number of rows of our entity group (15 in this case)
13. Add a Motion Behavior after the Channel Operator Behavior and load the animation of your crowds proudly rising their sign boards.
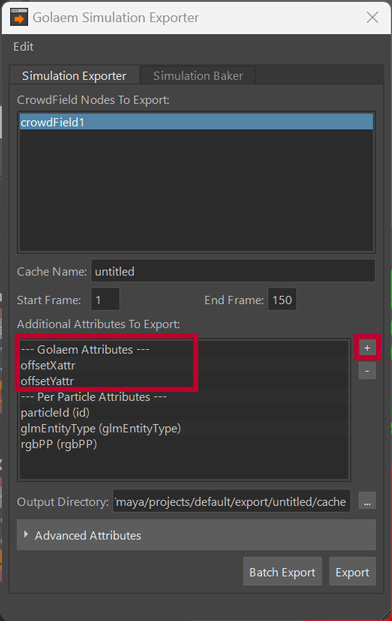
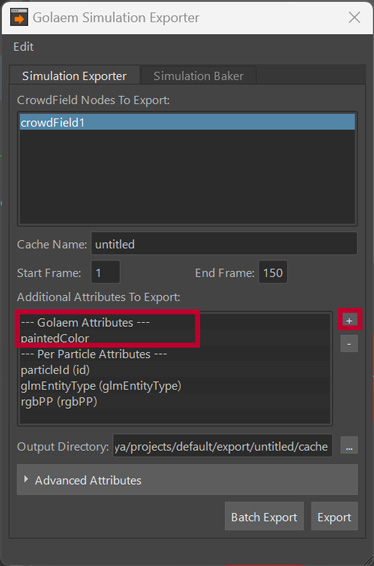
13. Edit your simulation to your will and export it using the Simulation exporter (do not forget to export your attributes by ticking the + box icon on the right side of the exporter window.
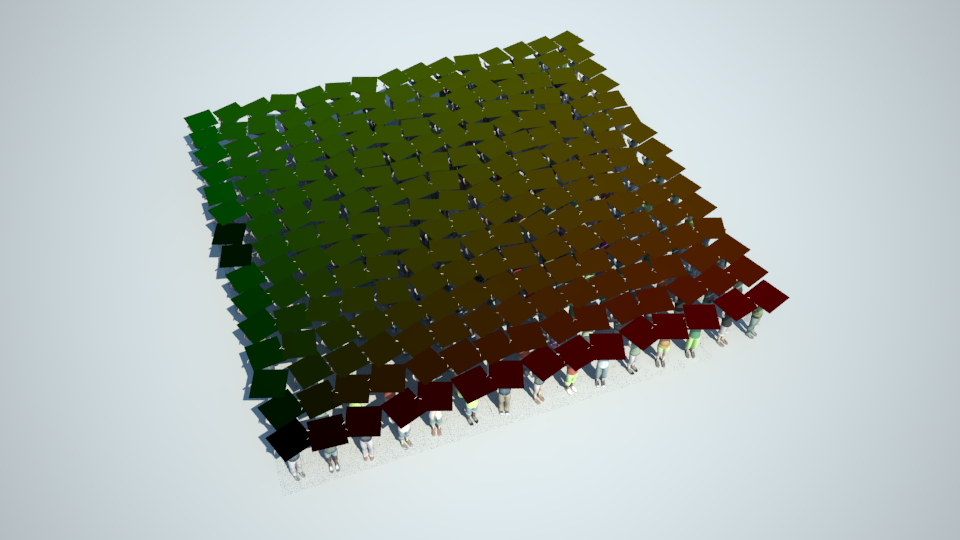
14. Render your scene!
![]()
Inherit the color of the Paint Zone Trigger
Based on this workflow we could for example get the color of Paint zone Trigger. Let's start over from point 5.
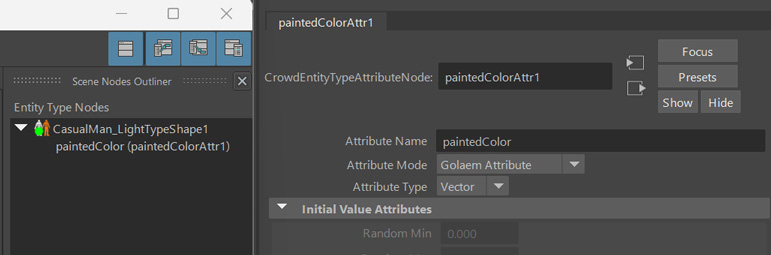
6. To store the color of the Paint Zone Trigger where your characters are created on, add a Golaem Attribute named paintedColor and set its Attribute Type to Vector.
7. In your shader scene create a shader for the signboards, be sure to map this shader to your Golaem character by going in the Character Maker geometry tab and clicking the reset shader button (save your gcha).
Add a aiUserDataColor in order to load the paintedColor attribute value we will export later.
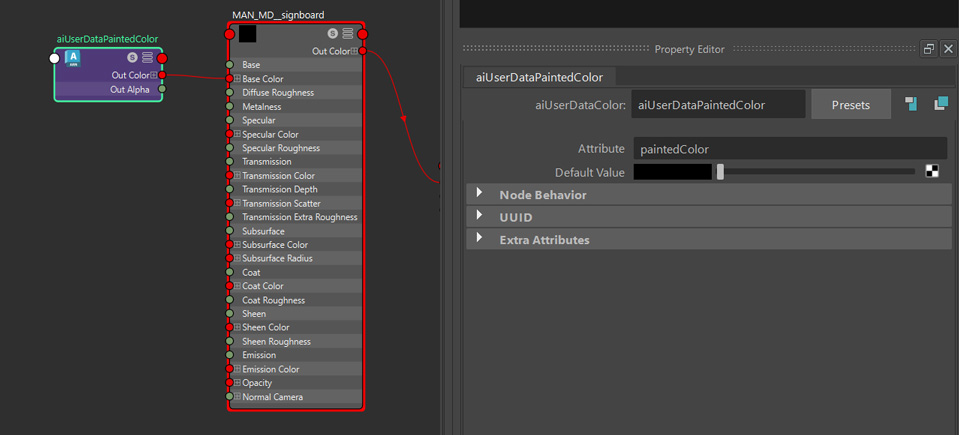
8. Go to the Geometry Tab in the Character Maker, find the shader assigned to your signboard and add a vector Shader attributes: paintedColor. You can also use the Reset Shaders button after selecting the signboard Mesh Asset node. This will add the Shader Attribute node automatically. Set the ShaderAttribute mode to Vector / Attribute and its value to paintedColor.
after selecting the signboard Mesh Asset node. This will add the Shader Attribute node automatically. Set the ShaderAttribute mode to Vector / Attribute and its value to paintedColor.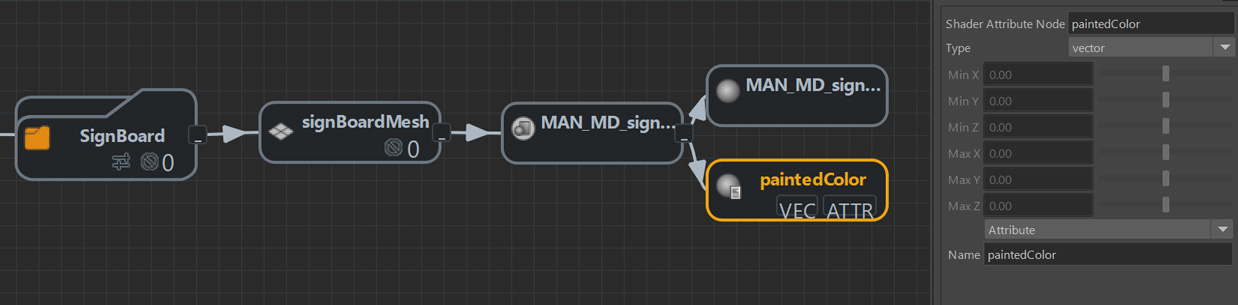
9. Go into your Behavior editor and drag and drop an ChannelOperator Behavior into the Behavior Graph of your entities.
10. Edit its stop trigger for your entities to pass through it and run the other behaviors we may add behind it.
11. Create an output on our ChannelOperator Behavior and set it to Golaem Attribute this.attribute.paintedColor to write the value to the Golaem Attribute we created
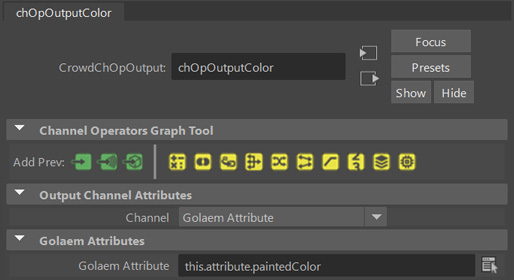
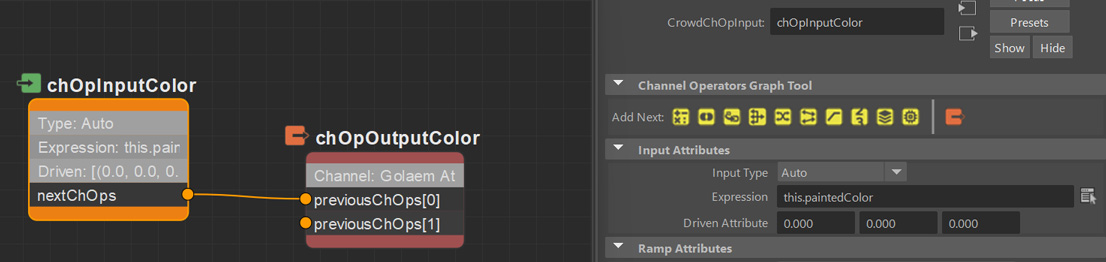
12. Open the Channel Operator Editor and feed the node we just created with a ChannelOperatorInput node with an expression set to
this.paintedColor
13. Add a Motion Behavior after the Channel Operator Behavior and load the animation of your crowds proudly rising their sign boards.
14. Edit your simulation to your will and export it using the Simulation exporter (do not forget to export your Golaem attribute by ticking the + box icon on the right side of the exporter window.
15. Render your scene!