Using Sensors
As of August 5th, 2025, Golaem will no longer provide direct support.
All support for Autodesk Golaem will now be handled exclusively through Autodesk support channels and this website will be deactivated.
Please bookmark the Autodesk Golaem Support section for any future support needs related to Autodesk Golaem packages.
This tutorial shows how to setup Sensors and use them in crowd simulations.
Creating the Sensor
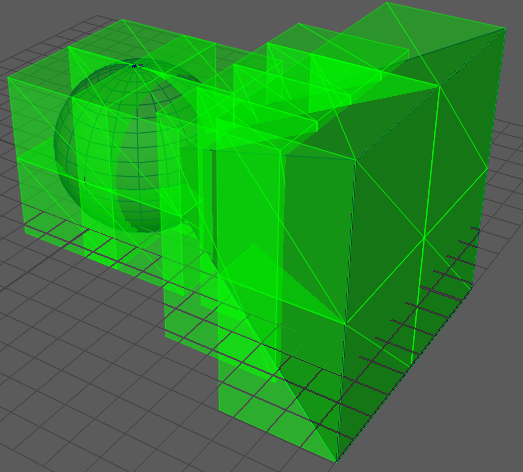
1. Start by creating the Maya geometry that will be used as the perception volume. In this tutorial, we use a sphere and a pyramid to represent the field of vision of a character. Keep in mind that the 0, 0, 0 coordinate will be mapped to the root of the character and that the front of the character is considered x-front and y-up.
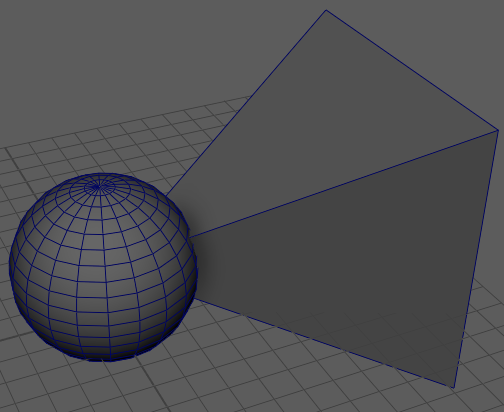
Sensor Geometry
2. Create a Sensor Locator with this geometry. You can create a group containing the two meshes, select it, and click on the Sensor Locator button ( ) in the Golaem shelf. Make sure the geometry is properly mapped by checking the In Maya Geometry attribute.
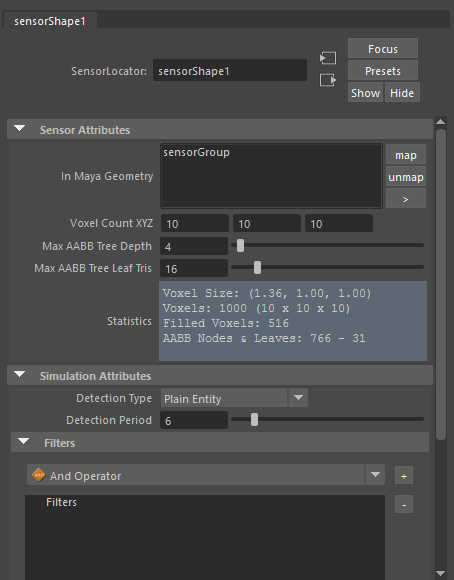
3. Check that the perception volume is correct. Enable Display Voxels on the Sensor Locator and check that the entire geometry is covered by voxels. Keep in mind that the Maya meshes that make up the voxel geometry must be closed, convex and their face normals must point outwards.
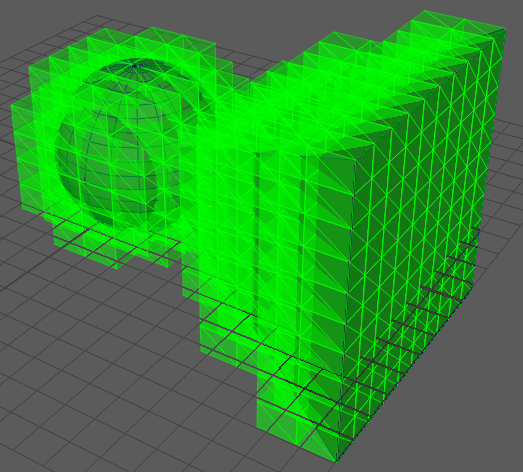
Sensor Locator - Voxels
You can tweak Voxel Count XYZ and Max AABB Tree (increase them for more precision). The AABB Tree will be the effective shape that will be used in the perception.
Sensor Locator - AABB tree leaves
You can now disable sensor display and hide the sensor geometry.
Creating the Crowd Simulation
4. Create a plane for the ground and add two Entity Types - the green entity type and the blue entity type. Here we use the Crowd Man from the Golaem Character Pack. Also, create a Terrain Locator and place the entities as in the figure below using the Population Tool.
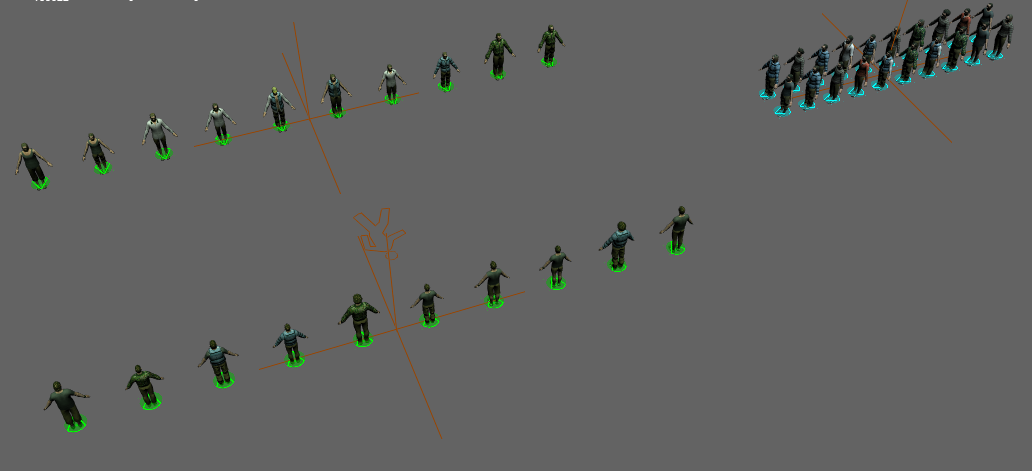
Placed Crowd Entities
5. Make the blue characters walk across the plane between the green characters by using a Navigation behavior, a Goto behavior, and a Locomotion behavior.
6. Add an Activate Sensor behavior on the green Entity Type and configure it to use the Sensor Locator. You can select one green entity and check the results in the Visual Feedback tool (radar view). If you click on Enable Visual Feedback and also enable Sensor Geometry and Perceived Objects in the Maya Viewport Settings, the visual feedback will also show in Maya's viewport.
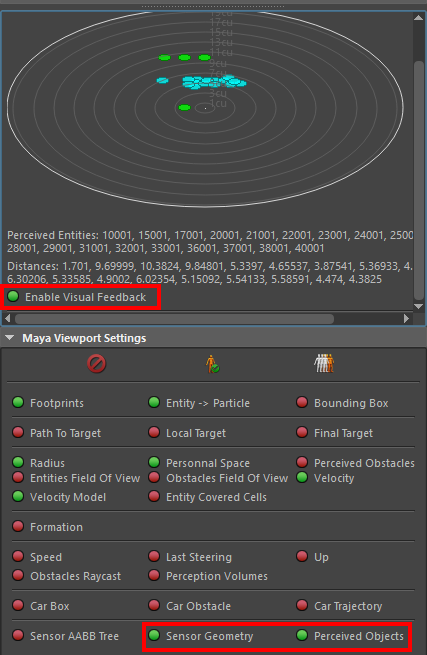
Visual Feedback Settings
The simulation should look like in the images below. Note that in the Visual Feedback view the characters are displayed as circles of the same color as their entity type.
 |
 |
| Maya Viewport | Activate Sensor Visual Feedback |
Filtering
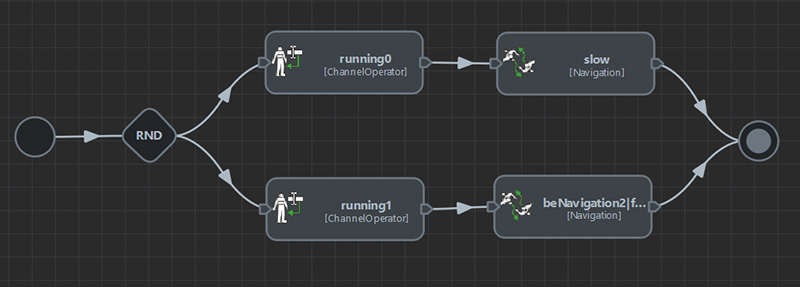
7. First, modify the behavior of the blue entities so that some of them run while the others walk. You can use a Random operator and add a second Navigation behavior with higher Navigation Speeds (between 2 and 3 for example) and higher Acceleration (5). With this setup, half of the blue entities will run. You might need to adapt the Locomotion behavior so that the entities can run at higher speeds.
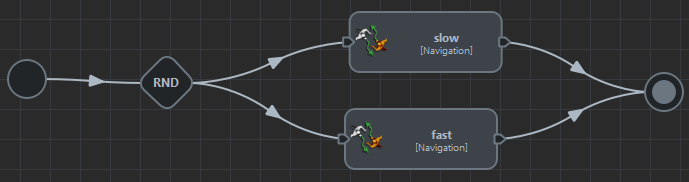
Use two navigation behaviors
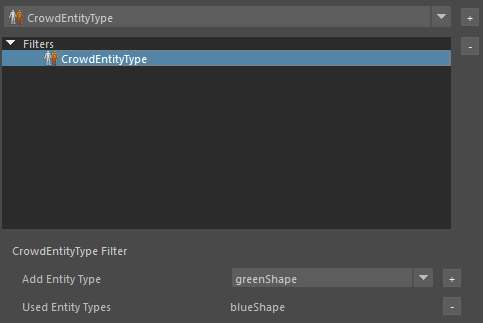
8. Let's say we only want to detect running blue characters. This is where filters come in. Go to the Sensor Locator attributes and add a CrowdEntityType filter in the Filters section. Select the added filter and add the blue entity type. Only the blue entities will be detected.
 |
 |
| Keep only blue entities | Result in Visual Feedback |
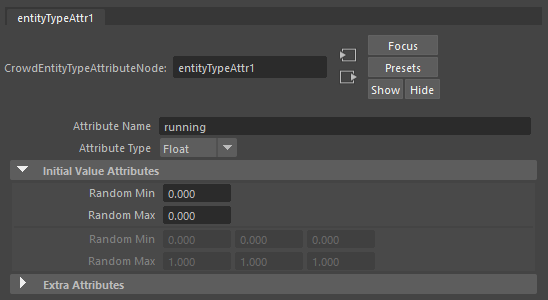
9. To detect running characters, we need to set up an Entity Type Attribute. Select the blue entity type in the behavior editor and add an entity type attribute named "running" and set its initial value to 0. Don't forget to update the particle system of the blue entities using the Population Tool (Replace button). This will create the "running" PP attribute.
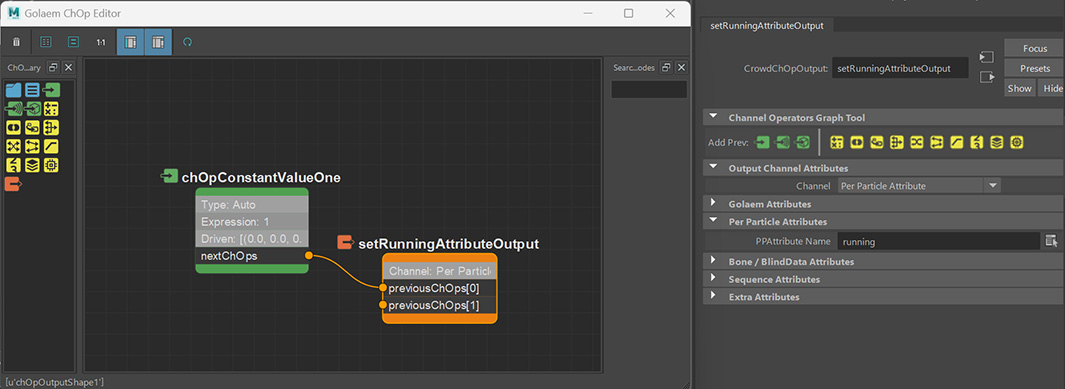
10. Add a ChannelOperator behavior on the blue entities before each navigation behavior. The one before the slow navigation sets the "running" attribute to 0, and the other one sets the attribute to 1. Don't forget to set their stop triggers to True so that the behavior exits immediately and the following Navigation behavior gets started.
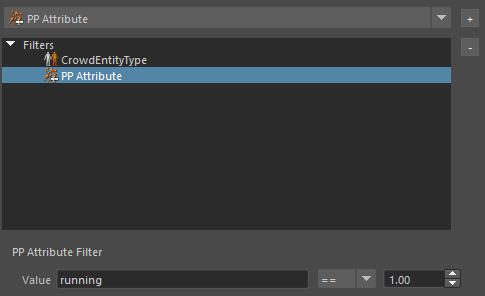
11. Go back to the Sensor Locator and add a new filter, PP Attribute. Select it and update its parameters so that the expression to test is "running == 1". This way, the sensor will only detect blue entities with the "running" PP attribute value equal to 1.
 |
 |
| PP Attribute sensor filter | Result in Visual Feedback |
Using Sensor Results
There are several Activate Sensor Channels available for use in other behaviors (see Channels page). Let's make the standing characters (green) look at the running blue characters.
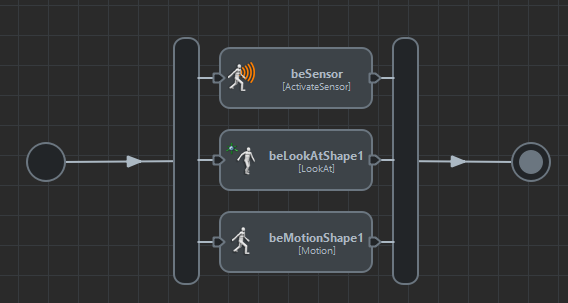
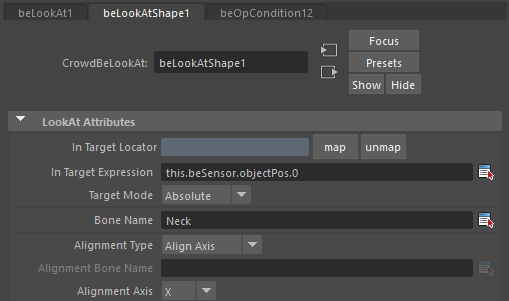
12. Just add a Look At behavior on the green characters in parallel with the Activate Sensor behavior. Fill the In Target Expression with the following channel expression:
this.beSensor.objectPos.0
This will make the green characters look at the first position that is output by the sensor. Also set the Bone Name to "Neck" as this will be the actual bone for rotating the head.
You can also add a standing idle motion on the green characters to get a more realistic result.
 |
 |
| Green character behaviors | LookAt parameters |
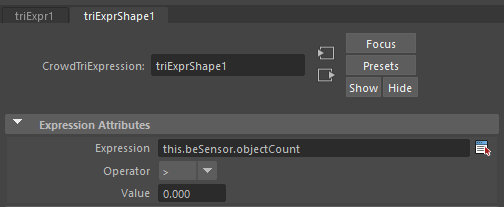
13. To make sure the LookAt behavior is not active if nothing is detected, edit its start and stop triggers. On the Start trigger, use an expression trigger with the following expression:
this.beSensor.objectCount > 0
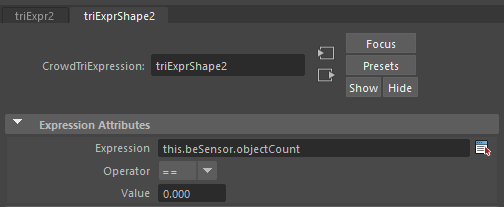
Do the same with the stop trigger, but with the following expression:
this.beSensor.objectCount == 0
 |
 |
| LookAt Start expression trigger | LookAt Stop expression trigger |
14. To make each green character look at the closest running character, add another filter on the Sensor Locator: Sort By Distance. This filter sorts the perceived entities by their distance to the entity that detects them.
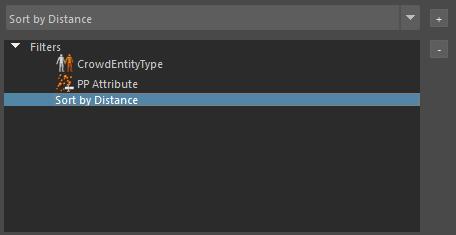
Sort by Distance filter
Here are the results of the crowd simulation in Maya's Viewport: