


Basic Workflow
As of August 5th, 2025, Golaem will no longer provide direct support.
All support for Autodesk Golaem will now be handled exclusively through Autodesk support channels and this website will be deactivated soon.
Please bookmark the Autodesk Golaem Support section for any future support needs related to Autodesk Golaem packages.
Initial Setup
Note: You can find the corresponding maya scene file (physicsFlyingSaucer.ma) in the Golaem Crowd Samples
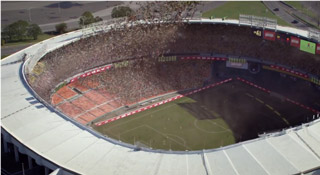
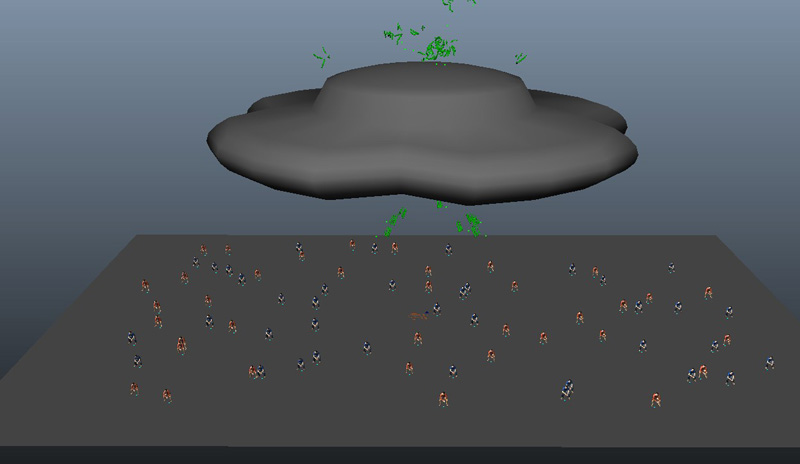
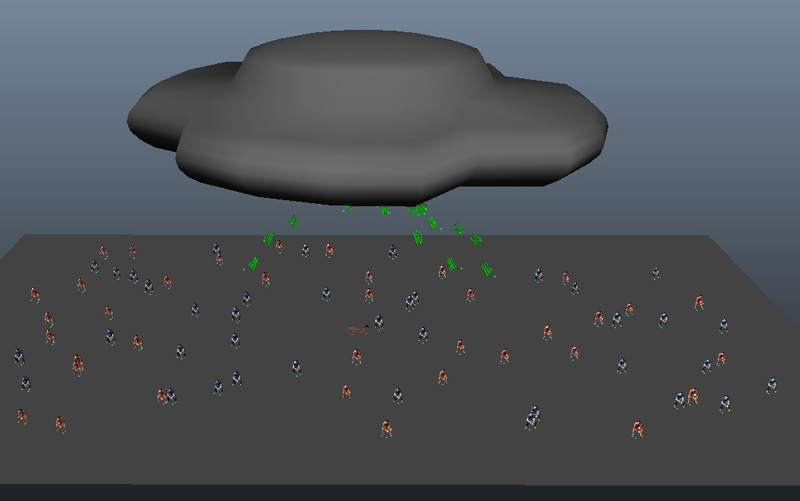
The initial setup is very similar to a classical stadium, some people playing a loop sit motion at random, and a keyframed UFO flying over. When the UFO reaches the center of the character group, it starts spinning (still keyframe) and will suck up characters.
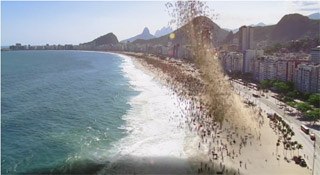
Here is an example made by Fullframe Filmes (see full video at the bottom of this page).
Create two EntityTypes. Characters from EntityType1 will be influenced by the UFO, and not the others (EntityType2). In order to easily differenciate them, EntityType1 will be displayed using "Dynamic Shape" mode, and EntityType2 using "Render Previz" mode.
You can have a look at the Quickstart if you want to know how to create the initial setup
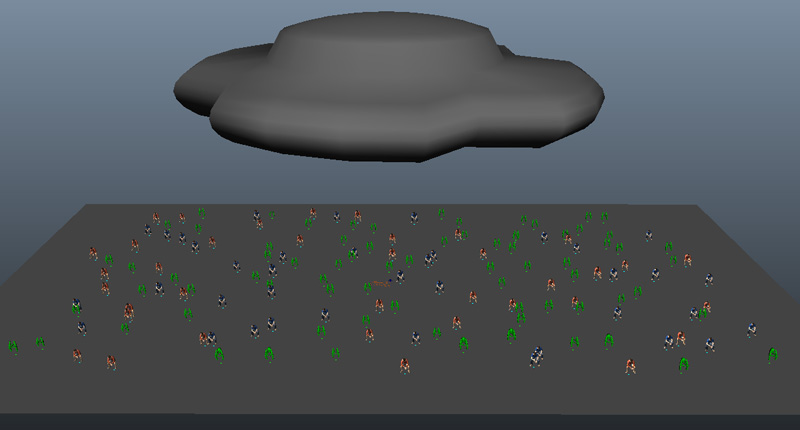
Each EntityType has a distinct behavior which is just playing a simple motion.

Creating a Physics Locator 
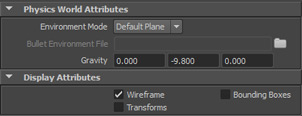
To be able to compute physics simulation, Golaem Crowd needs a Physics Locator. This locator describes the physical word (which objects are colliders) and provides global parameters like gravity.
As the world is very simple and you do not need any collision with the physical world, just use the "Default plane mode" which is an infinite plane located at the center of the scene.
You can have a look at the Preparing your scenes for physics if you want to learn how to describe a more complex world.
Enabling Physics on your Characters 
To put your characters in the physical world, you need to add a Physicalize Behavior in the flow of the characters being sucked up. As we are going to add some behaviors after this Physicalize Behavior, let's create a Behavior Container first.
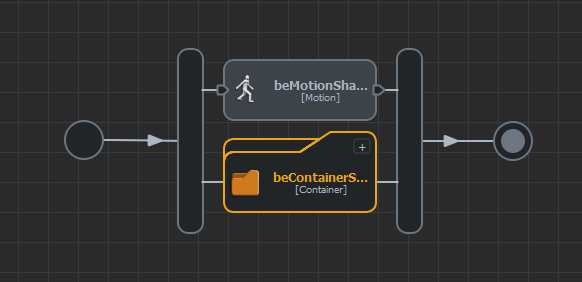
Double-click on this container to open it, and add a Physicalize Behavior inside.
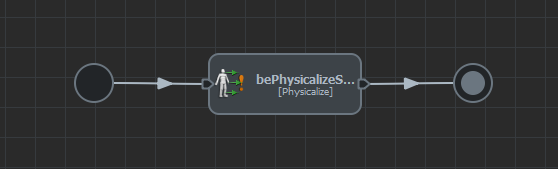
We want our characters to turn to dynamics when the UFO start spinning. However we want them to be in the physics world right at the start of the simulation.
A very important thing to remember is that the Physicalize Behavior put the character in the physics world when it starts (exactly what we want), and switch to the chosen mode only when it stops. So in our case we want this behavior to stop when the UFO start spinning.
We will use a driven attribute trigger (or if you want to make easier, you can just use a current frame trigger...).

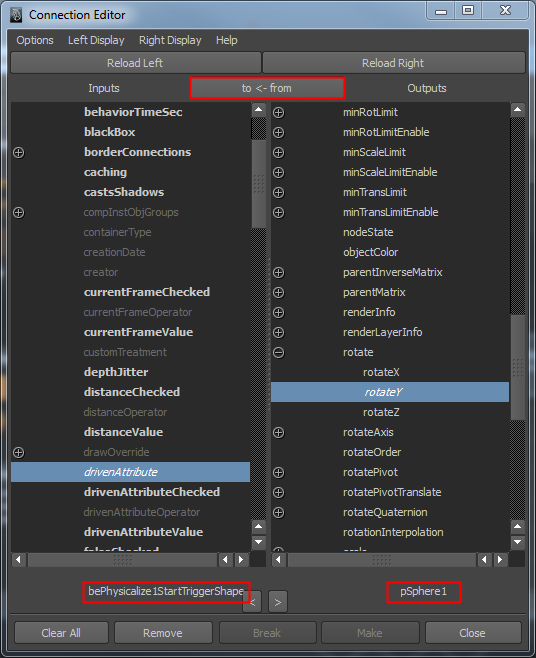
The driven Trigger has an attribute which can be connected to any floating point value of any Maya object. This way you can control your Golaem simulation with any Maya input. Here the rotation angle of the UFO (aka pSphere1) will be used.
First you need to connect the two attributes together using the Connection Editor (Window/General Editors/Connection Editor). Watch out about which object you select (you need to select the Shape of the Trigger, not its transform!!!) and the way you are connecting them (from the sphere to the trigger)
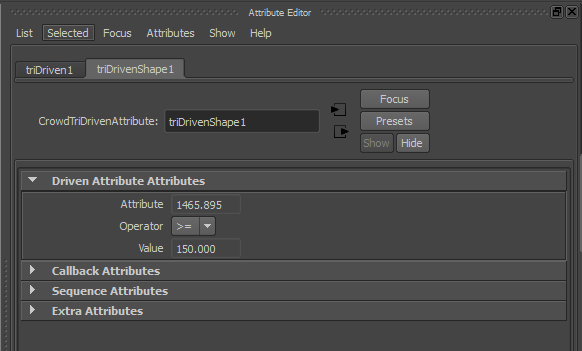
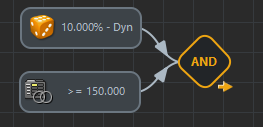
When the attribute is connected, you can see its name and current value in the attributes editor of the Trigger node. Enable the Driven Attribute Trigger, and set a starting angle value and an operator (here greater than 150).
Do not forget to set the driven Trigger as a root (right click on it to see the option).
Note that even if is not mandatory in this case, it is a good practice to wait at least two frames before stopping a Physicalize Behavior (see How to keep the current velocity of the character when switching to dynamics? in the Physics FAQ). As our characters are not previously moving and the UFO will not start spinning when the simulations starts, we do not care about this here.
To make things a little bit more interesting and avoid all the people turning to dynamics at the same time, we can mix this driven trigger with a Random Trigger and link them with and AND operator which will be our new root.
Adding a Force Behavior 
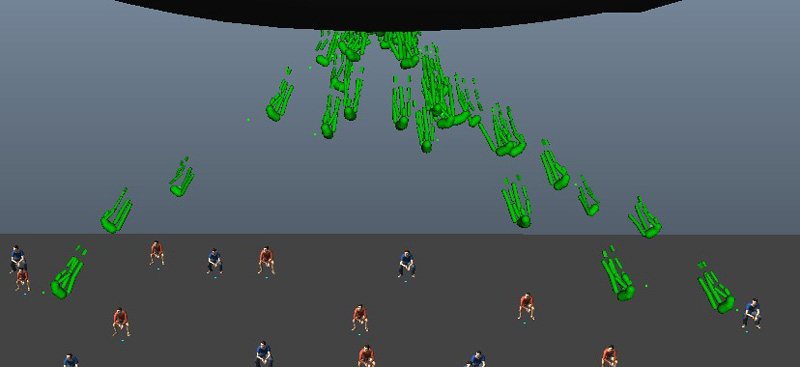
The Force Behavior can be used to apply an impulse or a constant force on the characters.
Let's then add it after the Physicalize Behavior added at the previous step.

Select the Force Behavior and have a look at its attributes. We will use a the Constant Force mode of the Force Behavior.
There are several way to describe the direction of the force. The easiest way is to use a locator at the center of the UFO, so that it is computed automatically based on the character position.
Then you can also control the magnitude of the force (how fast they will reach the UFO). A positive intensity sends the characters away from the locator (explosion), so you need to use a negative intensity here (value is found by trial and error). To avoid having to set a too high magnitude (which is not really good for a physics engine), you can reduce gravity, as in our case they will literally be flying upward.

Hit play, and here you are!
It looks good but the characters do not stop in the UFO! You need to specify a stop trigger and freeze the characters.
Stopping Characters
You need a 3D Zone stop trigger so when they enter the UFO geometry, the Force Behavior stops and we can change their Physicalize Mode.
Go inside the Force Behavior Stop Trigger container and drag and drop a Zone Trigger.

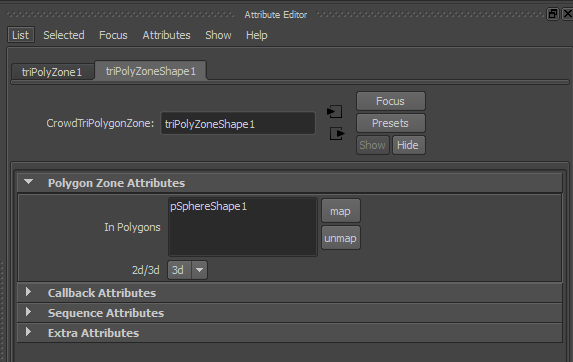
Select the UFO (pSphere1) and map it in the Zone Trigger (tips: after selecting it, open the Behavior Editor, and while holding SHIFT, select the stop trigger on the Force Behavior, click map in the attribute editor).
Switch the 2D/3D checkbox to 3D.
Do not forget to set the 3d trigger as the root, or it will not work.
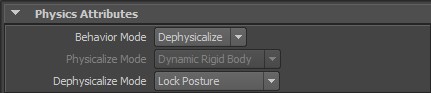
If we just stop the Force Trigger, characters will keep flying a bit, and then fall due to the gravity. What we need is to stop simulating physics for these characters. It is as simple as using an Physicalize Behavior and using the Dephysicalize (Lock Posture) mode.

The characters now stop correctly inside the UFO.
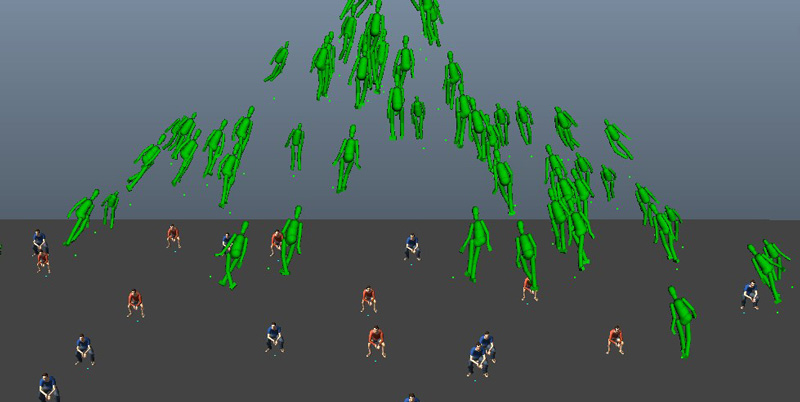
However if you look closely, you can notice that they are all pulled by their arms and legs. This is because they are lighter than their torso/head.
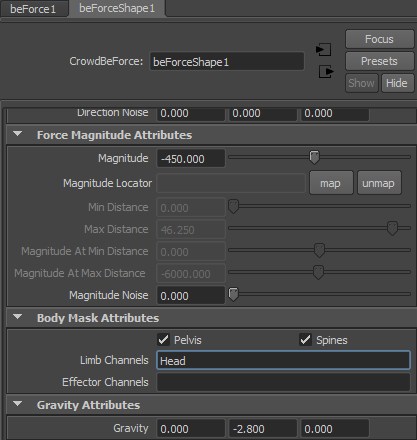
Applying force only on a part of the body
In order to make the effect more realistic, we can exclude legs and arms from the force behavior so that the force is applied directly on their spine/head.
It is done using the Body Mask Attributes.
In Production
To illustrate this case in production, watch this commercial for Brahma, a famous brazilian beer brand, made by Fullframe Filmes.