


Look At
CREATION
- Behavior Editor / Behavior Library:

- Golaem Menu: Crowd Behaviors / Behaviors / CrowdBeLookAt Node
- MEL command: glmCrowdBeLookAtCmd;
Configuration
LookAt Attributes
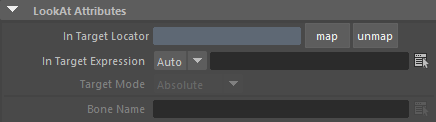
| In Target Locator |
Maya locator attached to the Look At Behavior. The locator will be used as a target for the Look At constraint on the given Look At bone. Notice that, this locator can be animated. If no locator is mapped or there is no target expression, the behavior will not start. |
| In Target Expression | Expression that evaluates to a target (3D vector). If no target locator is mapped or there is no target expression, the behavior will not start. |
| Target Mode | This attribute allows a choice of two target mode :
|
| Bone Name | Name of the effector bone which will be used to rotate toward the Look At target (e.g. head, left wrist, right wrist). |
Alignment Attributes
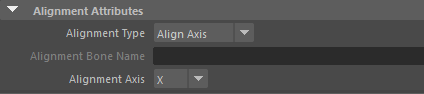
| Alignment Type |
Specify if you want to aim at using a bone or an arbitrary vector value (see examples below)
|
| Alignment Bone Name | The bone name you want to align the target with (see examples below). |
| Alignment Axis | The local axis of Bone Id you want to align toward the target (see examples below). |

Starting / Stopping Duration Attributes
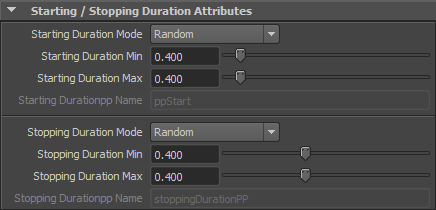
| Starting / Stopping Duration Mode |
This attribute allows a choice of two modes :
The Starting / Stopping Duration value is in seconds. |
| Starting / Stopping Duration Min | See Random option of the Starting / Stopping Duration Mode above Available only when the Starting / Stopping Duration Mode is set to "Random" |
| Starting / Stopping Duration Max | See Random option of the Starting / Stopping Duration Mode above Available only when the Starting / Stopping Duration Mode is set to "Random" |
| Starting / Stopping Durationpp Name | Name of the float per-particle field of the relative particle system, containing the Starting / Stopping Duration Mode value which will be used (for more explanation about how to use ppAttributes, see ppAttributes Handling) Starting / Stopping Duration value is set to 0 if the ppAttribute name is empty or invalid Available only when the Starting / Stopping Duration Mode is set to "Per-Particle Attribute" |
Bone Weights Attributes
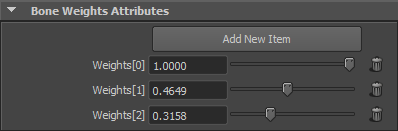
Weights Look At attributes of a look at behavior
The aiming rotation is applied to the specified Bone Id. it can also be applied and weighted on an arbitrary number of bones. For each weight added, a bone in the hierarchy will get influenced. The weights don't need to be normalized. You can add any number of weights but the behavior can't animate bones higher in the hierarchy than the root. If No weights are set, a default weight of 1 is set and only the rotation of Bone Id is modified.
| Add New Item | Add a new weight in the list. Click trash  icon to add or remove a weight. icon to add or remove a weight. |
| Weights | The weight applied to the bone in the skeleton hierarchy. |
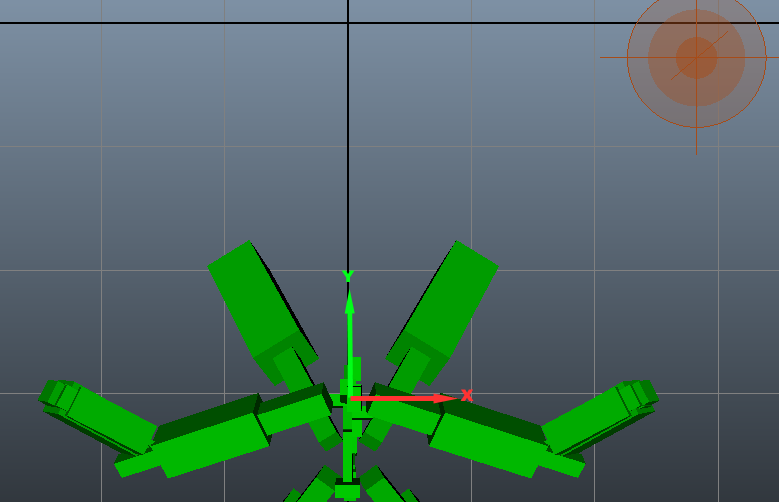
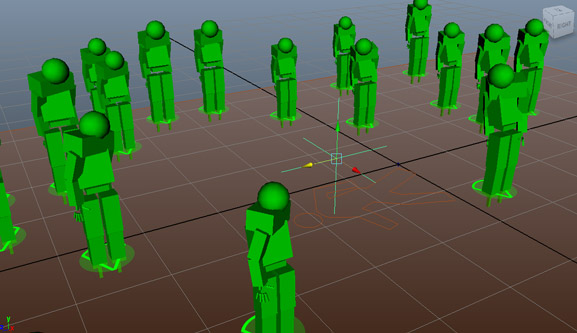
In this example, we want to align the head toward the target. Alignment type is Axis and the front axis is Y.
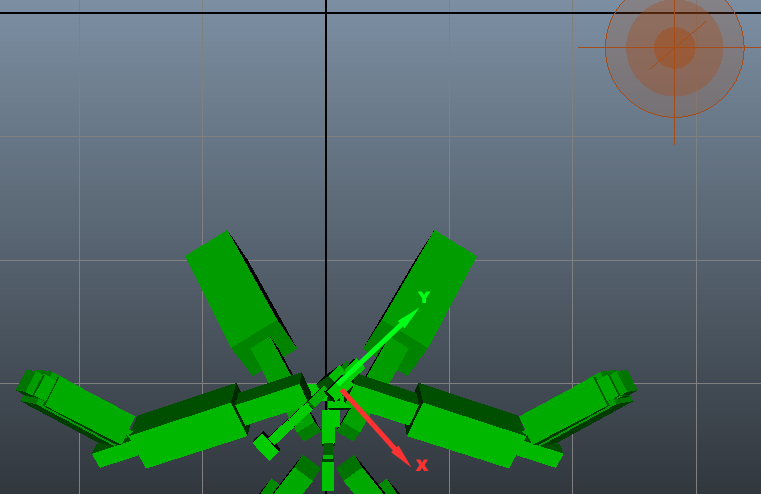
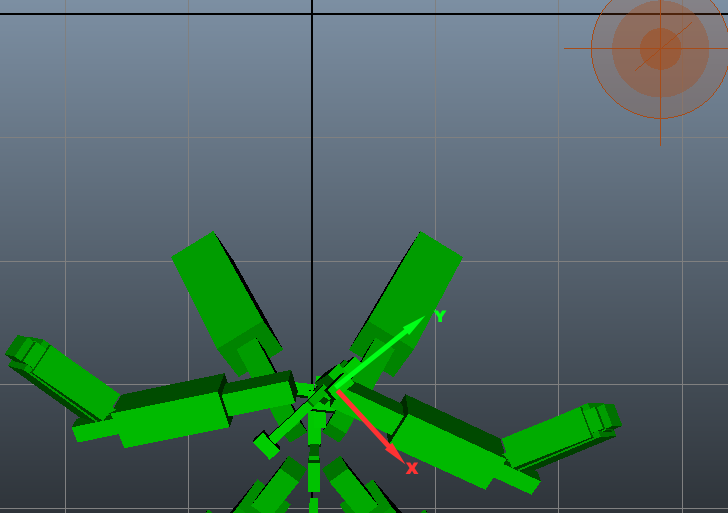
With added weights, the Look At rotation is proportionally distributed across the hierarchy.
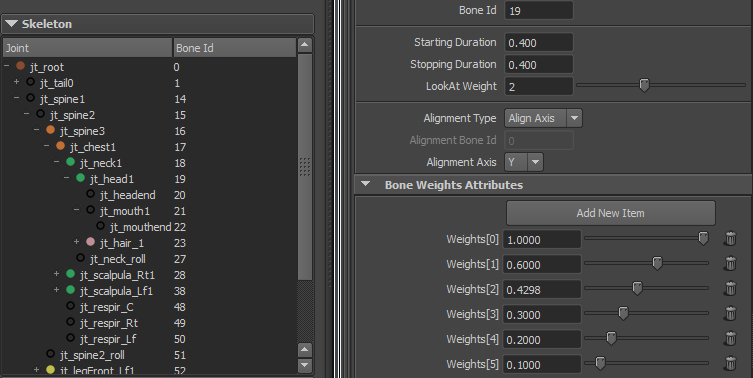
The bone Id for the example above is the N° 19. The weights attributes can be are respectively 1.0, 0.6, 0.4298,... for bones 19,18,17,16,...
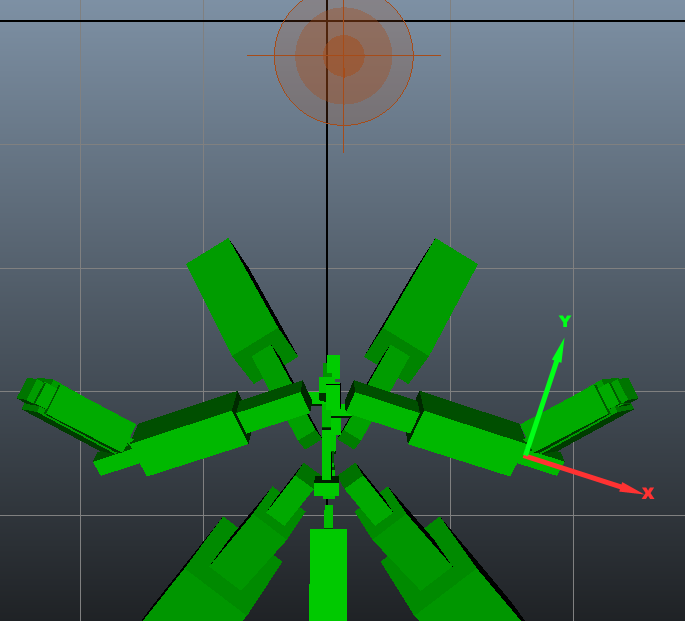
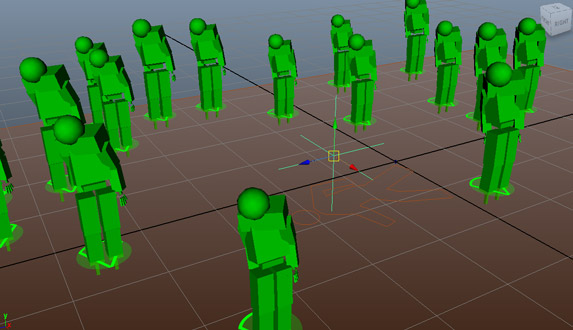
Sometimes, the Look At can't work with a X,Y or Z front Axis.
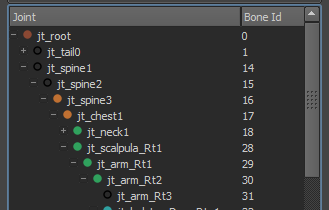
On the example above, we want to modify rotation for bone 30 so that bone 31 is aligned toward the target.
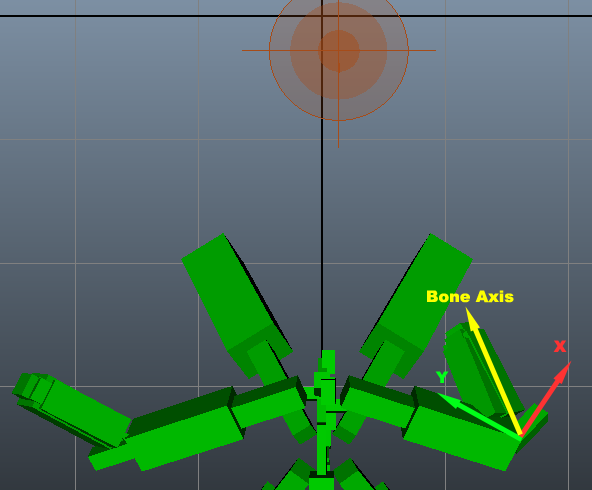
We set Bone Id to 30 and alignment Type Bone with Alignment Bone as 31.
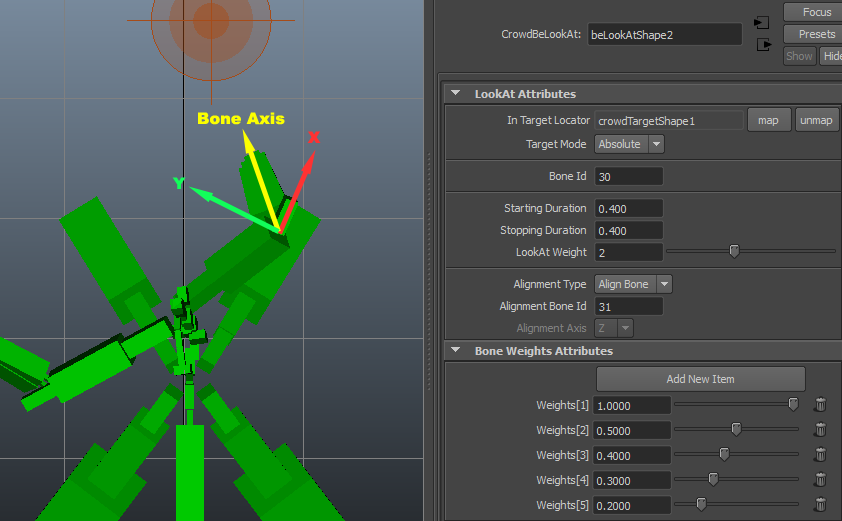
Weights Attributes also influence Bone Alignment. The list of weights influence bones N° 30, 29, 28, 17 and 16.
Speed Attributes
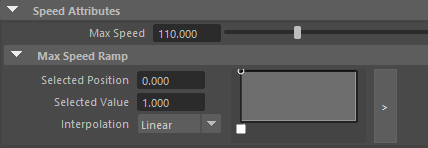
| Max Speed (in °/sec) |
Maximum speed to reach the target |
| Max Speed Ramp | Ratio which which the Max Speed will be multiplied based on the remaining angular distance to reach the target. |
Joint Limits Attributes
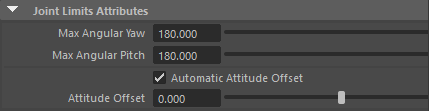
| Max Angular Yaw | Maximum angle delta (in °) yaw |
| Max Angular Pitch | Maximum angle delta (in °) pitch |
| Automatic Attitude Offset | Set to true to automatically configure the attitude offset (see below for an explanation of the Attitude Offset) |
| Attitude Offset | If automatic Attitude Offset is set to false, this allow to manually configure it (see below for an explanation of the Attitude Offset) |
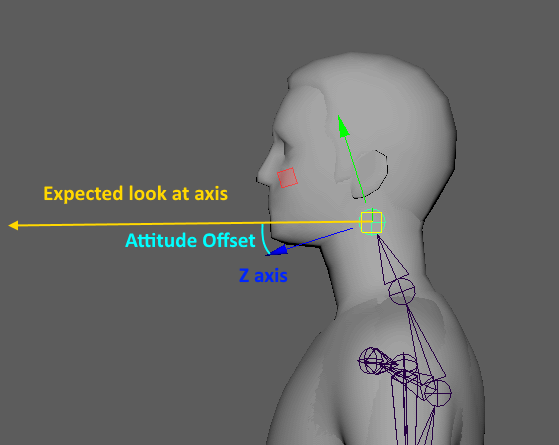
The Attitude Offset allows to configure the difference between the skeleton's alignment axis configured in the main parameters, and the expected alignment axis according to the mesh