


Rendering through USD
As of August 5th, 2025, Golaem will no longer provide direct support.
All support for Autodesk Golaem will now be handled exclusively through Autodesk support channels and this website will be deactivated soon.
Please bookmark the Autodesk Golaem Support section for any future support needs related to Autodesk Golaem packages.
Setup Simulation in Maya
Create your Crowd Simulation within Maya using Golaem Crowd. In our example we will use the stadium scene from the Golaem Crowd Samples. Once the simulation is done, open the Simulation Exporter to export the Simulation Cache. To export the
Specify the directory in which you'd like the files to be exported and press the "Export USD file" button. You will obtain two files:
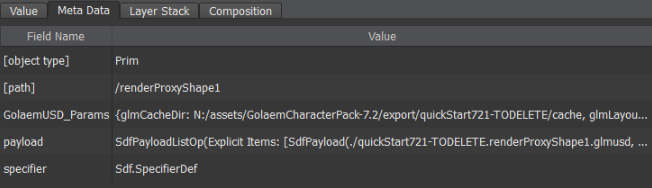
- cacheName.proxyNodeName.usda which stores all the parameter values of the Crowd Render Proxy required to render exported Simulation Caches as Crowd Characters. Details about this .usda file can be found here.
- cacheName.proxyNodeName.glmusd which is an empty file required by USD to register the Golaem plugin extension.
Setup USD
Rendering a Simulation with USD
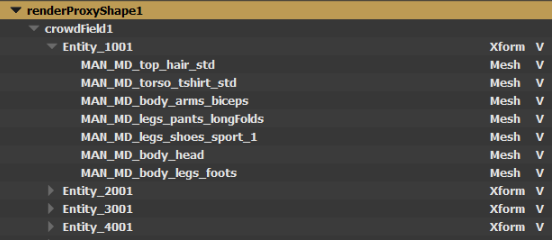
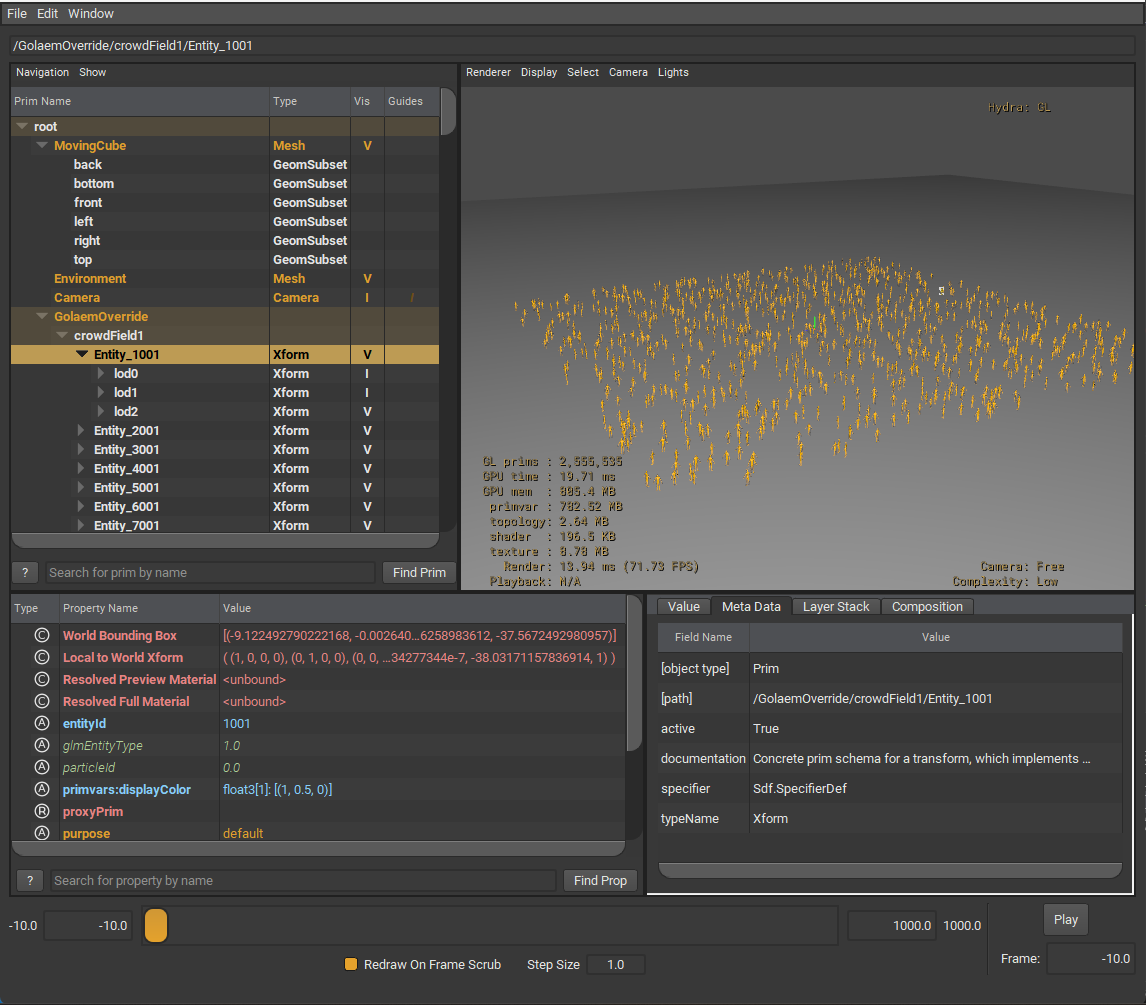
To render a Golaem Simulation, you can reference the generated usda file in your mainSceneFile USD file. If the Golaem For USD plugin is correctly installed, the Golaem Entity geometries will be generated in the scene hierarchy as a USD geometry. They can be manipulated as any USD object at this point.
Assigning Materials
Material Files can be referenced in the Golaem For USD file (.usda). They should match the name of the Surface Shader or the Shading Groups set in the Character File within the Character Maker in Maya. The parameters glmMaterialPath can be used to define the path to the USD Materials to link and glmMaterialAssignMode to use Surface Shader Names (set to 0, default) or Shading Group Names (set to 1) An example can be found below:
#usda 1.0
def "GolaemCacheProxy1" (
   GolaemUSD_Params = {
      # Golaem parameters
      ...
      token glmMaterialPath = "/Root/Materials"
      int glmMaterialAssignMode = 0
   }
    payload = @./Golaem.glmusd@
)
{
    def Scope "Materials"
    (
        add references = [@./Materials/CasualMan.usda@, @./Materials/CasualWoman.usda@]
    )
   {}
}
Attributes
Shader Attributes
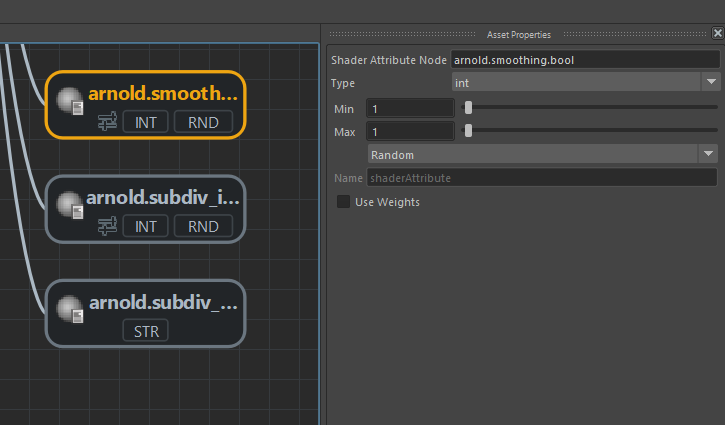
If Shader Attributes are defined within the Character File of an Entity, the Shader Attributes will be assigned at the USD Mesh level. These attributes can be used to make shading variations if required
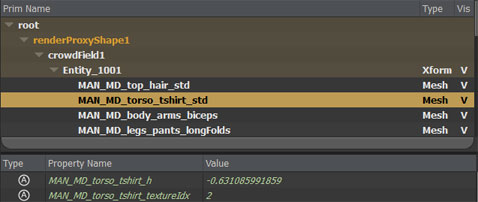
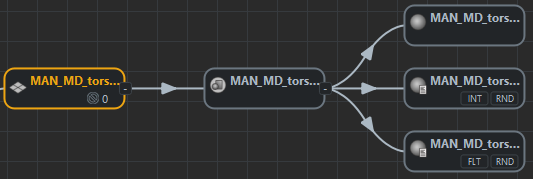
Two Shader Attributes are defined for the Tshirt Mesh. Those attributes can be read as properties in the generated USD Mesh.
Renderer Attributes
If Shader Attributes are defined as Renderer Attributes, they will be availabe as renderer specific user attributes

Golaem Attributes
If Golaem Attributes or PPAttributes are exported in the Simulation Cache as "Additional Attributes" in the Simulation Exporter, these will be assigned at the Entity XForm level.

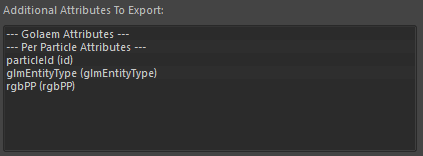
Three additional attributes are defined for the Simulation. Those attributes can be read as properties in the generated Entity XForm.
Editing the Simulation
Simulation results (character positions, orientations, postures) and Assets repartition or shading assignment (shader, shader attributes...) can be edited using the Simulation Layout Tool in Maya. You can see the results once saving the Layout File with these edits and by refreshing the Golaem For USD file in your USD environment.
Assets repartition or shading assignment (shader, shader attributes...) can also be edited using the Character Maker in Maya. When done, you just need to save the changes in the Character File. Reexporting the library file is not required.
The actual transformation and scale of the node in the USD scene is taken into account.
If you'd like to change any Crowd Shader properties (texture, color, displacement, multi matte IDs...), it can be done on the assigned Materials in USD (see above).
USD Skel mode
To generate Golaem entities as USD Skel characters, edit the exported USD file (.usda) and add int glmDisplayMode = 1 (0 = bounding box mode, 1 = USD Skel mode, 2 = skinmesh mode) in the GolaemUSD_Params section. In USD Skel mode you must also reference the USD characters to use with the parameter glmUsdCharacterFiles, which must match exactly the Golaem character files listed in glmCharacterFiles. The USD character files are exported with the Simulation Baker in USD Skeleton mode. Here's an example of how to edit the usda file:
def "GolaemCacheProxy1" (
   GolaemUSD_Params = {
      # Golaem parameters
      ...
      int glmDisplayMode = 1
      token glmCharacterFiles = "[...]/golaem/characters/SoldierFortressArrow.gcha;[...]/golaem/characters/SoldierFortress.gcha"
      token glmUsdCharacterFiles= "[...]/export/usd/skel/SoldierFortressArrow.usda;[...]/export/usd/skel/SoldierFortress.usda"
      ...
   }
    payload = @./Golaem.glmusd@
)
{
}
Using LODs
LOD (Level of Detail) is automatically enabled when baking a simulation to the USD procedural from a Maya scene where LOD is enabled (see the LOD attributes on the Crowd Render Proxy and on the Crowd Manager Node). The parameters that control LODs in the usda file are int glmLodMode and float3 glmCameraPos. glmLodMode is set to 1 and glmCameraPos is set to the position of the camera used for LOD.
def "GolaemCacheProxy1" (
   GolaemUSD_Params = {
      # Golaem parameters
      ...
      int glmLodMode = 1
      float3 glmCameraPos = (47.30885645576164, 2.57717590819666, 44.67954106391982)
      ...
   }
   payload = @./Golaem.glmusd@
)
{
}
The possible values of glmLodMode are :
- 0 = LOD is disabled
- 1 = use static LOD. Available in skinmesh mode (glmDisplayMode = 2) and in USD Skel mode (glmDisplayMode = 1). In USD Skel mode there is a variant for each LOD.
- 2 = use dynamic LOD. This is only available in skinmesh mode (glmDisplayMode = 2) and in this mode the LOD of a character can change at each frame based on the distance to the camera position. The glmCameraPos can be connected to another position to track at each frame, like in the example below:
over "GolaemOverride"(
    prepend references = [@C:/tests/export/lodCharacters/usd/proc/lodCharacters.renderProxyShape1.usda@]
    GolaemUSD_Params = {
        int glmDisplayMode = 2
        int glmLodMode = 2
    }
)
{
    float3 glmCameraPos.connect = </Camera.xformOp:translate> # glmCameraPos will be evaluated at each frame
}
Dynamic LODs in skinmesh mode
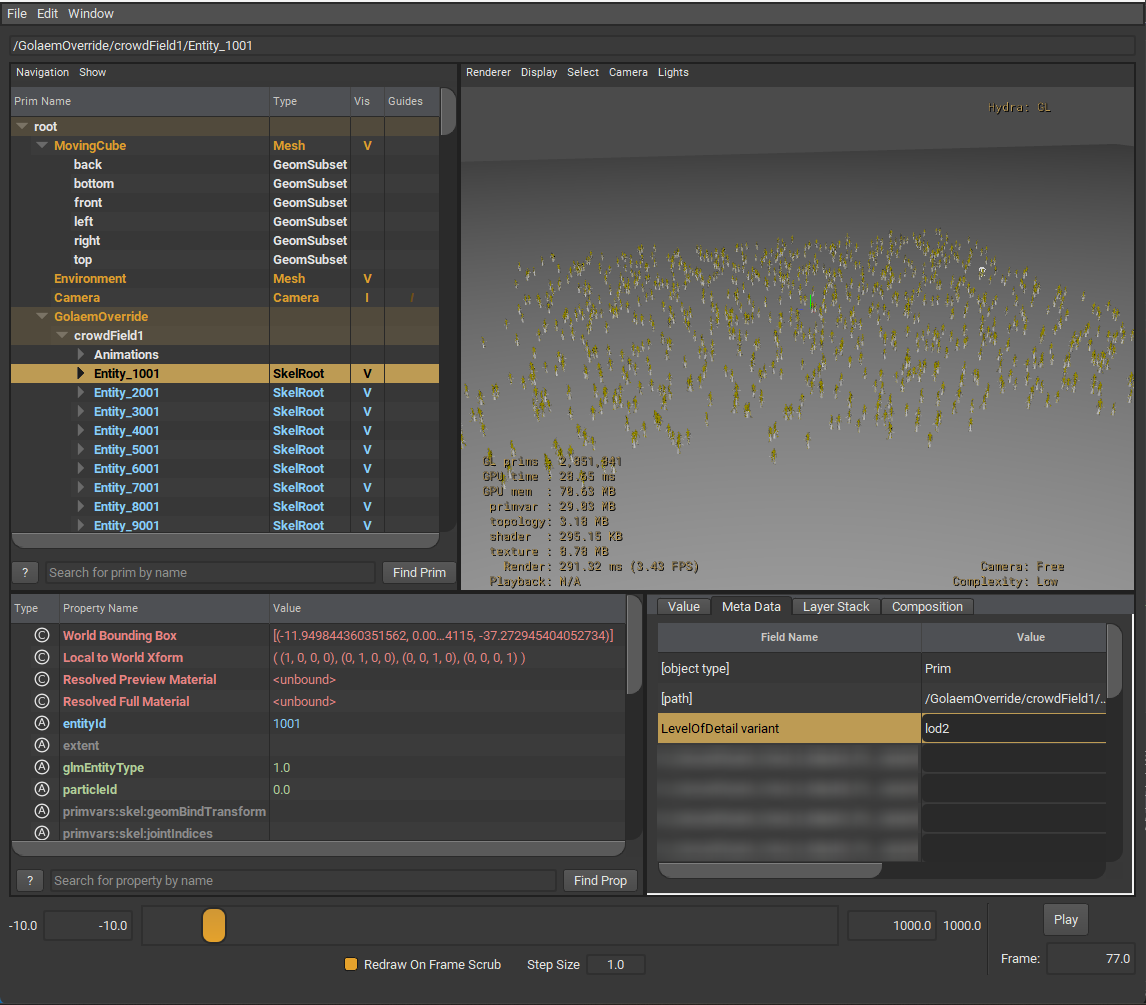
Static LODs in USD Skel mode (using variants)