


Creating a Logo with Crowds
In this tutorial we will use represent your logo using Golaem Crowd characters, walking from random positions in order to create its shape.
CREATING THE TARGET POPULATION TOOL
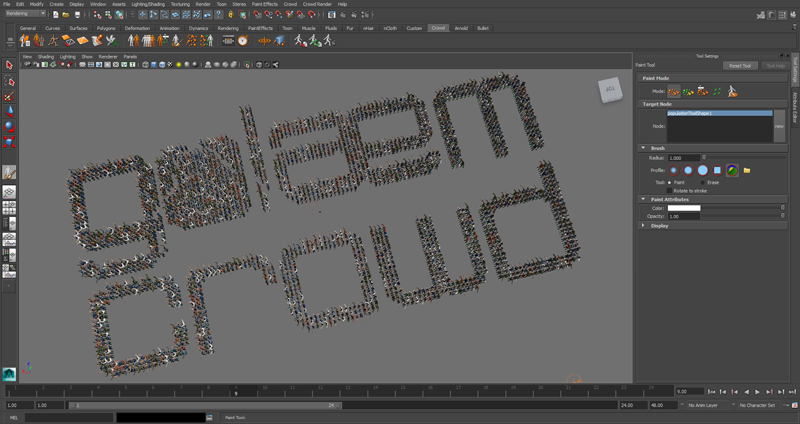
1. First you need to create a square image with a black background (no characters generated here) and your logo in white (filled with the maximum possible characters). You can use intermediate shades of grey to create gradients.
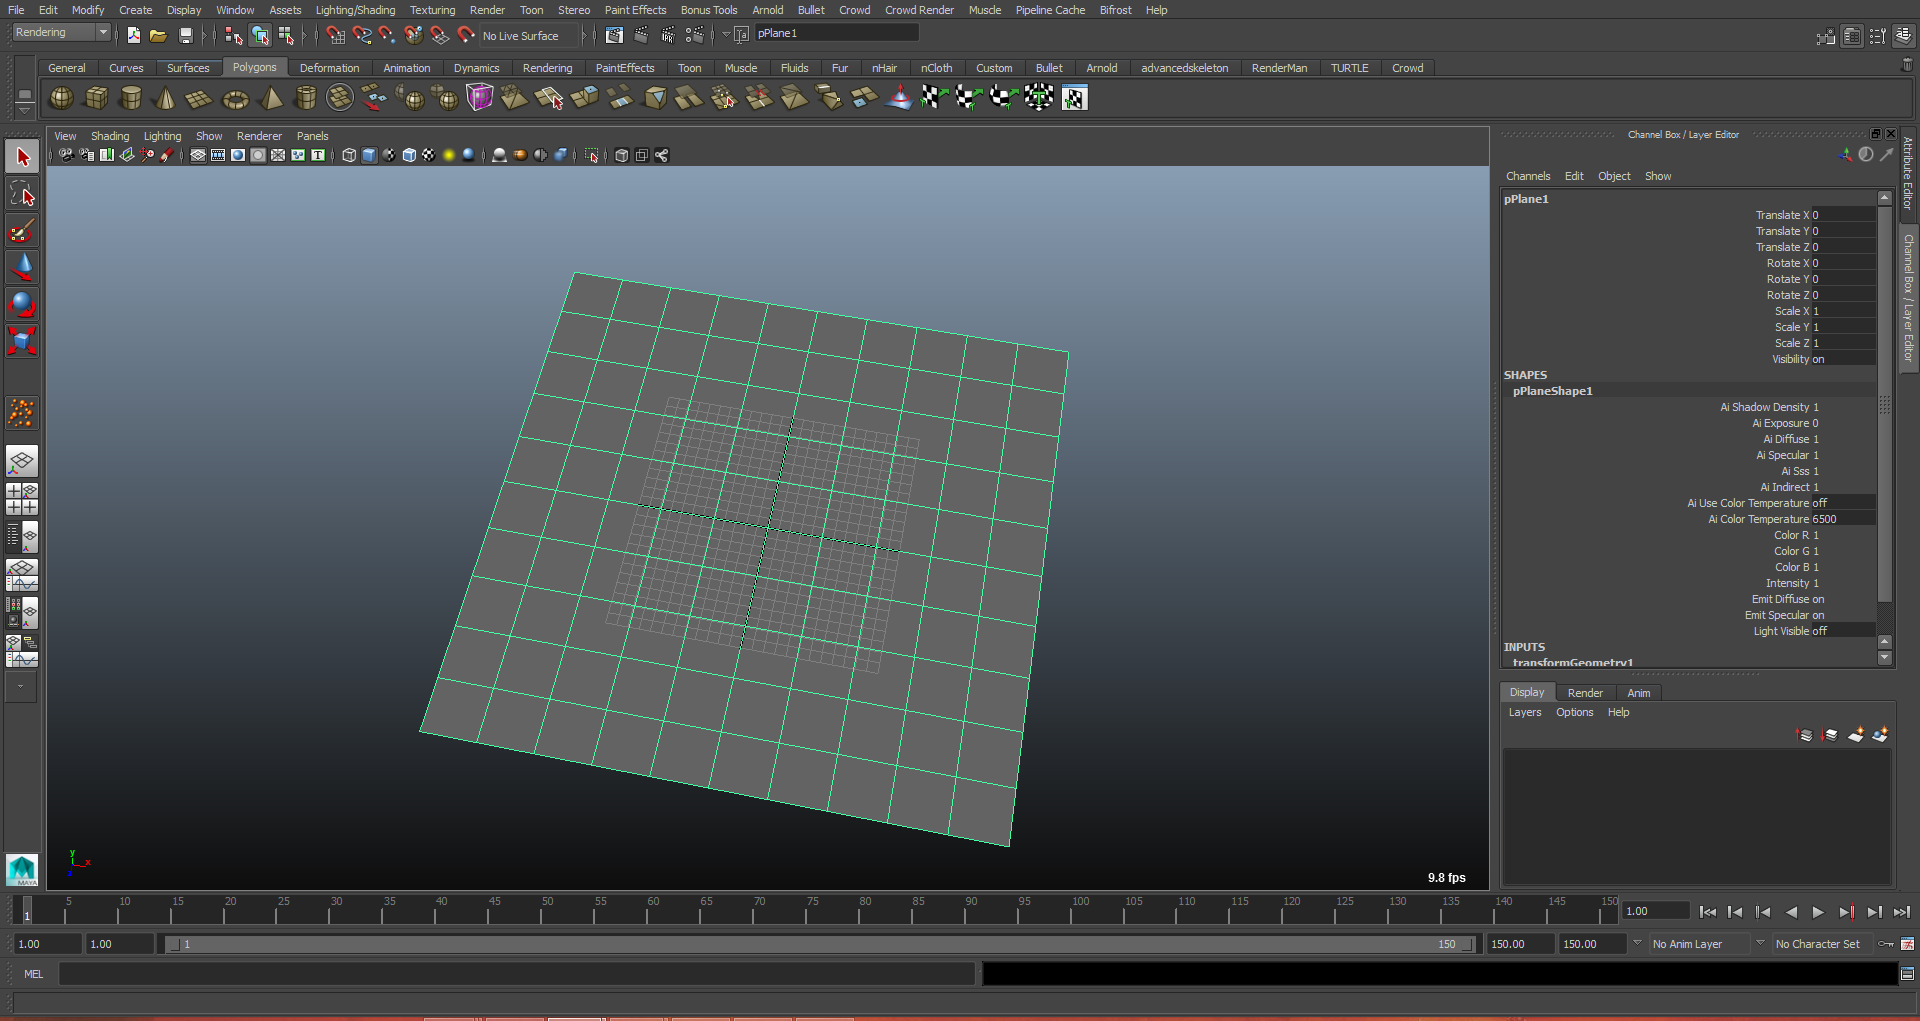
2. When you are done, switch to Maya and create a polygon to place your crowds on. Do not forget to freeze its transform (Maya/Edit/Freeze Transformation). Then select it and click on the Golaem Crowd Paint Tool icon 
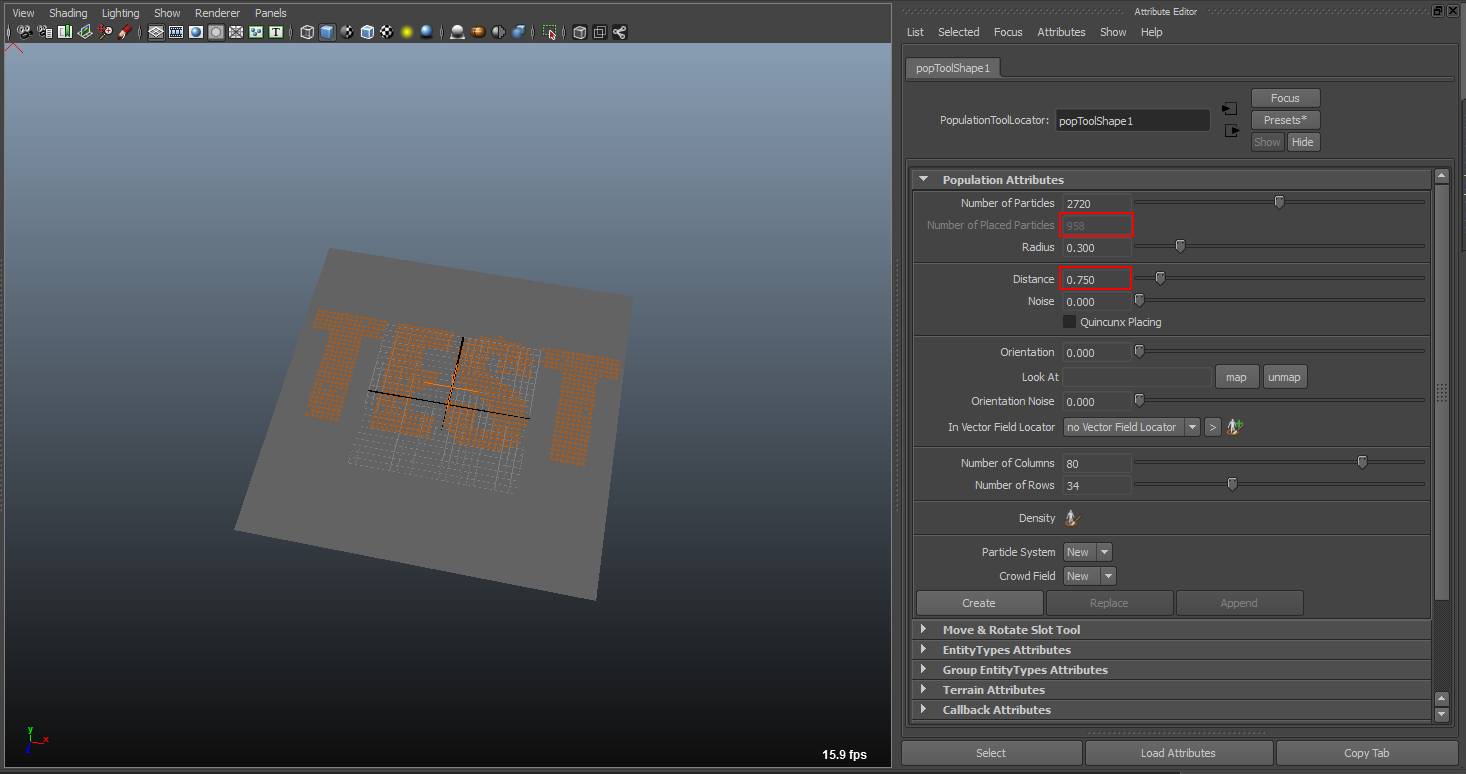
3. In the Tool Settings Panel, select the Population Mode and click New. Then click on the Load 32bits PNG below and browse to your logo image. Golaem Crowd will create a population tool based on the color of your image.
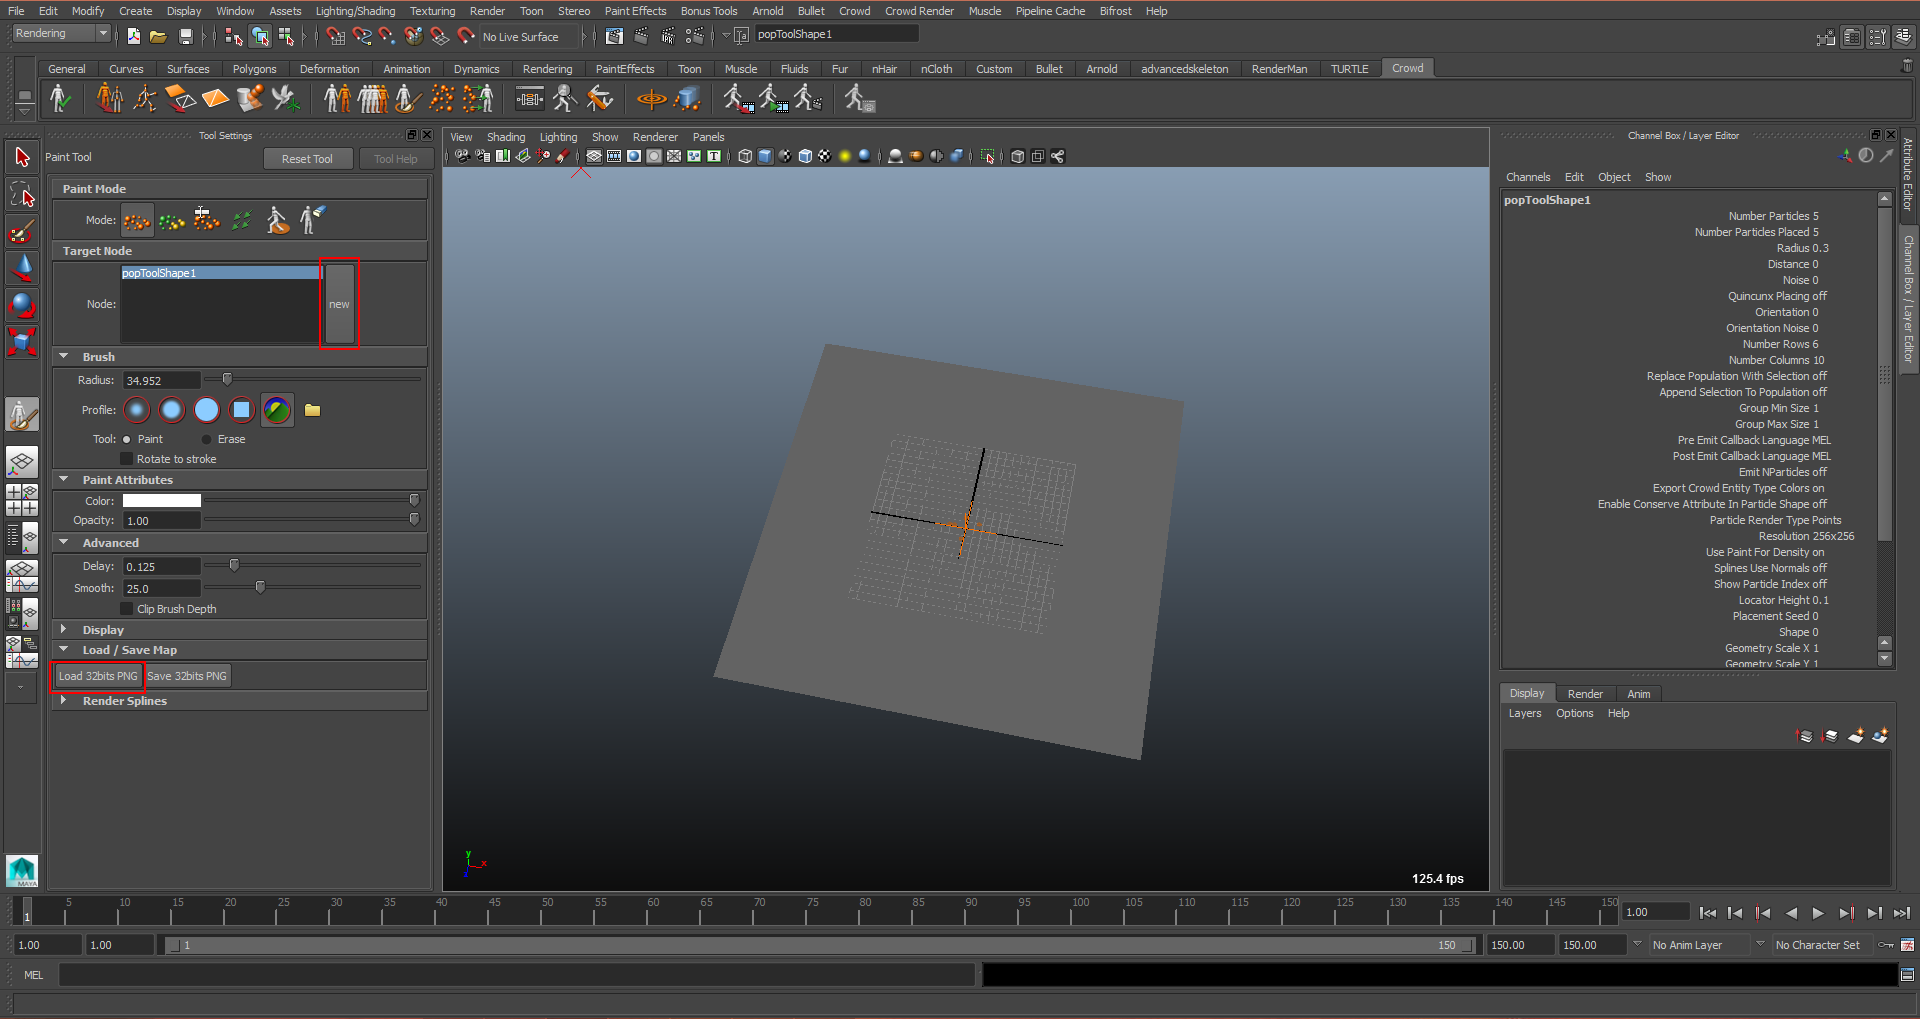
4. There may be too much particles for our simulation and the space between them will be too tight for them to be able to move.
5. You can fix this by increasing the distance parameter in the Population Tool
6. This Population Tool will be used to generate target particles and not Golaem Crowd characters so we do not want it to be linked to a Crowd Field. Set Crowd Field to none and particle system to new, then click on create.
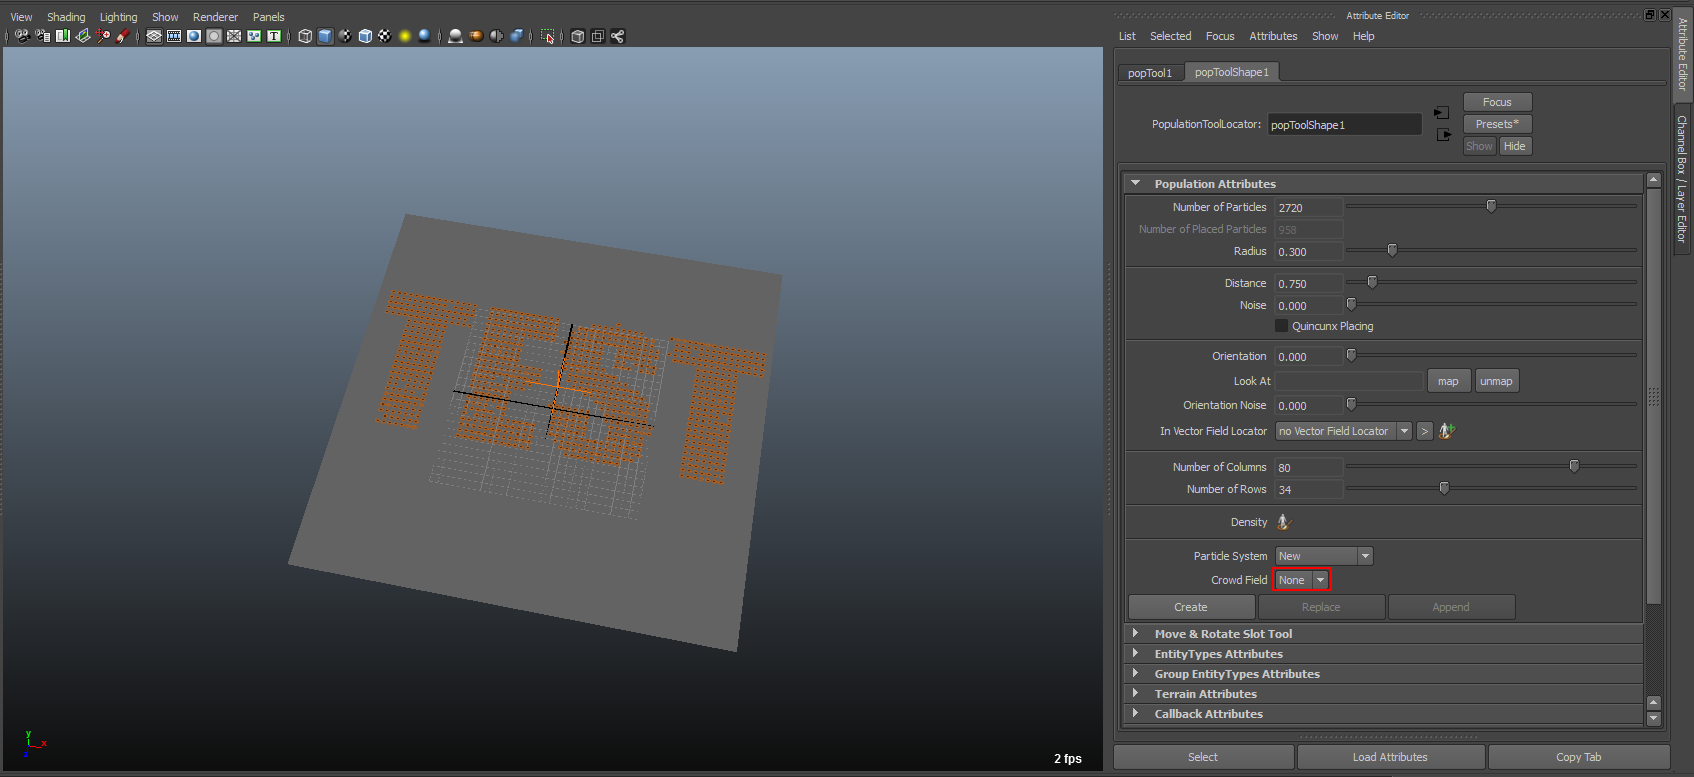
7. The target particles are now created.
CREATING THE CROWD
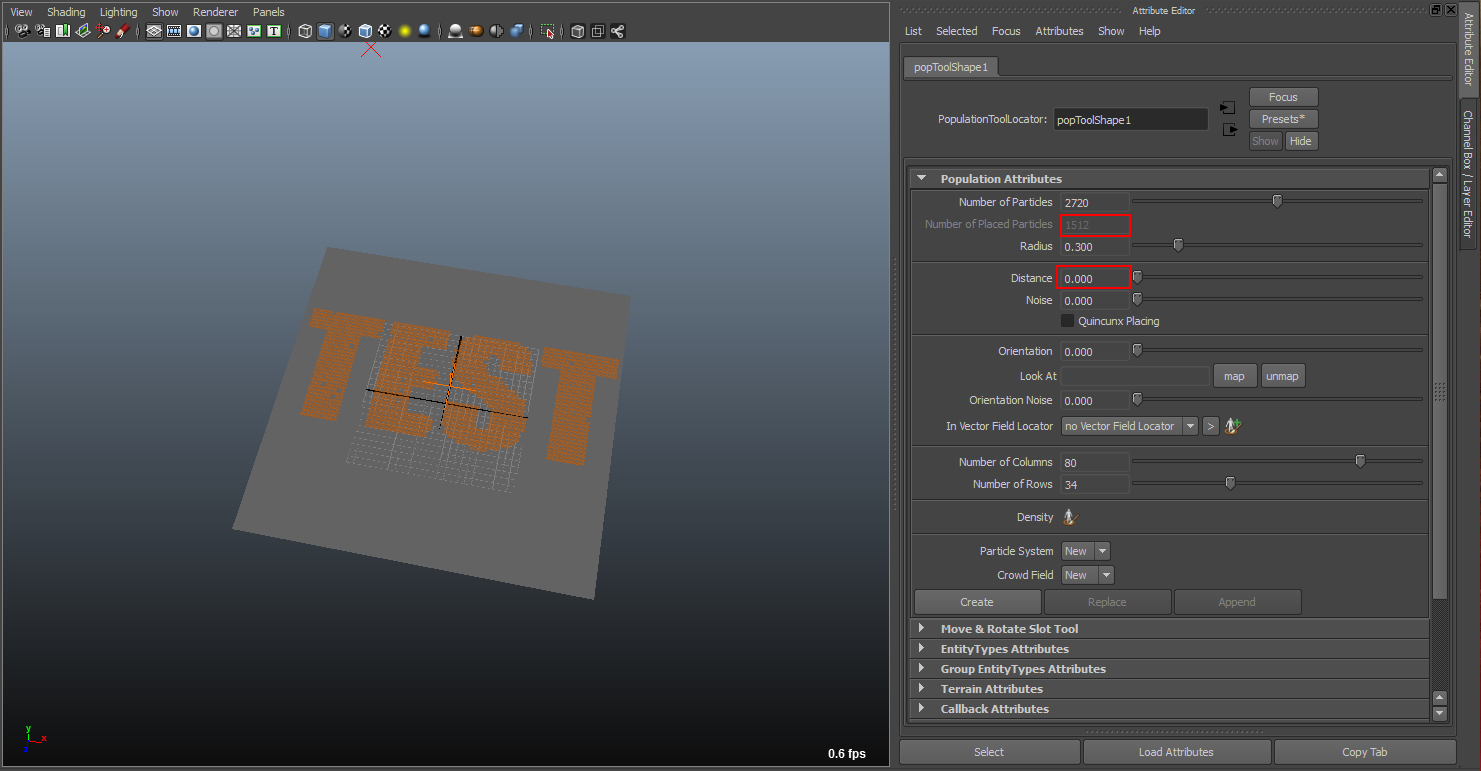
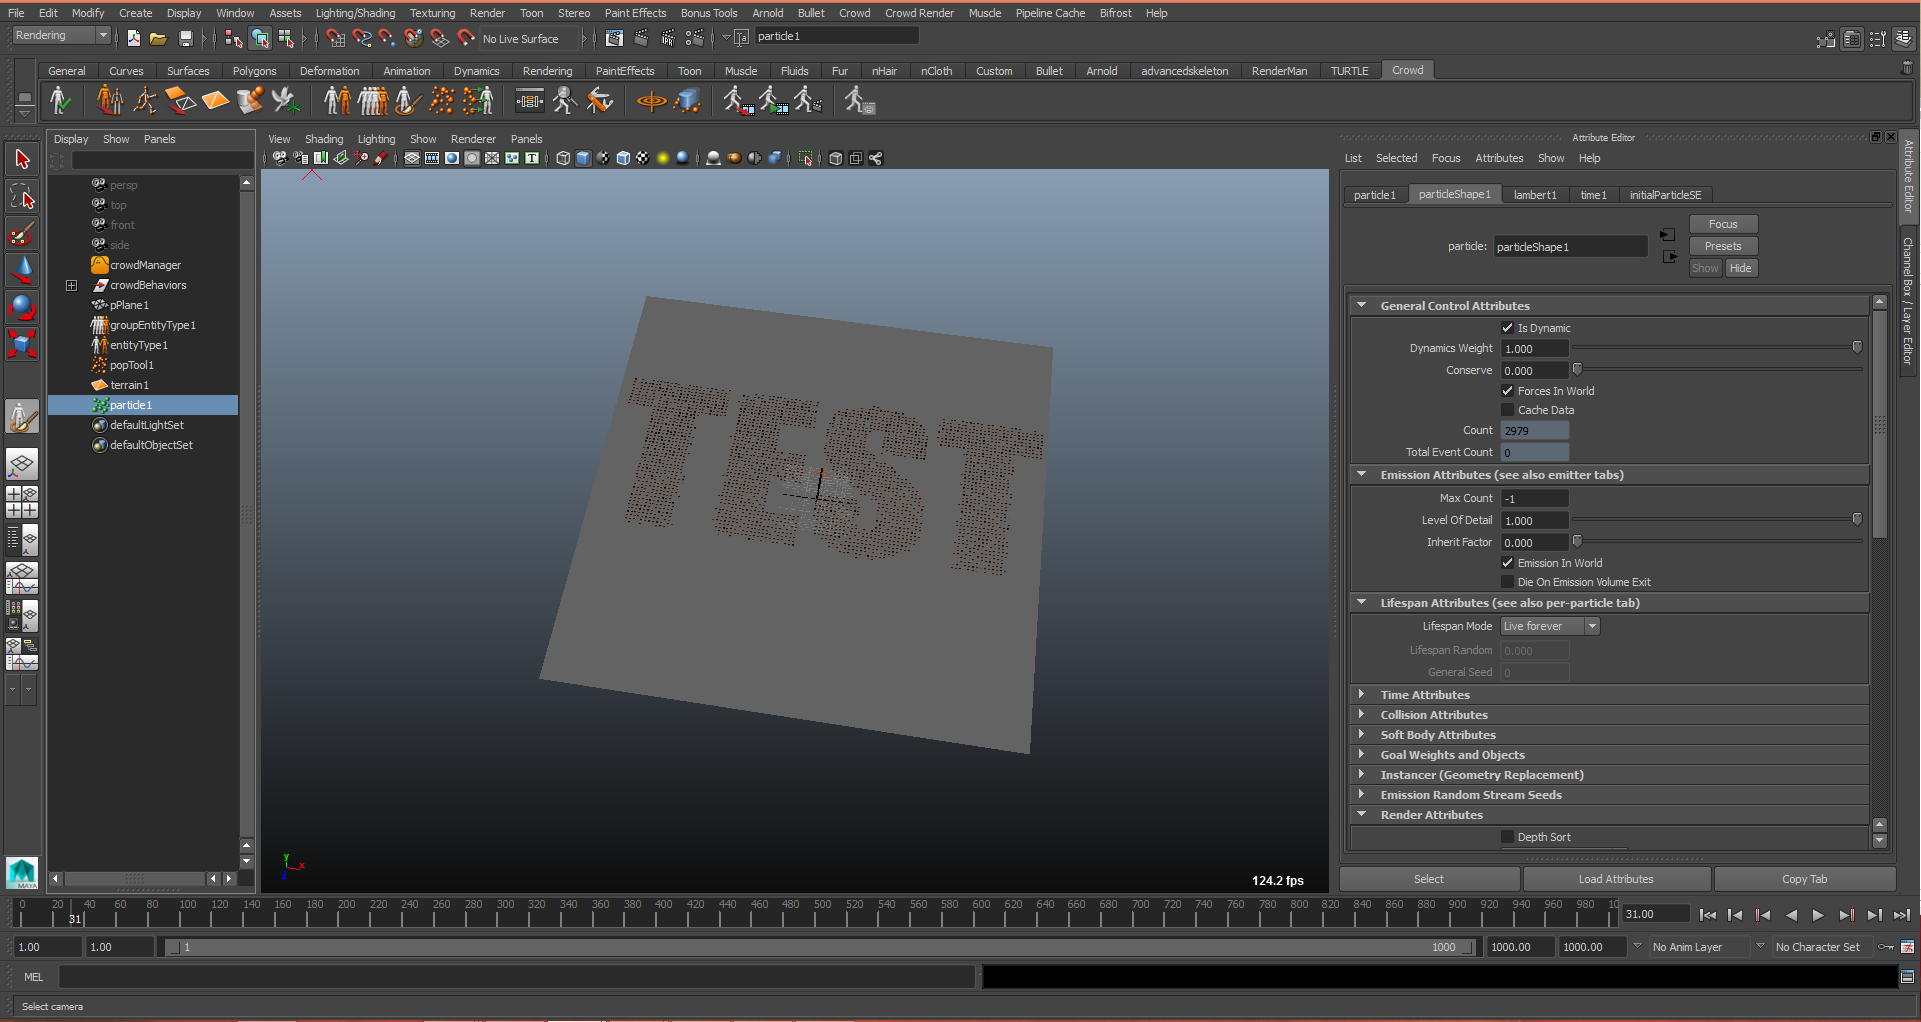
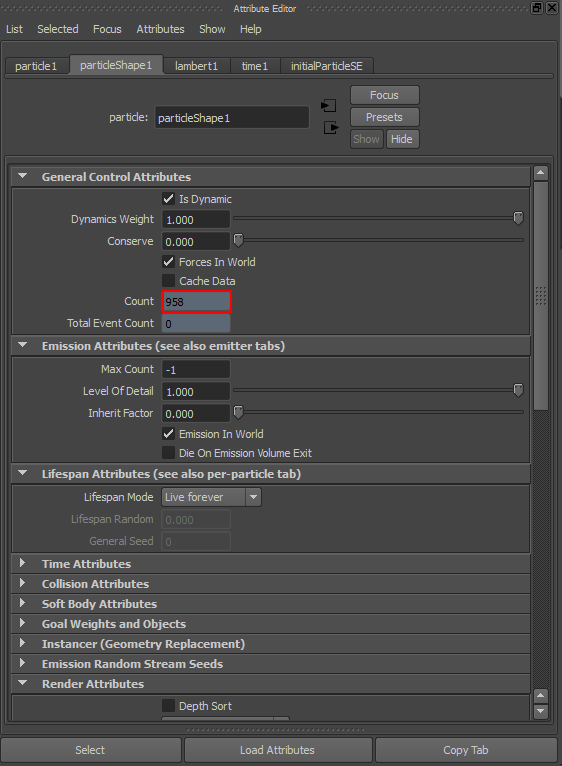
8. Select your particle system and in the attributes ckeck the number of placed particles
9. We are now going to create our entities. Create one EntityType  and load the crowdman character from the samples (don’t forget to add the renderingType)
and load the crowdman character from the samples (don’t forget to add the renderingType)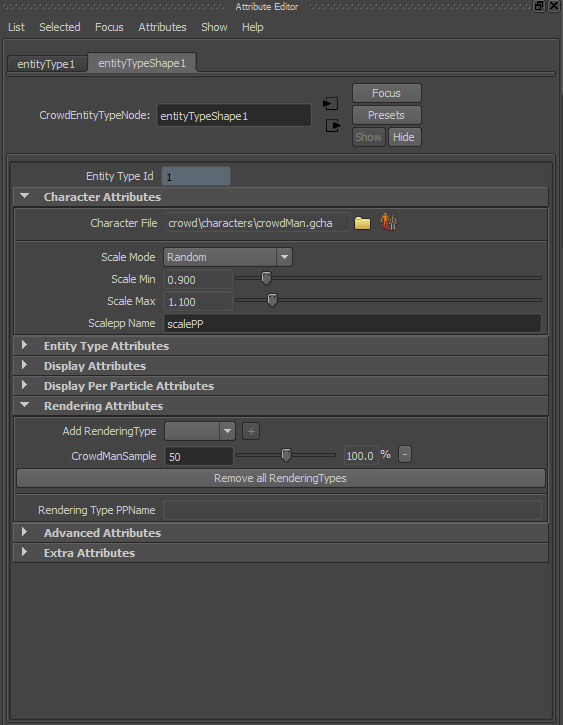
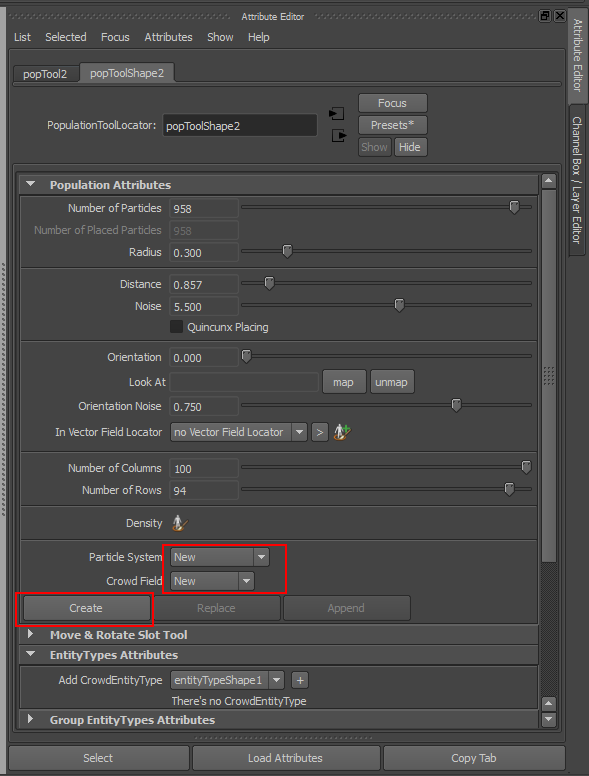
10. Create a new Population Tool  (larger but with the same number of particles than the first one.
(larger but with the same number of particles than the first one.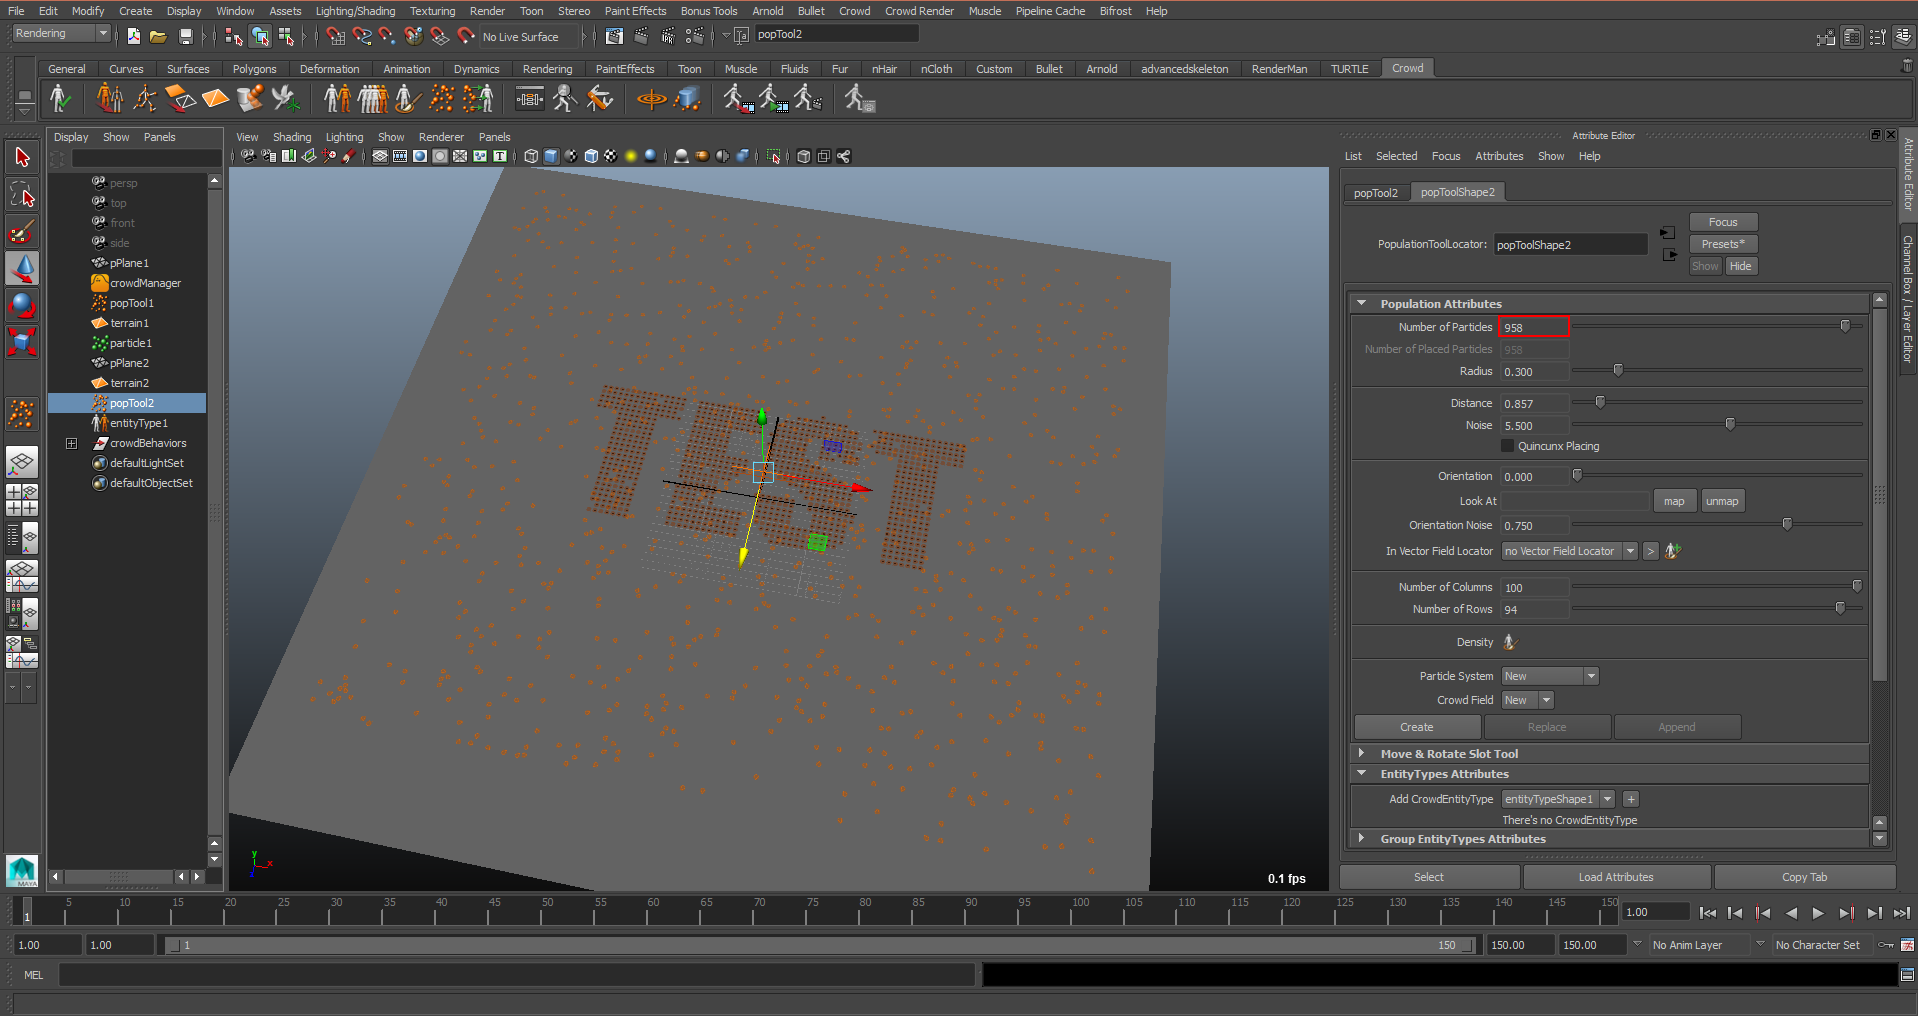
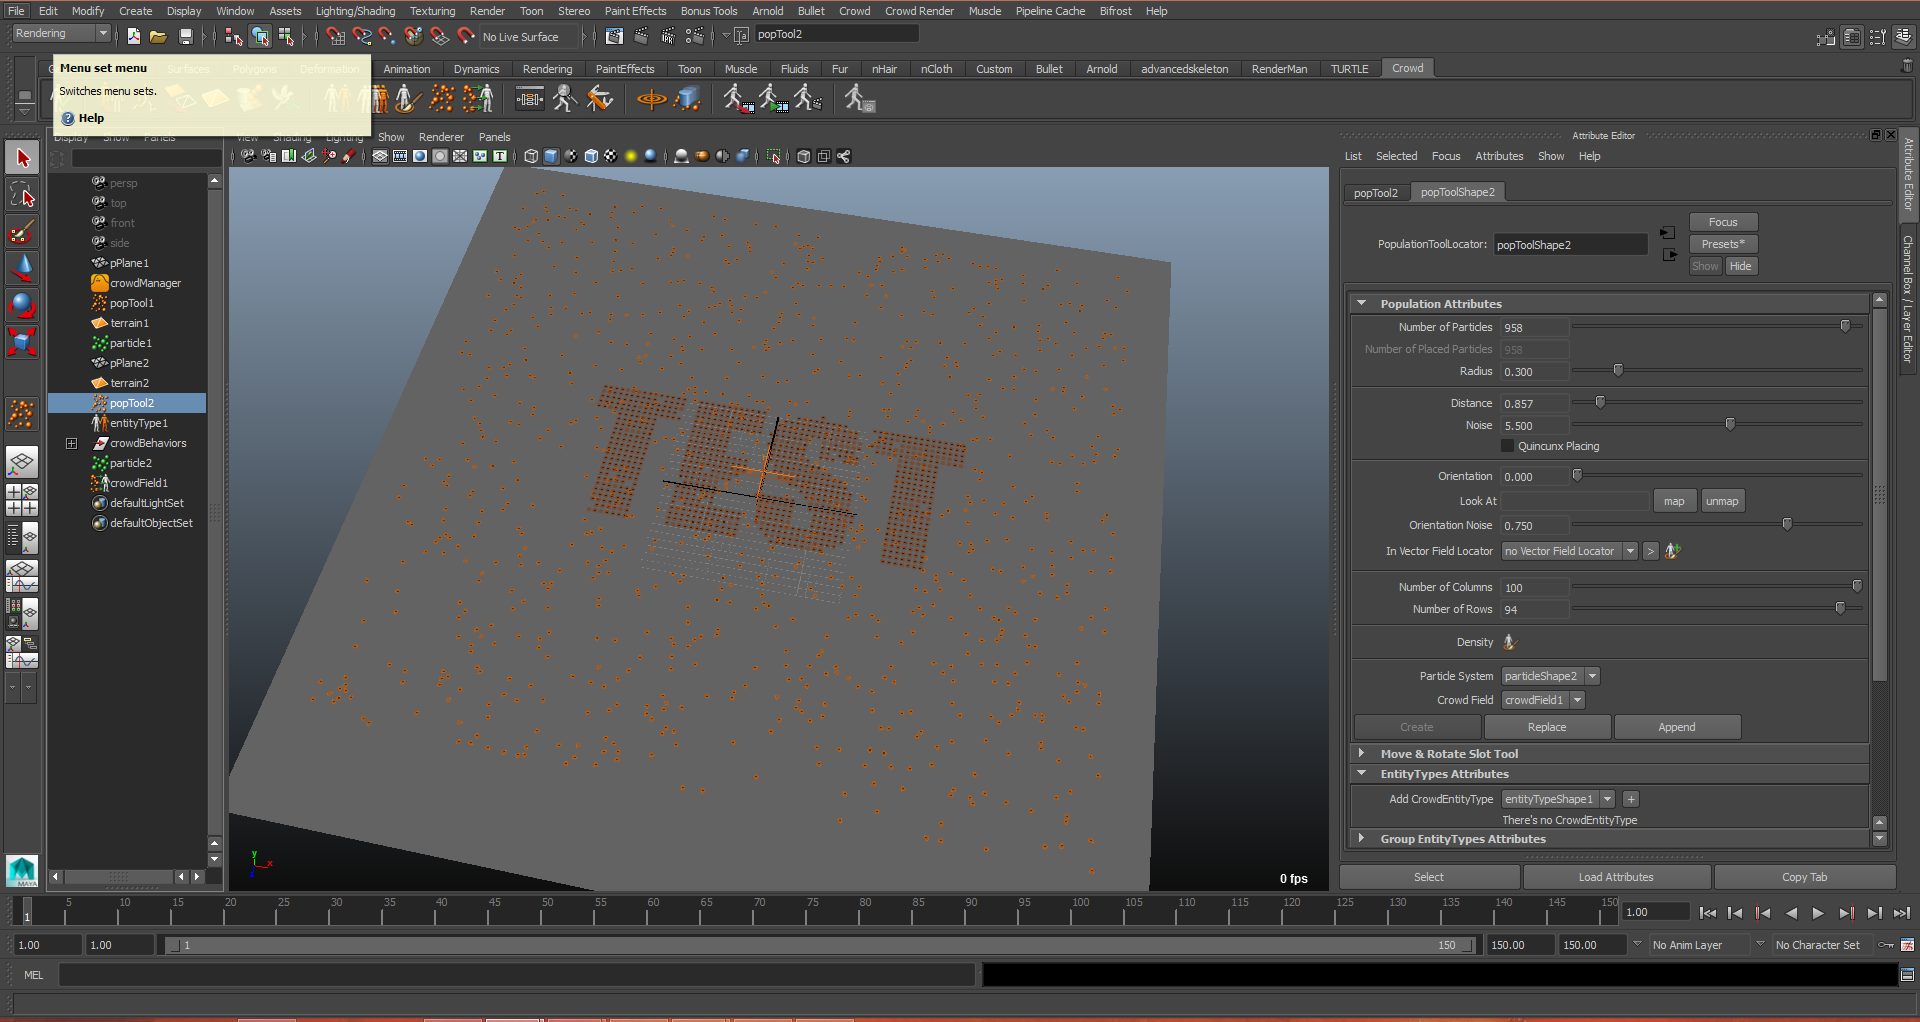
11. Add some noise in the placement and place your particles (this time linked to a new Crowd Field)
12. Your characters are now placed.
CREATE THE FORMATION BEHAVIOR.
13. For the Navigation Behavior to work, you will need a Terrain Locator. For our simple setup, we just need to select the ground polygon and click on the Terrain Locator icon  . (see here how to create terrains for more complex use cases)
. (see here how to create terrains for more complex use cases)14. Now let’s add some moves to our crowds. Open the Behavior Editor  .
.
. Select your EntityType and drag and drop a Navigation Behavior  . Your crowd will stil not move, we are going to control it through a GroupEntityType
. Your crowd will stil not move, we are going to control it through a GroupEntityType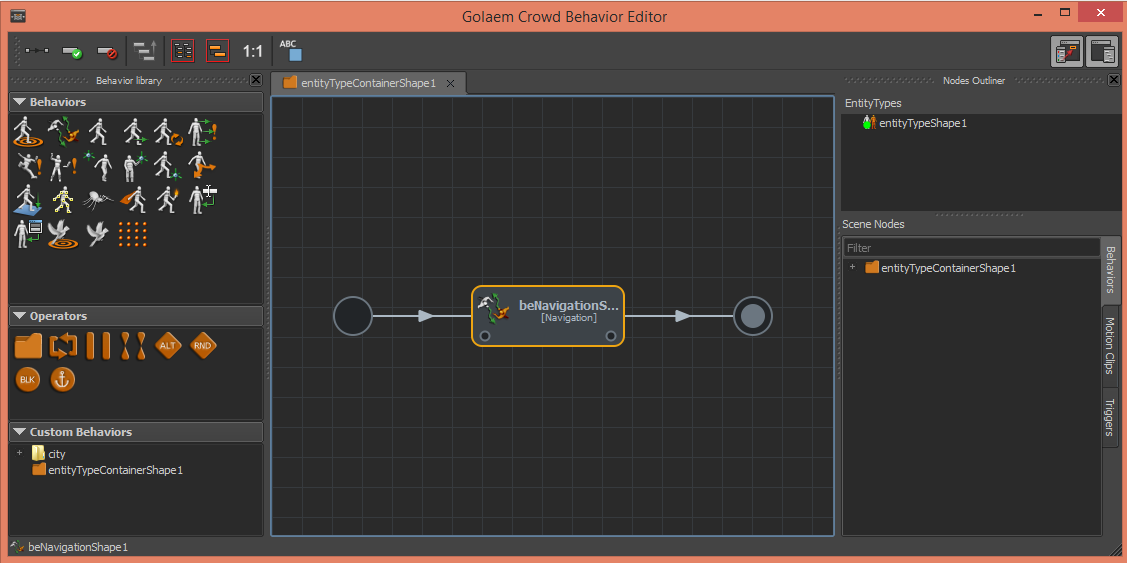
15. Click on the GroupEntityType icon  and go into your Population Tool attribute to add the GroupEntityType to this Population Tool. It means that the characters placed by this Population Tool will be part of this Group and influenced by its behaviors
and go into your Population Tool attribute to add the GroupEntityType to this Population Tool. It means that the characters placed by this Population Tool will be part of this Group and influenced by its behaviors
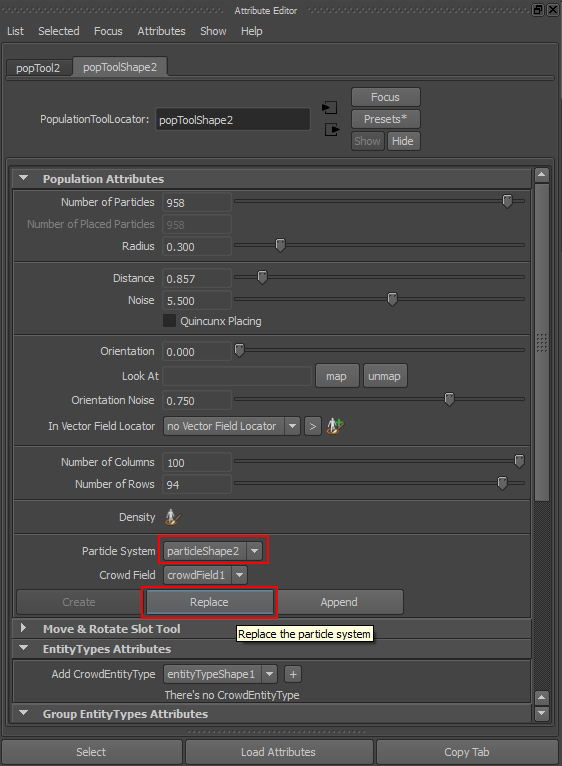
16. Make sure to select the particle system corresponding to your Golaem Crowd characters as the output particle system, and then click Replace
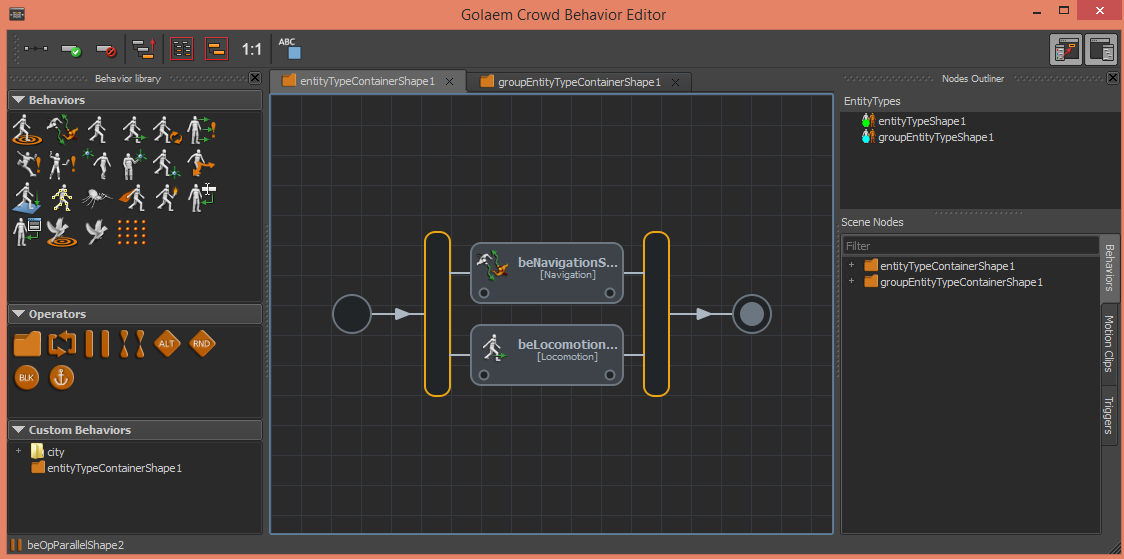
17. Back into the Behavior Editor, double click on the GroupEntityType to open its behavior container and drag and drop a Navigation Behavior. Then drag and drop a SetFormation behavior  on top of it to get them in a parallel operator.
on top of it to get them in a parallel operator. 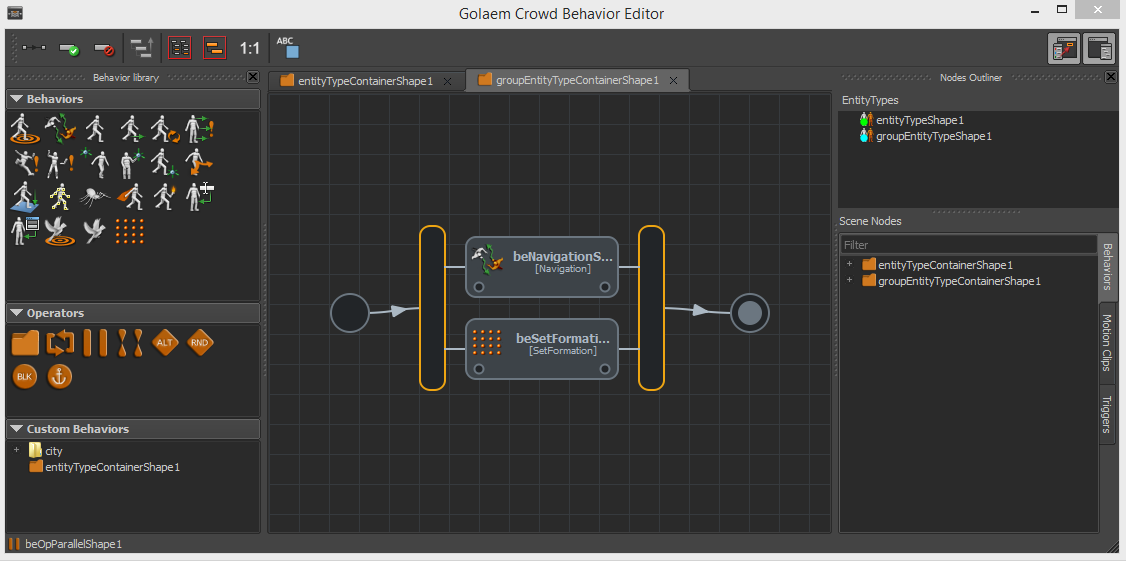
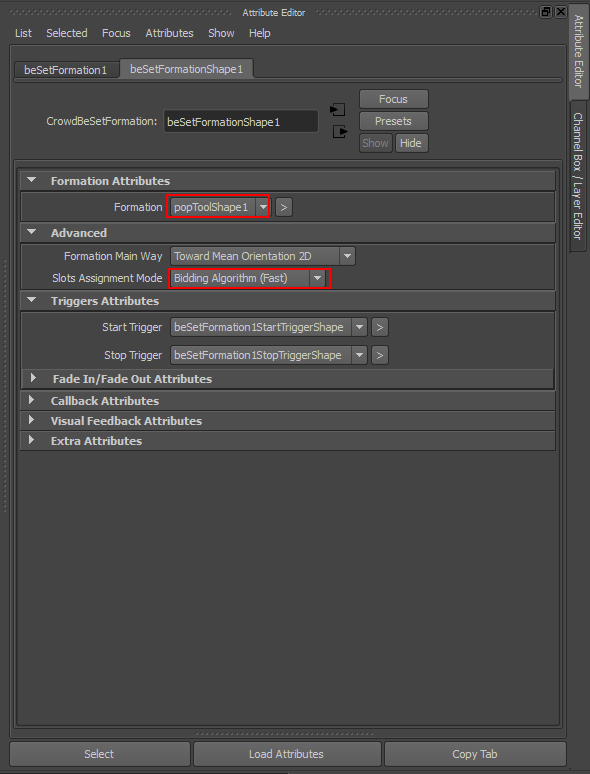
18. In the SetFormation behavior, map the goal Population Tool and select the Biding Algorithm (Fast) as the assignment model.
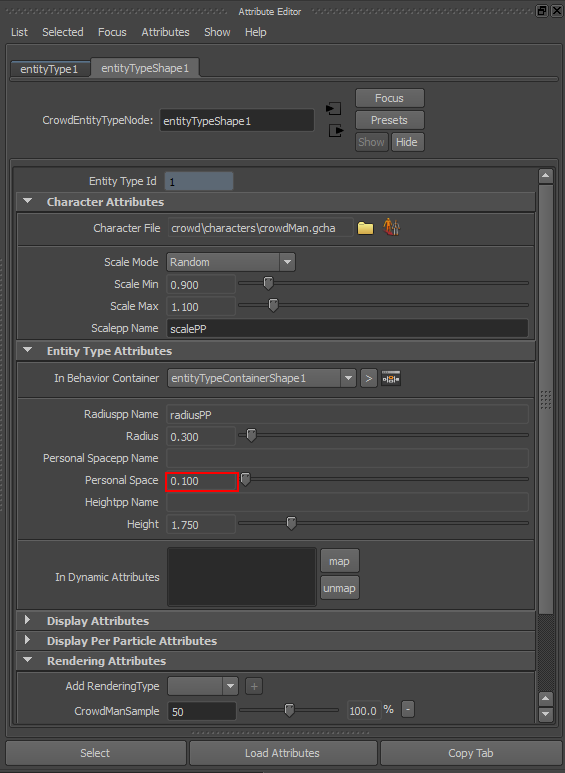
19. To get less repulsion between your entities decrease their Personal Space from the EntityType attributes
20. Save your scene at this point.
If you created many particles the initialization of the simulation can be long as the SetFormation bidding algorithm is time consuming.
Play your simulation, your crowds are now moving!
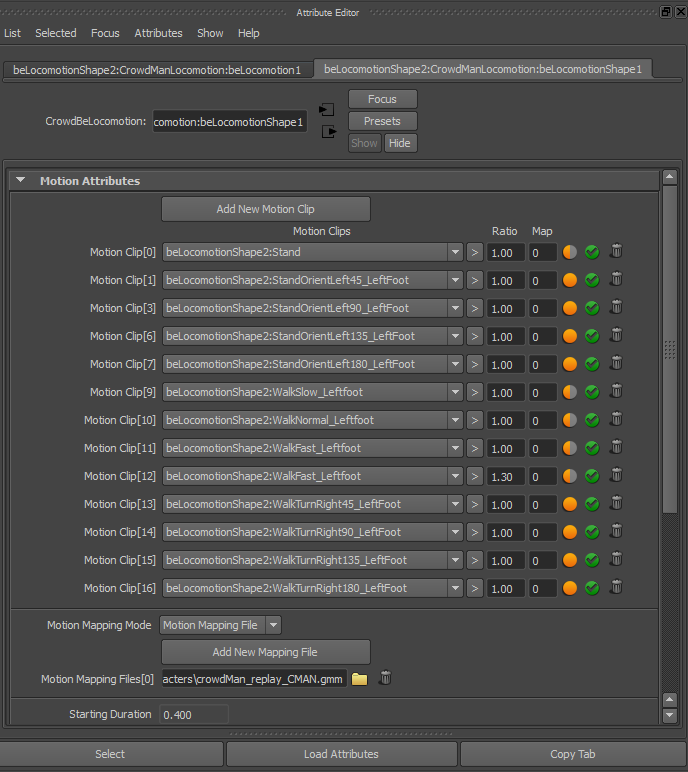
21. Now to give some natural moves to your crowds go back in the Behavior Editor, open the EntityType (not the group one) and add a locomotion behavior and its motions (or drag and drop a previously save Locomotion Behavior template) in parallel to the navigation.
22. Play again your simulation.