


Creating synchronized close combat actions
As of August 5th, 2025, Golaem will no longer provide direct support.
All support for Autodesk Golaem will now be handled exclusively through Autodesk support channels and this website will be deactivated soon.
Please bookmark the Autodesk Golaem Support section for any future support needs related to Autodesk Golaem packages.
Most close combat shots can be solved by using synchronized motions replayed around a locator thanks to the SyncMotion Behavior 
1. Create the source animations. You should try to center the animations around the center of the scene (0,0,0) to simplify further placement. Also be sure to use differents names (even if it is just thanks to namespace) for each bones hierarchy for the motion conversion step to work properly.
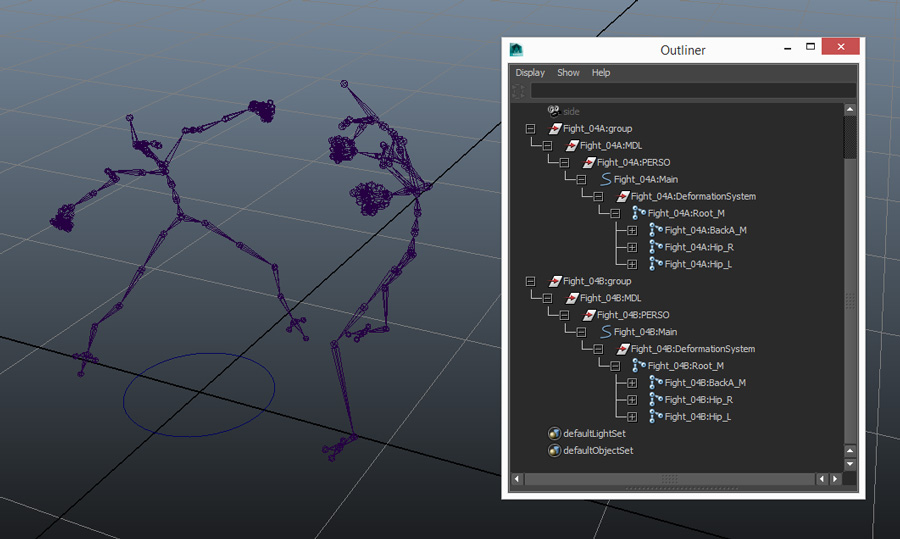
2. Import each motion thanks to the character maker (see Creating Motion Files)
3. Create a new scene to setup your simulation
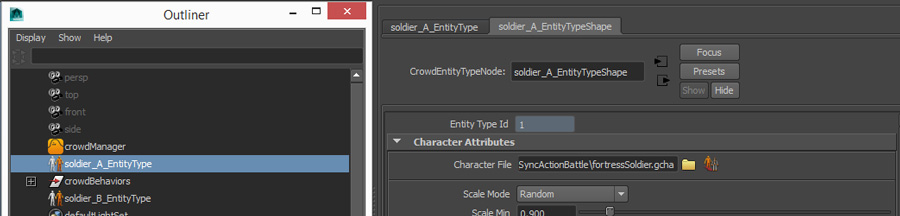
4. Create one EntityType  for each soldier (for example soldier_A_EntityType and soldier_B_EntityType) and set their character file, rendering type... (if you do not know how to do this check the quickstart)
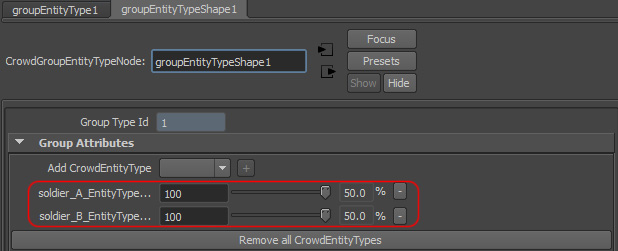
5. Create a GroupEntityType 
6. Add the EntityType previously created and let their repartition to 50/50 in order to make sure you get a soldier of each type when placing a group
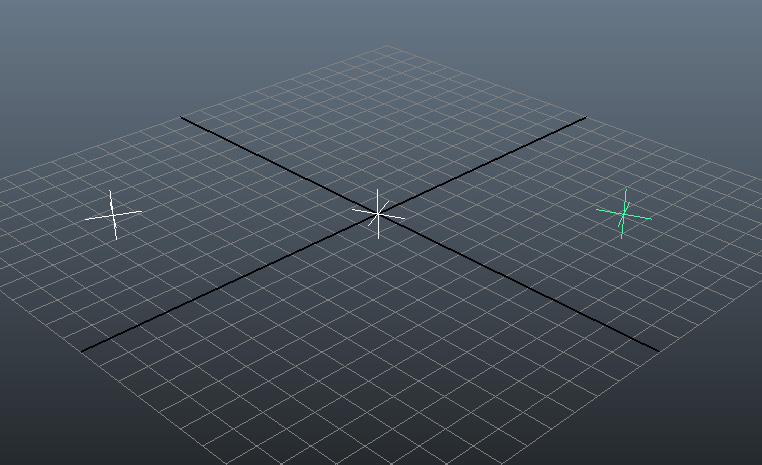
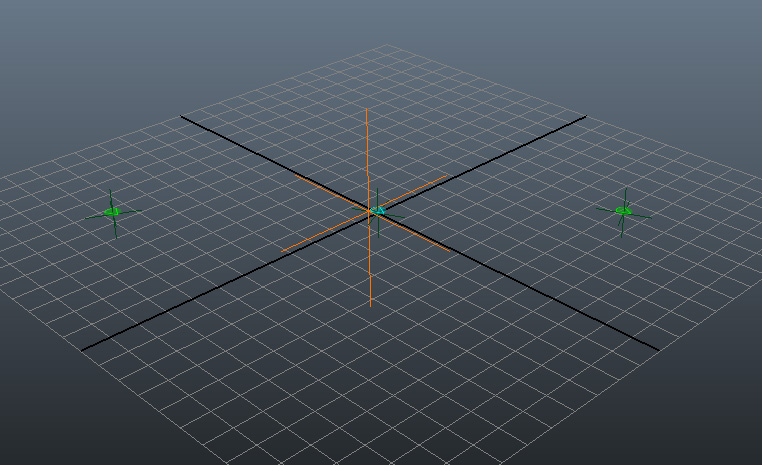
7. Place and orient a few locators in your scene to locate the battle actions
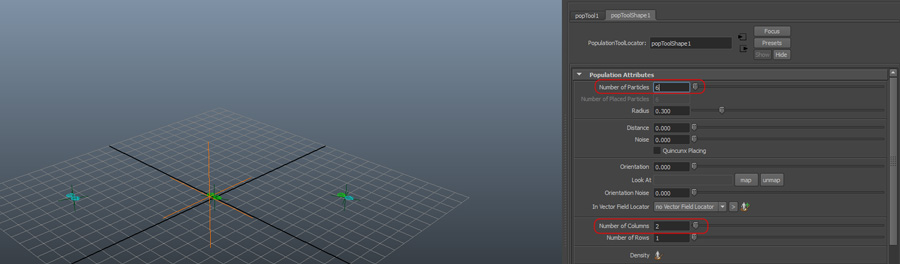
8. Select your locators, and double click on the Population Tool  to display its settings. Click on create particles on selected objects
  . This will create a population tool slot on each of your locators
9. As we need 2 soldiers for each locator, increase the Number of columns to 2, and increase the Number of Particles. Note that we do not care if the slot are placed exactly like in the source motion, the SyncMotion Behavior will take care of this.
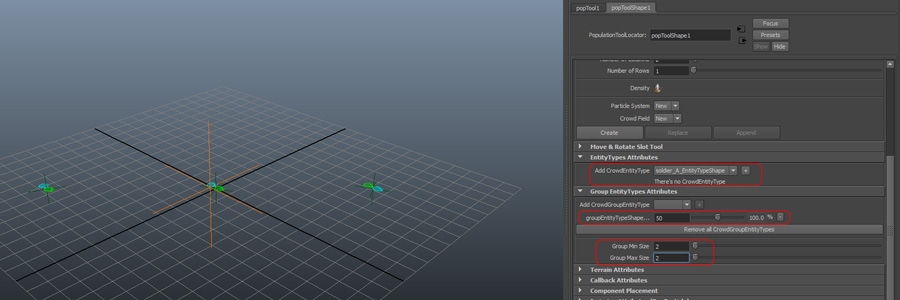
10. As you can notice we do not get exactly 1 green / 1 blue per locator. That's why we created a GroupEntityType.
Go to the EntityType Attributes panel and remove every EntityType. Then go to the GroupEntityType attributes and add your GroupEntityType.
Also set the group min/max size to 2 to ensure that each couple is generated as group and not as 2 individuals. On top of making sure we get half blue, half green for each couple, it also gives a unique GroupId to each couple which we will use later.
11. Click Create to place your characters
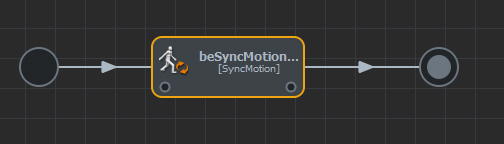
12. Go to the Behavior Editor  and create a SyncMotion Behavior for each EntityType (not for the GroupEntityType). Map a different motion for each EntityType (FightA for Soldier_A and FightB for Soldier_B).
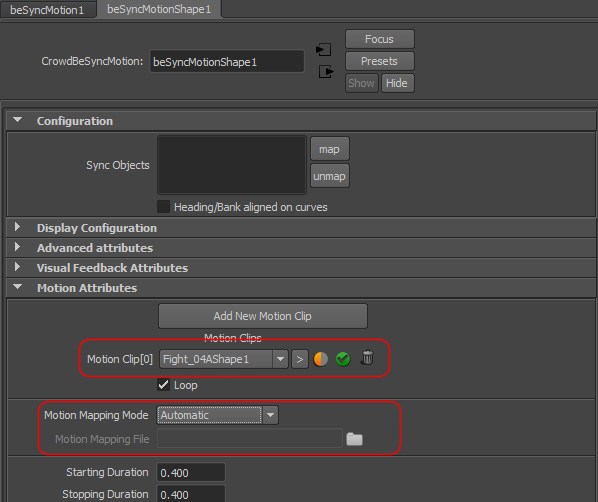
13. Also map the locators in each SyncMotion Behavior (select the locators, hold SHIFT, select the syncMotion Behavior in the BehaviorEditor and click map)

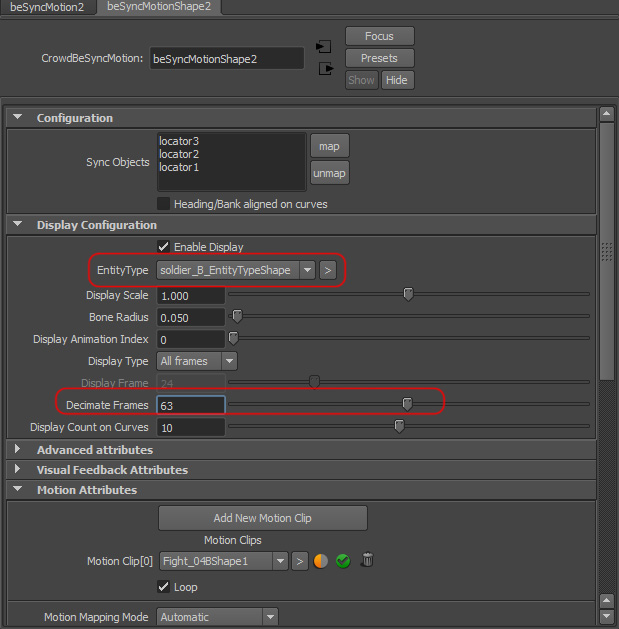
14. You can activate the display on both SyncMotion Behavior by setting an EntityType in its display attributes and decimating frames or playing frame by frame (in this latter case, you can even use the Maya Connection Editor to connect the display frame attribute of the first syncMotion behavior to the second one in order to play both syncMotion Behavior display at the same time like we do in the above video).
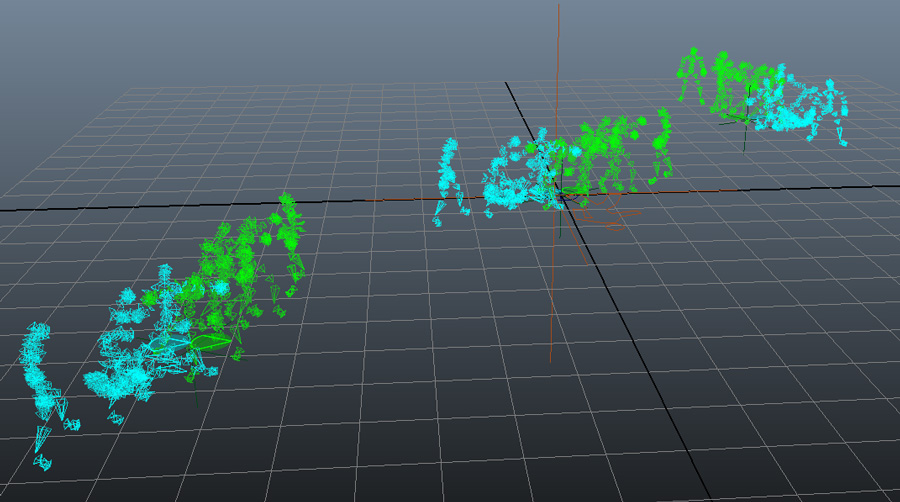
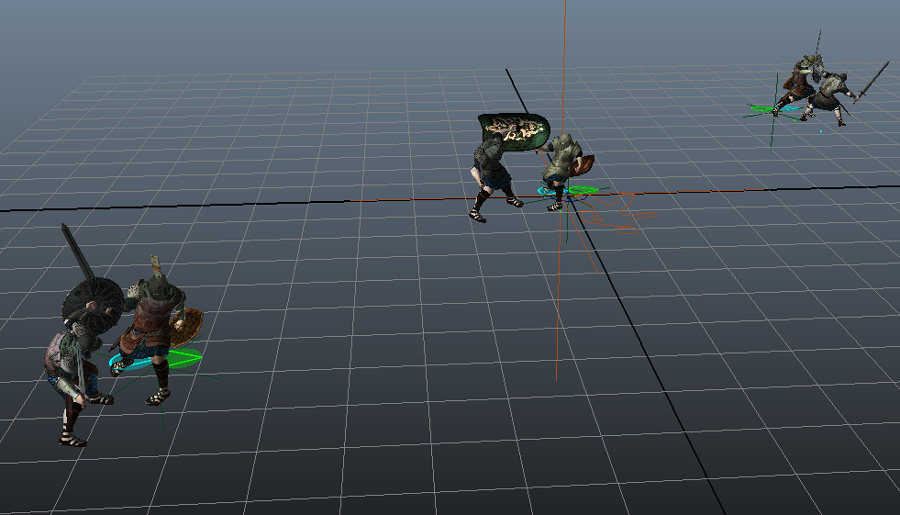
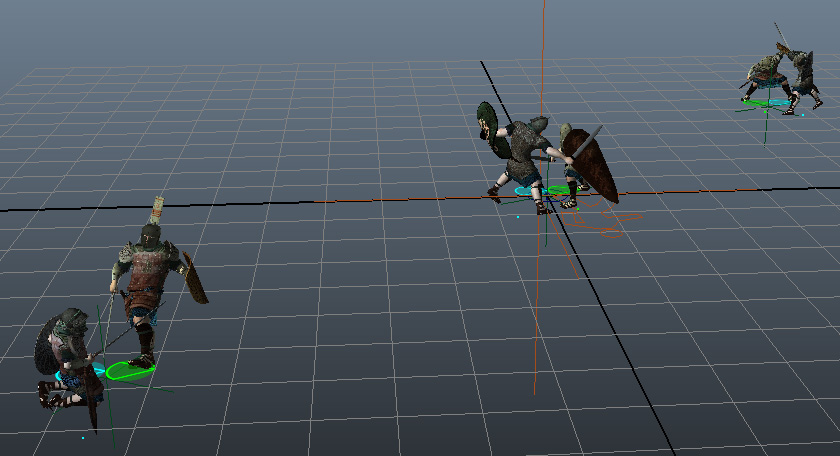
15. Play. All your characters play their motion in Sync. However you can notice that they all start at the same time
16. To avoid this, we can compute a start Percent per-Particle attribute for each group (the value of this per-Particle attribute needs to be the same for each character of a group in order to keep them in sync). Add a startPP per-Particle attribute on the particle system. (for a complete overview of per-Particle attributes with Maya and Golaem Crowd, see Per-Particle Attributes Handling)
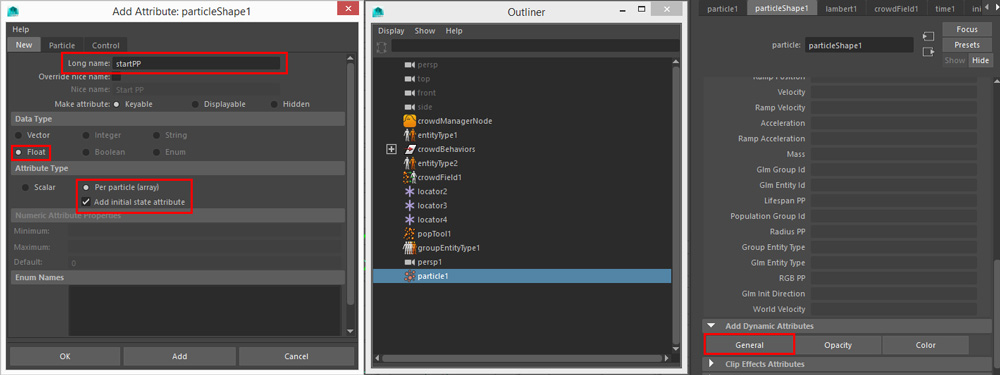
17. Then right-click on the created startPP and select Creation Expression
18. Set the following expression. Because the value is computed based on the groupId, it guarantees that the startPP value will be the same for each character of a group. Here the group1 will start the motion at 10%, group2 will start at 20% ...
Of course you can modify the expression, and there are plenty of other ways to get a similar result.
particleShape1.startPP=particleShape1.populationGroupId*0.1;

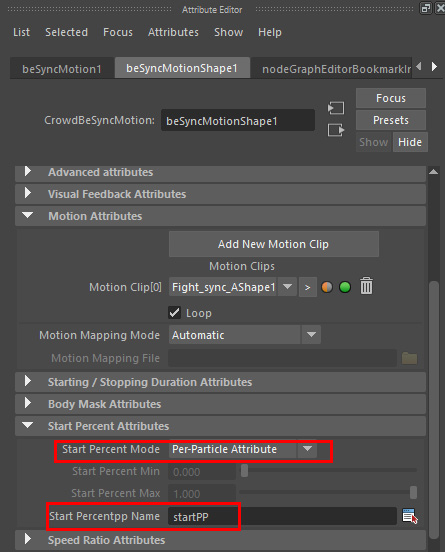
19. On each of your SyncMotion Behavior, set the Start Percent Mode to PerParticle Attribute, and make sure that the perParticle attribute name is the same as the one your created (here startPP).
20. Rewind and play again.
21. Repeat the same procedure to add other synchronized actions in your scene.