


Making a horde of crawling insects
As of August 5th, 2025, Golaem will no longer provide direct support.
All support for Autodesk Golaem will now be handled exclusively through Autodesk support channels and this website will be deactivated soon.
Please bookmark the Autodesk Golaem Support section for any future support needs related to Autodesk Golaem packages.
In this tutorial we are going to explain how to generate many insects on a ceiling and make them crawl on all walls and possibly on top of each others.
To do that we are going to use several advanced features of Golaem:
- Population tool emitters attributes: to gradually generate our insects over time
- Navigation with custom navigation sensor: so that our characters avoid only obstacles and NOT each others
- CharacterController: to easily make insects crawl on top of each others
- UVPin: to project our simulation done on 2d terrain to the walls
- Physicalize Behavior: to make some characters fall down
Because the tutorial already covers several areas of Golaem, it assumes that you know how to load character, place them, make them navigate around a scene and start/stop behaviors based on triggers. If not, please read the Quickstart, Populate City Streets, Stadium Basic Workflow tutorials or watch the Golaem Workflow Overview video.
If you do not have a character to play with, we will provide ours in the Golaem Character Pack
Creating the environment
But first of all, we need to create an environment for our crawling creatures.
Create a big cube representing our room.
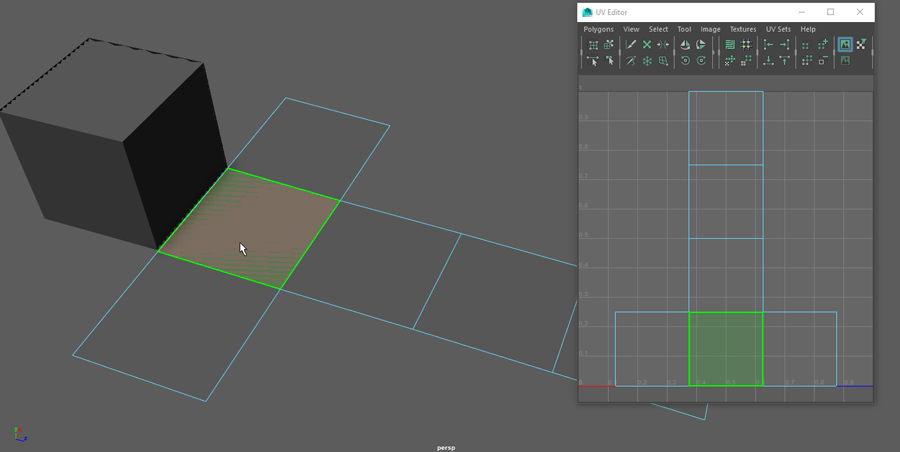
We will actually need two versions of this cube. The usual one that we just created, and an unwraped version in order to create our simulation.
So duplicate this cube and unwrap it. Beware, when unwrapping it, you should make sure that it looks exactly the same as its UV unwrap.
Indeed using the UVPin, we will project the character from the unwrapped cube UVs to the same 3D Cube UVs.
If when unwrapping the cube, you have two faces next to each others which actually are not next to each others in UVs, you will have characters flying/popping in your scene.
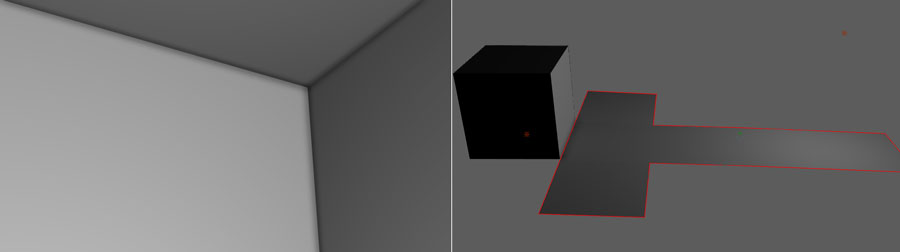
When you are done, place a Maya point light and a camera inside the 3D Cube, and another point light and camera outside pointing to the unwrapped cube.
Switch the viewport mode to "use all lights" and do not forget to adjust the near/far clip plane of the camera so that I you can see all the cube.
Select the unwrapped cube and compute a navmesh with it so that our characters will be able to stay inside when navigating.
Note that if you may need to adjust the unit depending on the size of your cube/characters.
After the terrain is created, if needed to not forget to also adjust the CrowdManager unit to the same unit as the one used for your terrain.
Emitting Characters
Next we are going to make our characters being generated.
For that we will check wich polygons is the ceiling of our 3D cube, and place a population tool near one of its sides.
Create your EntityType, and load your character file. Adjust its min/max scale if needed, depending on the scale of your environment.
Then add a Population Tool on the right polygon and also adjust its radius if needed.
Note that we could use only one slot to generate our characters, but the generated characters would most like always be on top of another one and generate a lot of popping/jumping. So instead we will make a square of slots, so that they are randomly spread among these. Let's also randomize the slots orientation.
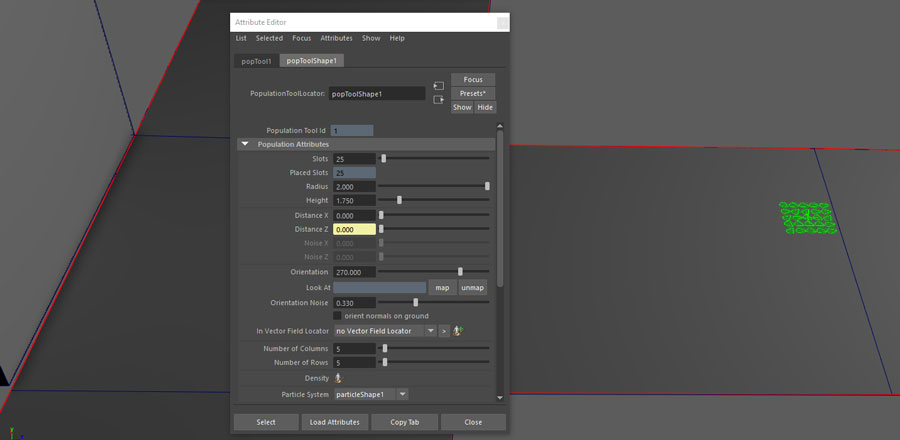
Then we need to set the Emitters attribute Emitter Max Count (maximum number of generated entities during the whole simulation) and Emitter Rate (nb of emitted characters per second)
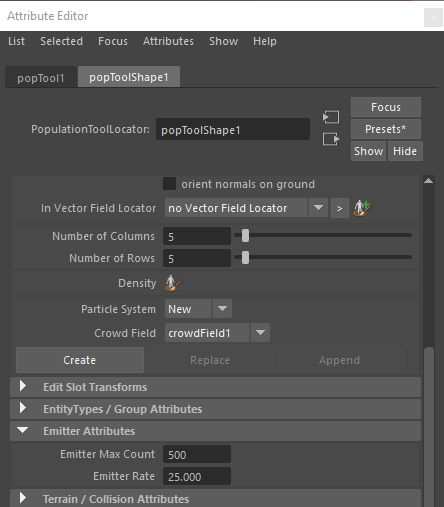
And click create. This is very important as it will init the particle system in which entities will be generated.
If you try to play the simulation you will see that characters are randomly generated on slots, and when it is filled, the are generated on top of each others because obviously they are not moving yet.
Making our characters navigate in the environment
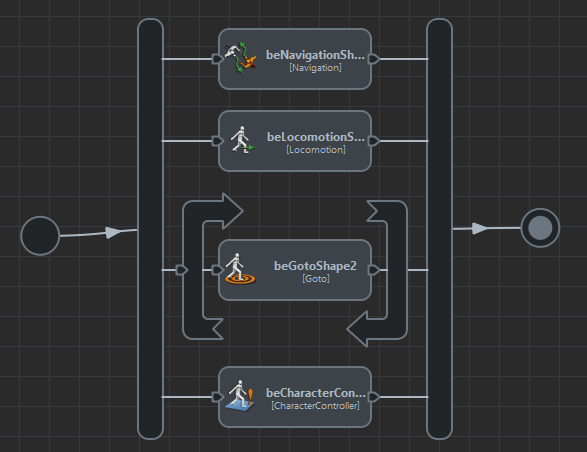
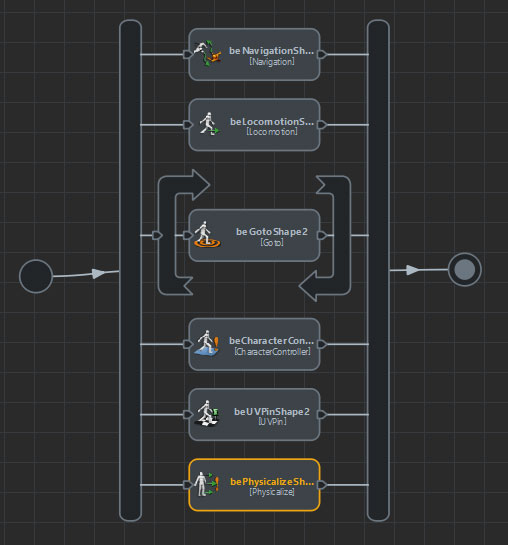
As usual, add a Navigation Behavior and a Goto Behavior in parrallel. You will notice that we embbeded our Goto Behavior in a Loop Operator, so that the characters keep finding and reaching a random target. Otherwise they would just stop after reaching the first target they choose.
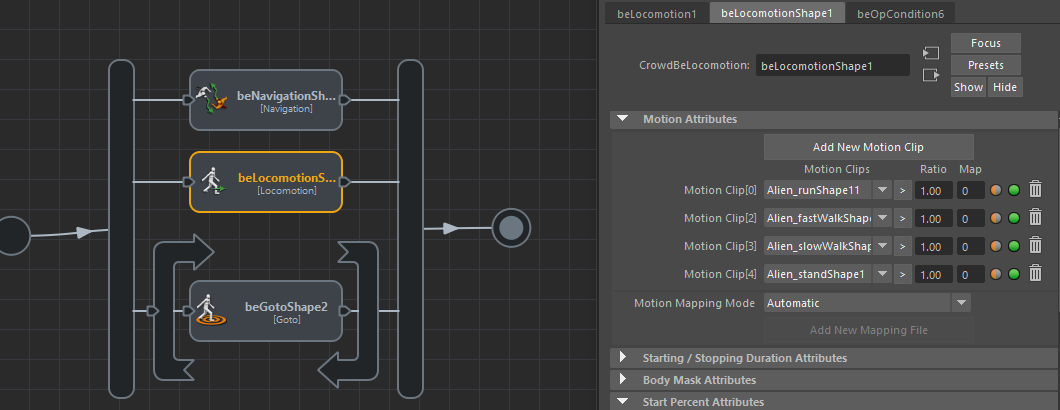
Then add a Locomotion Behavior with different motion speed and a rest motion.
Play your simulation.
As you can see, our characters are walking very slowly and as they are generated on top of each others, they are blocked by other characters.
Actually it is one of the rare case where we do not want them to avoid other characters, because otherwise they will never crawl on top of each others. So we need to make them blind to other characters, while keeping avoiding obstacles.
For that we need to create a custom Sensor. Create a big cylinder shape and hide it.
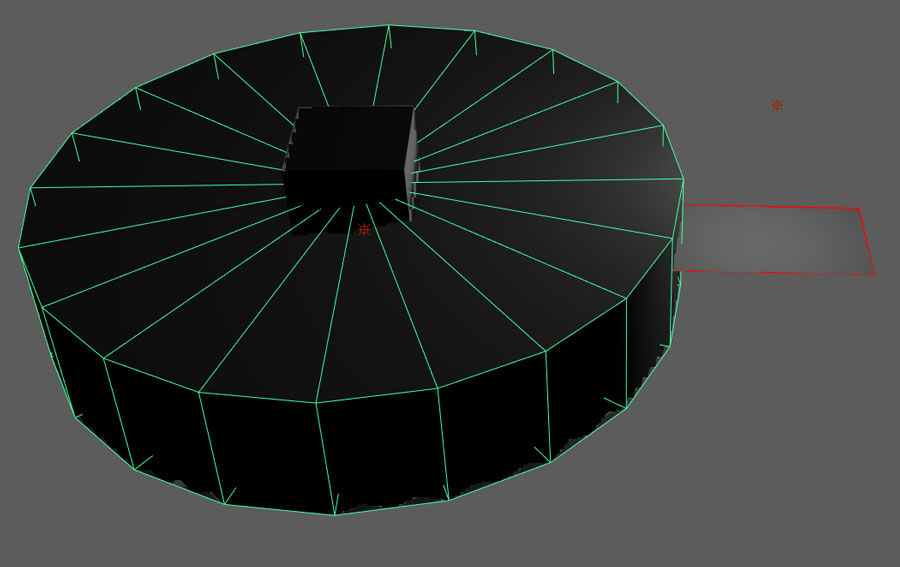
Then create a Sensor Locator  and map this cylinder inside. Finally change Detection Type to Navigation Obstacles.

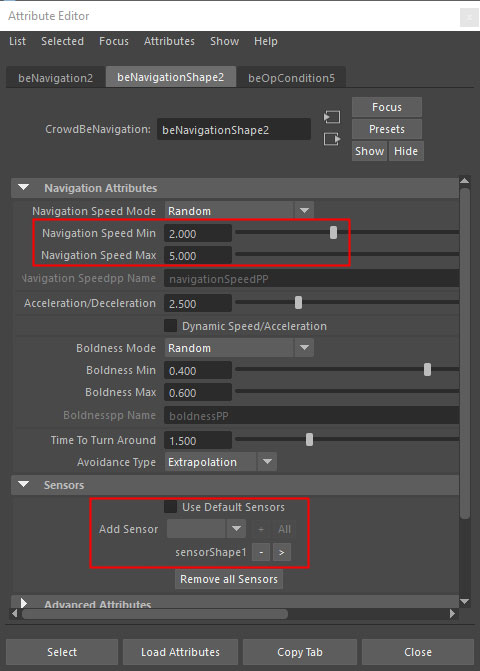
Now you can select the Navigation Behavior and uncheck "Use Default Sensors" and add our custom one by clicking the + button. Try again and you will see that now they are not avoiding each others at all.
Also adjust the Navigation Behavior min/max speed so that it matches the speed of the motions in your Locomotion Behavior.
Here is our crowd for now:
Making our characters crawl onto each others
To easily make characters crawl onto each others, the best is to use the CharacterController Behavior 
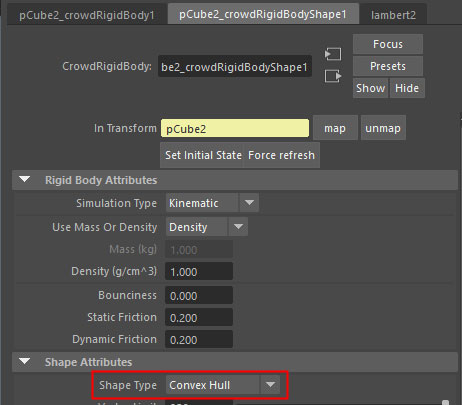
The CharacterController relies on Physics to compute simple collisions between characters and automatically make the crawl onto each others if needed. So we need to have a correct Physics ground. Select the unwrapped cube, and clik on the Crowd Rigid Body icon  . You may need to change the Rigid Body Shape Type so that your characters do not fall through it. In our case, we had the best results with Convex Hull
From there, to be able to see what exactly happens, you should activate the Collision Shapes display on the Physics Locator.
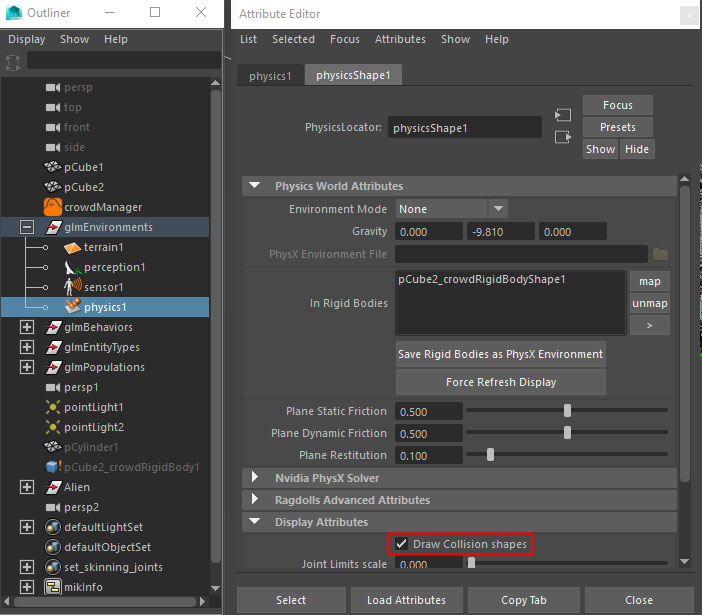
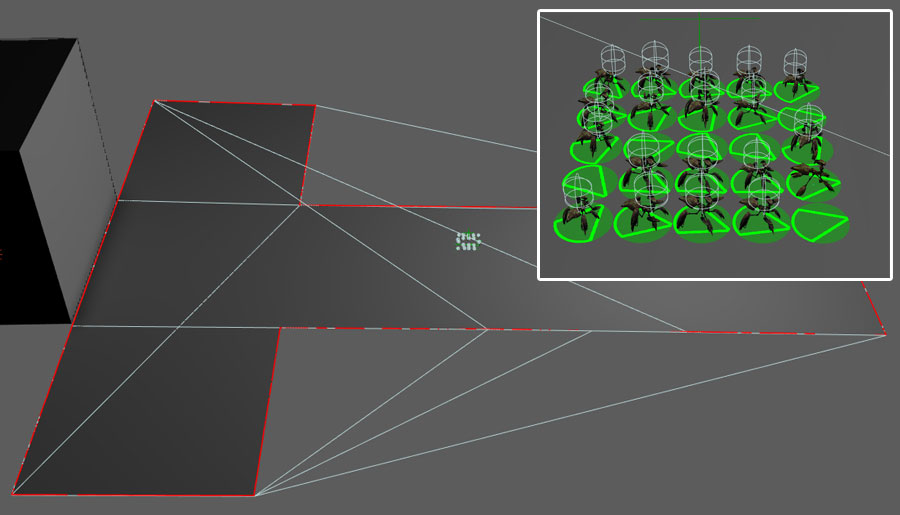
Now you should see white lines representing the physics world. A ground made from our unwrapped cube + a capsule on each character generated by the CharacterController.
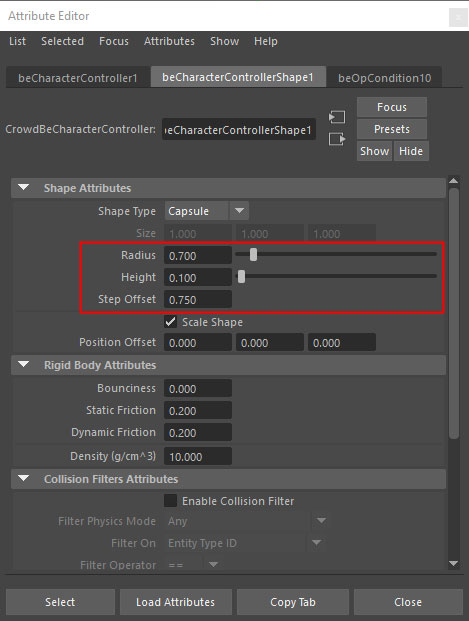
To adjust how our characters crawl onto each others, we need to adjust the width / height of the capsule so that it better matches the size of your character.
After doing that, you will noticed that the characters may be not crawling on each others yet. This is because there is a limit to the height they can crawl. So you can try to increase the step offset.
When playing with the different parameters, you will notice that the CharacterController capsule is bound to the particle, while our characters is not and still adapted to the ground. So sometimes when you character is far from its particle, we do not get what we want.
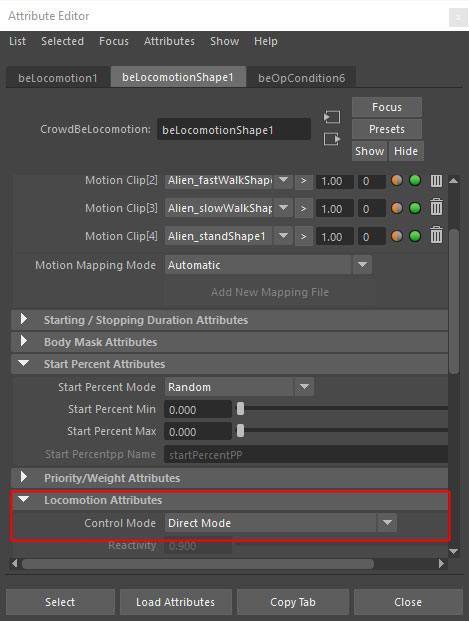
To avoid this, change the Locomotion Behavior Controller Mode to "Direct Mode". The characters will now be snapped to their particles.
Here is our crowd at this step
Do not forget to deactivate the physics collision shapes display when you are done with the CharacterController setup, as this display takes a huge toll on performances.
Making our characters walk on ceiling and walls
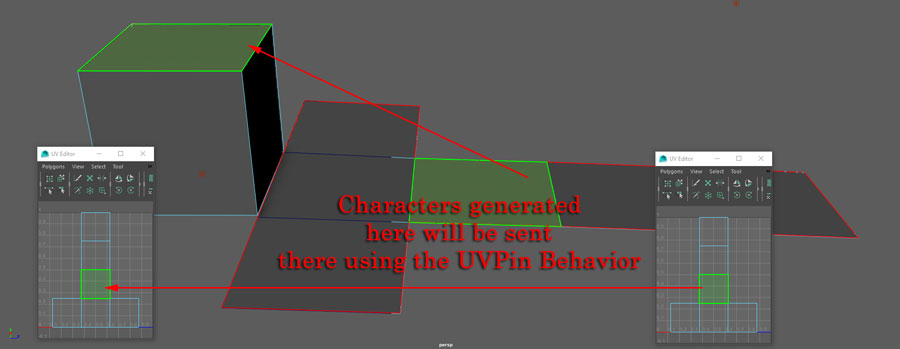
Now that we have a good simulation, we just need to project it on our 3D Cube.
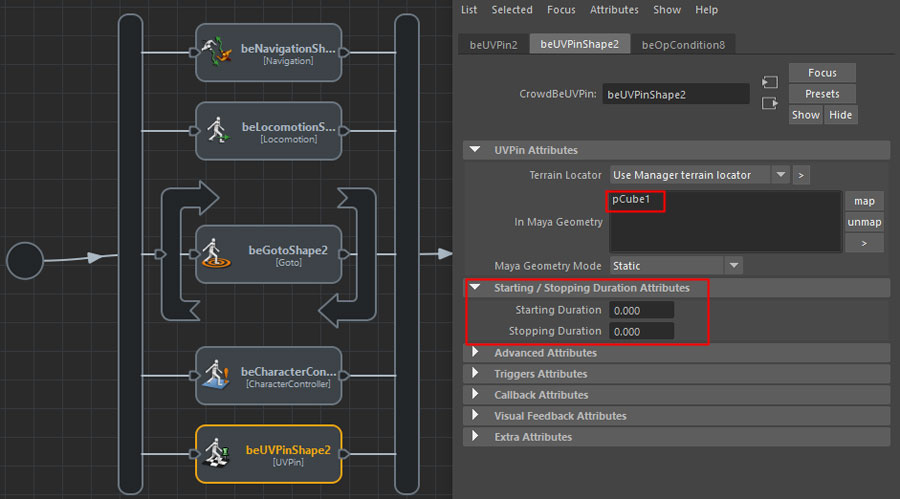
Add an UVPin Behavior  and map the 3D cube in it.
If you play your simulation now, you will see your characters flying from the unwrapped cube to the 3D one.
You can avoid this by setting the start/stop duration of the UVPin Behavior to 0.
Then change the camera to look inside the cube and see your characters crawling on ceiling/walls.
Making some characters fall from the walls
To make the characters fall from the wall, we need to physicalize them using a Physicalize Behavior and let the the Physics Simulation take control of them.
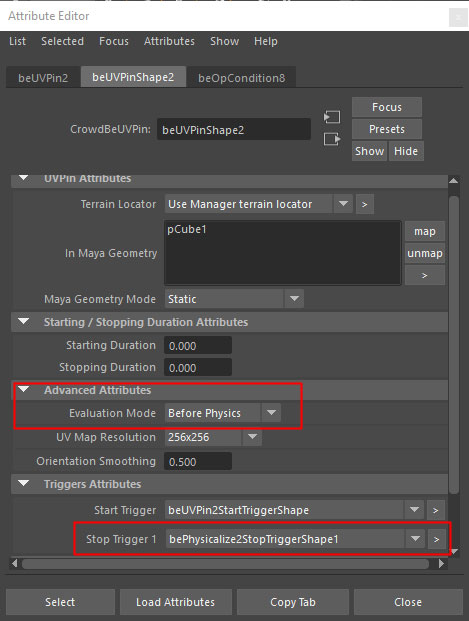
For that, we need to make sure that Physics will start AFTER the UVPin behavior projected our characters and keep the characters inside the 3d cube. We can do that by changing the UVPin Behavior evaluation mode to "Before Physics".
We also need to make sur that the switch to physics simulation (reminder: done when the Physicalize behaviors stops) is done at the same time that the UVPin is stopped. For that we we will also link the UVPin stop trigger to the Physicalize Behavior one.
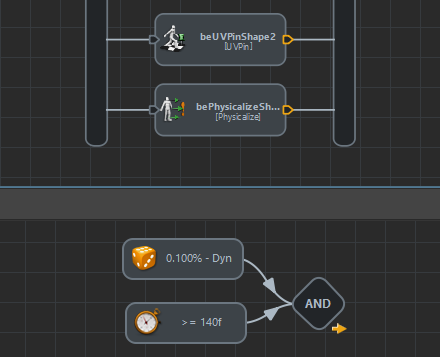
Then let's double-click on the Physicalize or UVPin behavior stop trigger symbol and add a random trigger, linked with a frame trigger to make sure they do not start falling at the beginning of simulation.
Play the simulation and take a look at our falling characters.
Note: In our case, only the root bone of our character is physicalized. If you other parts of your character, beware that it does not perturb your character controller behavior. In this case, you could start the physicalize behavior only just before making your character fall.
If you want to enhance the physics simulation, take a look at the physics tutorials