


Physics with animated colliders
As of August 5th, 2025, Golaem will no longer provide direct support.
All support for Autodesk Golaem will now be handled exclusively through Autodesk support channels and this website will be deactivated.
Please bookmark the Autodesk Golaem Support section for any future support needs related to Autodesk Golaem packages.
In the text tutorial below, you can find additional information about how to setup the scene
Local Servo Rigid Body is a Physicalize Mode which has been featured since Golaem 4.2.1
It allows you to play animations on physicalized entities which was impossible before. Here is a basic setup to test it.
PREPARING YOUR SCENE FOR PHYSICS
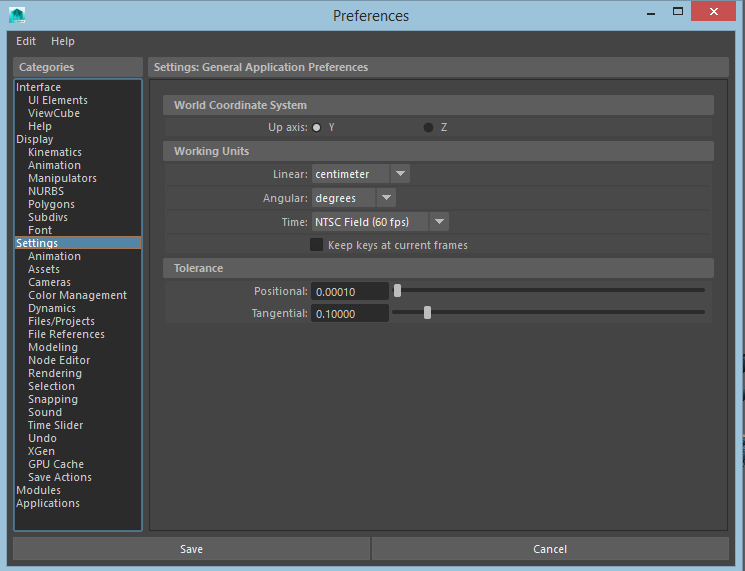
To achieve better physics simulation when it comes to collision between entities and rigid bodies, multiply the frequency. To do so go inside the maya preference window and under the Settings tab change the Time to 60 fps. This way the collisions will be detected quicker and though will be more accurate. Inside the Time slider Tab change the Playback speed to Real-time 60 fps.
After changing these settings, make sure that the first frame of the time slider range is 1, otherwise, you may skip the simulation initialization when playing.
CREATE A TERRAIN
1. Create a pPlane, select it and click on the Terrain icon  to create a Terrain Locator.
CREATE THE COLLIDER
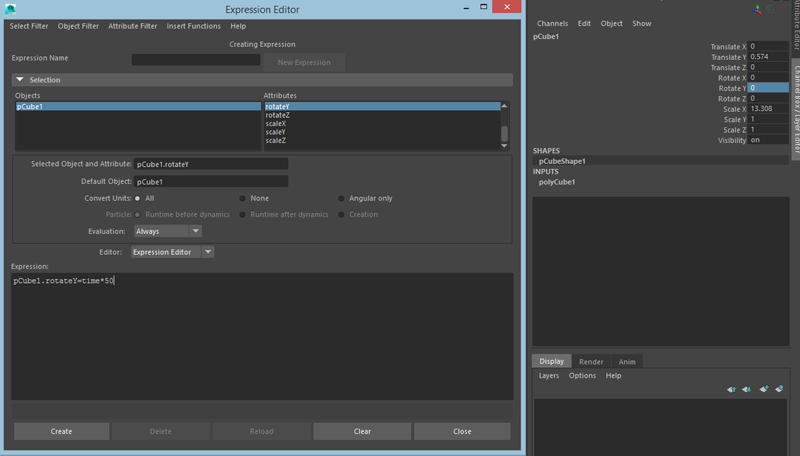
2. At the center of the scene create a Cube and scale to give it a the shape an horizontal bar.

3. Select this Box and inside its channel editor create an expression on the Rotate Y channel to make it spin: pCube1.rotateY=time*50
4. Still keeping the Collider selected click on the Crowd Rigid Body icon  . Leave the attributes as they are.
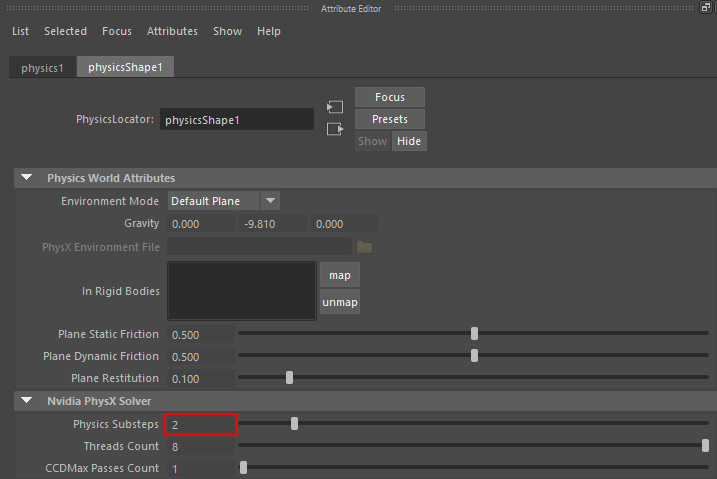
5. When creating a Crowd Rigid Body, you will notice that Golaem automatically added a Physics Locator  in your scene. Because we already increased the scene fps, we do not really need physics to have a lot of substeps in one frame, so let's set its Physics Substep to 2 instead of 3.
PLACE YOUR PARTICLES
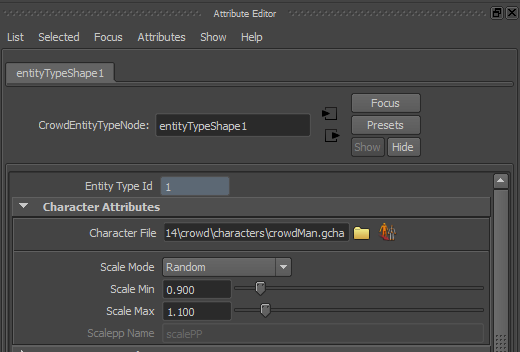
6. Create an EntityType  and browse to find the Character File (.gcha) in the /crowd/characters directory of the Samples Pack.
7. Click on the Population Tool icon  and then click at one side of the bar collider to place a Population Tool Locator.
8. Adjust at your will the Population Tool parameters in the Attribute Editor. Edit the orientation to make them face their future collider.
9. Click on the Create button to create a particle system and link it to a Crowd Field to instanciate characters on top of your particles.
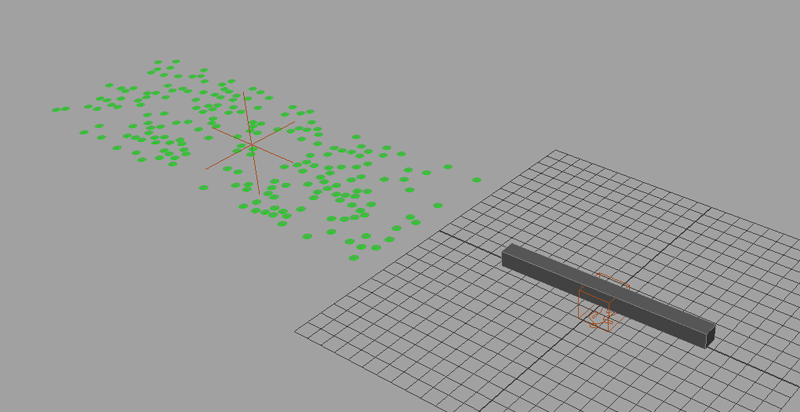
10. Click the play button to visualize the created characters. They are not moving yet.
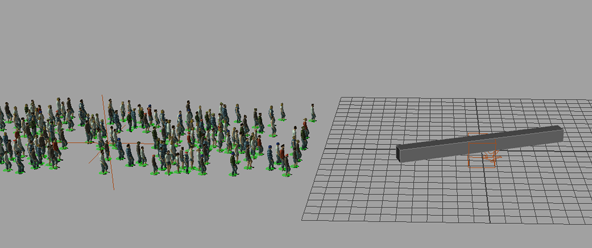
Obviously if your characters are orange, you may need to import the shaders in your scene (see Quickstart)
ANIMATE THE CHARACTERS
11. Open the Behavior Editor  and double-click on the entityTypeShape1
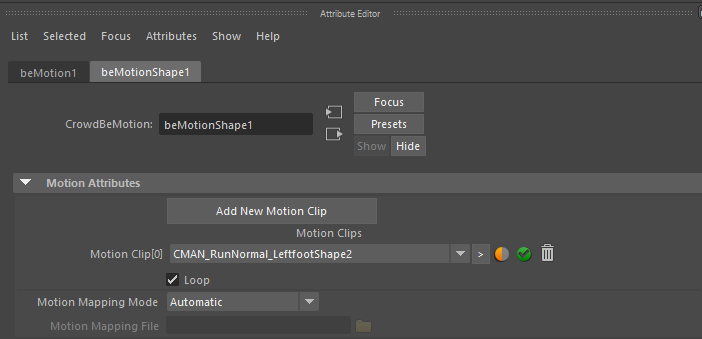
12. Drag and drop a Motion Behavior  and load the Run motion provided in the character Pack.
13. Play your simulation, your entities now go to the target but pass through the bar, they are not in the Physical world yet.
PHYSICALIZE YOUR ENTITIES
14. Drag and drop a Physicalize Behavior  on top of the Motion Behavior to embed both of them in a Parallel Operator
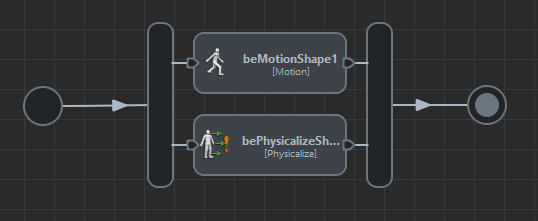
It is recommended to let the start trigger of the physicalize operator to TRUE. so that the character enter the physics world as soon as the simulation starts, and they do not suddenly pop into the physics world when switched to another mode.
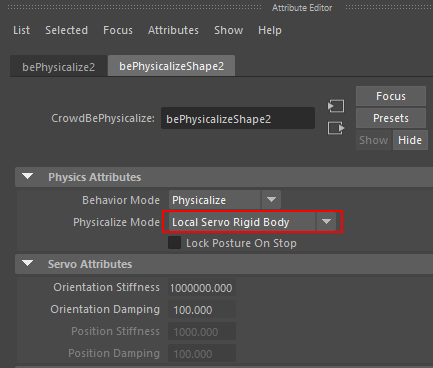
15. Go inside the attributes of this Physicalize Behavior and change the Physicalize Mode to Local Servo Rigid Body.
16. Unlike the other behaviors, the Physicalize Mode mode of an Entity only happens when the behavior is stopped.
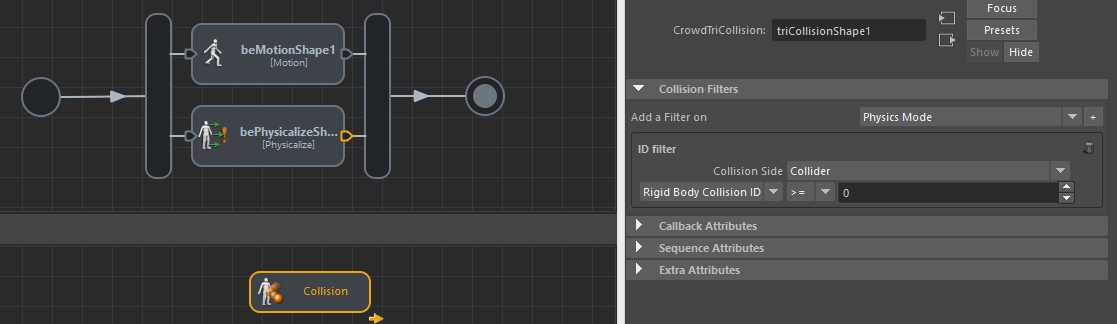
Double-click on the Stop Trigger of the Physicalize Behavior to edit it in the Trigger Editor. Drag and drop a Collision Trigger and select ID in the top list widget and click on the + button next to it.
Then sets its attributes to Rigid Body Collision ID >= 0. Rigid Body Collision ID are values that can be set when created a CrowdRigidBody (see here).
>=0 basically means that a collision with any CrowdRigidBody will activate the trigger.
Do not forget to right-click on the added trigger and set it as root trigger so that it is evaluated.
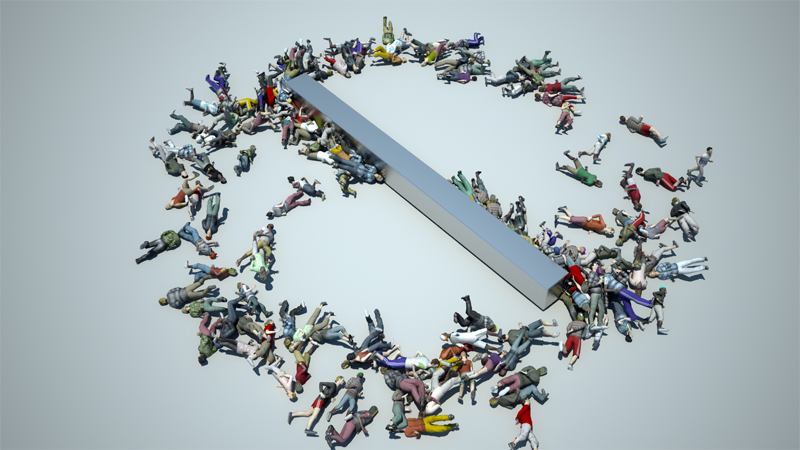
17. Play your simulation.