Rendering FAQ

You can find which versions of a rendering are supported by the different versions of Golaem in the Release Notes

Note that if you are using the oldest version of a renderer for which two versions are supported (e.g. V-Ray 2.4 and V-Ray 3), you probably need to do one extra-step manually after installation.

If your renderer is not supported, drop us a line, you never know...

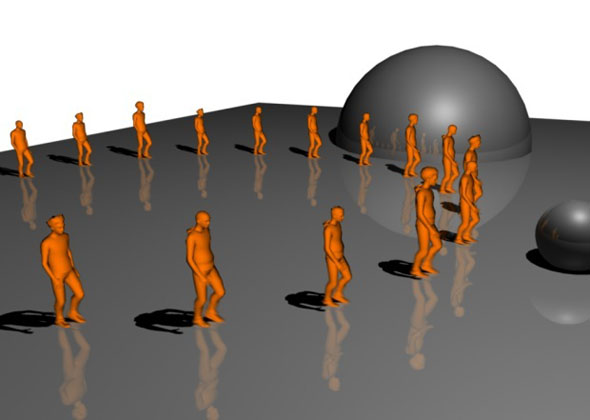
To be able to get good performances Golaem Crowd characters are not real Maya geometry. They are rendered thanks to procedural plugins for your renderers, called by proxys/standins. These plugins are loading a Golaem Crowd simulation cache and handling the geometry to your renderer.

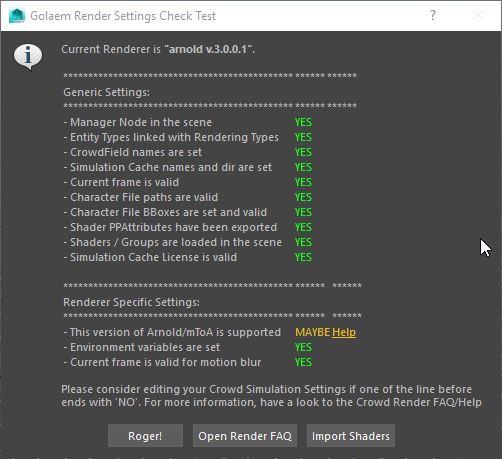
To check if everything in your scene is correctly setup for the procedural rendering to work, you should check your render settings.

Go to the CrowdRender menu (in the Rendering menu mode), and select "Check Render Settings". 
If one of these lines show a "NO", you should first correct the associated setting before trying to render.

In order to render its Simulation Caches, Golaem takes advantage of procedural rendering. : for each supported rendering engine, Golaem develops a plugin which is able to generate the geometry on demand based on a set of parameters.

When you start Maya, it loads the Golaem module (either because it was copied in the modules directory at installation, or because it is referenced by the MAYA_MODULE_PATH environment variable). This modules itself will set other environment variables for each renderering engine to be able to find Golaem procedural plugins. Those per-rendering engine environment variables are defined in the following page.

To be able to render on the farm, your IT department needs to deploy Golaem so that it is available from all render nodes and do some configuration on your render farm manager so that it sets some environment variables needed for Golaem to be loaded. Please check Render Farm Deployment and Troubleshooting Render Farm Deployment.

If rendering outside of a farm and of Maya (eg. with the rendering engine command line or another platform), you need to set those environment variables yourself in your application-specific context. Also if using the rendering engine command line, do not forget to export the Crowd Render Proxies in your rendering scene description (.ass, .rib, .vrscene, .rs). When doing so, a new type of object will be added to the rendering scene description and, if the environment variables are correctly set, this new node will trigger the procedural plugins and the creation of the crowd entities.

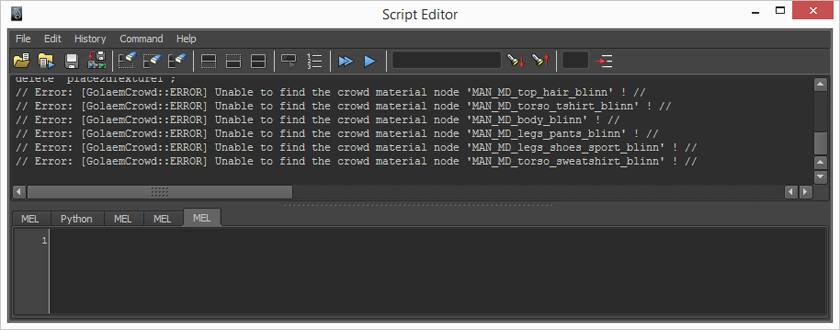
If you created a proxy and are using the right renderer, Golaem Crowd should output some errors or warnings in the script editor if something goes wrong,.
 
Just open it and check if Golaem Crowd reported something after you clicked on render.
 
 
Note that errors are often not outputed in the script editor but in the Output Window (because of the way some renderers works).
 
It means that your renderer cannot find the Shader Groups / Shaders referenced (by their name) in the Character Maker
 
 
Usually, all you have to do is to import the maya scene containing your source characters with all shaders in your scene so that your renderer will be able to find them (using the Crowd Render Menu / Import Shaders).
 
More about Shading Assignment  here.


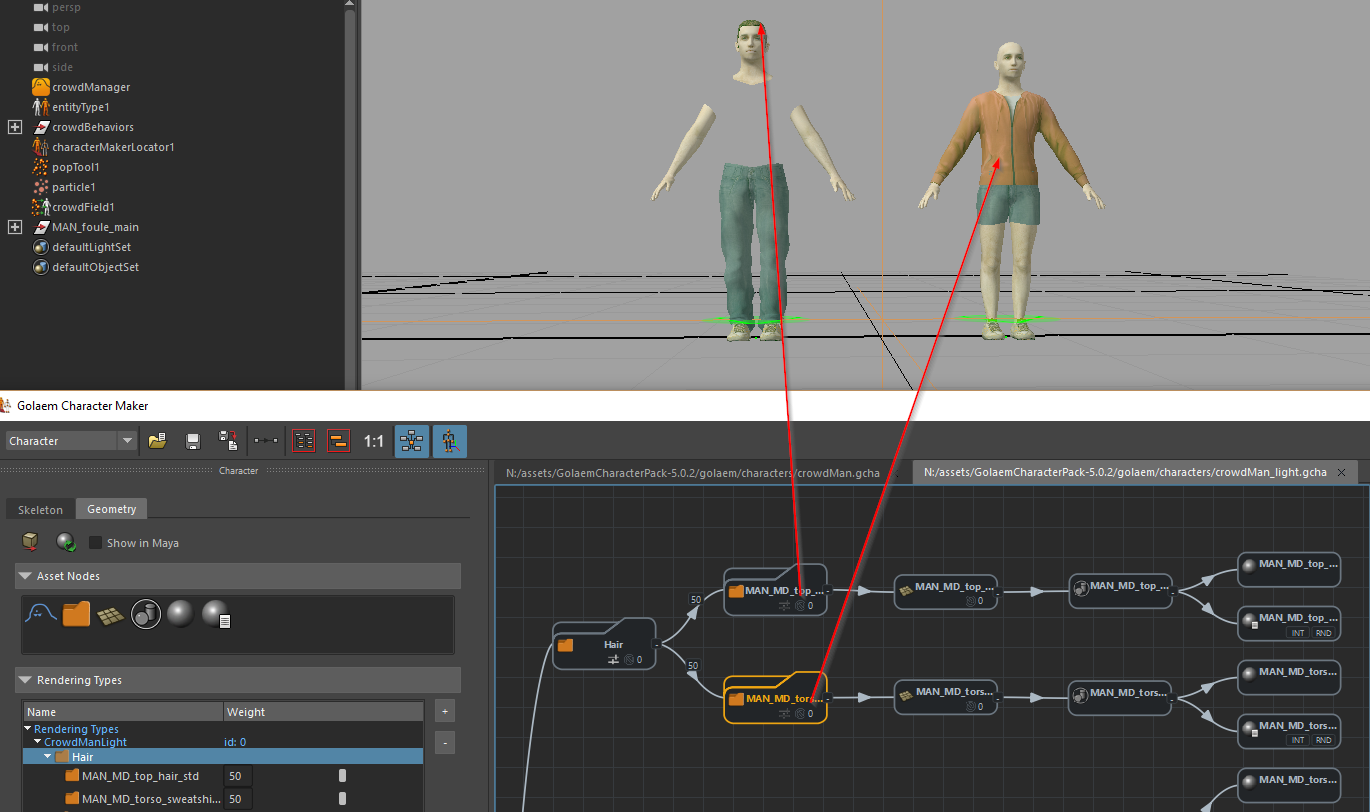
An Assets Group represents category of assets for the Character: tops, pants, hair styles...   When an Assets Group contains more than one Mesh Asset, it means that when generating a character, one and only one Mesh Asset from this group will be chosen among them which could lead to missing parts of geometries if you did not organize them correctly.
 
If your assets are not related and should/could be both shown when rendering your character, put them in different Assets Groups.
 
Note that if an Assets Group contains the Empty Mesh Asset, this means that the character has a chance to have no Mesh selected among the Meshes in that Assets Group.
 
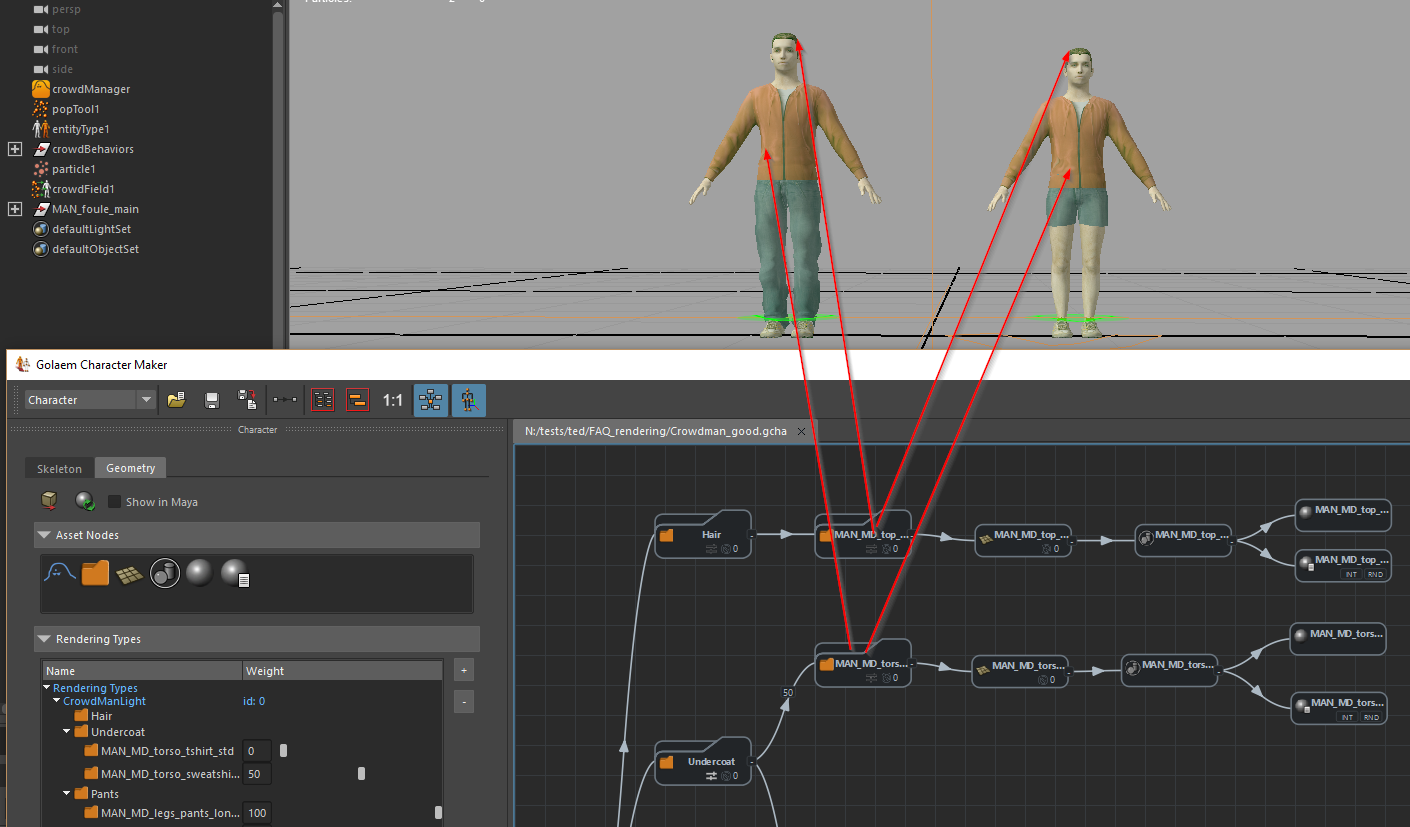
Hairs and sweatshirt being in the same Asset Group, only one of them is chosen for each character.
 
The same character where hairs and sweatshirt have been put in different Assets Groups
 
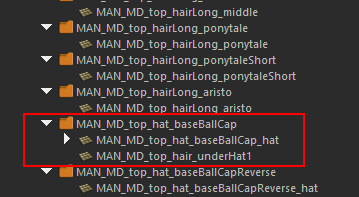
In some cases, you want various assets to be treated as a whole and always be together (e.g a T-Shirt Mesh + Arms Mesh or a Cap Mesh + a Hair Style Mesh). It is the role of the Mesh Asset to contain one or more meshes and guarantee that all the Meshes it contains belong together and will either all be present or absent from the character.

An AssetGroup enabling to randomize hair styles, some of which (in red square) are composed of several meshes
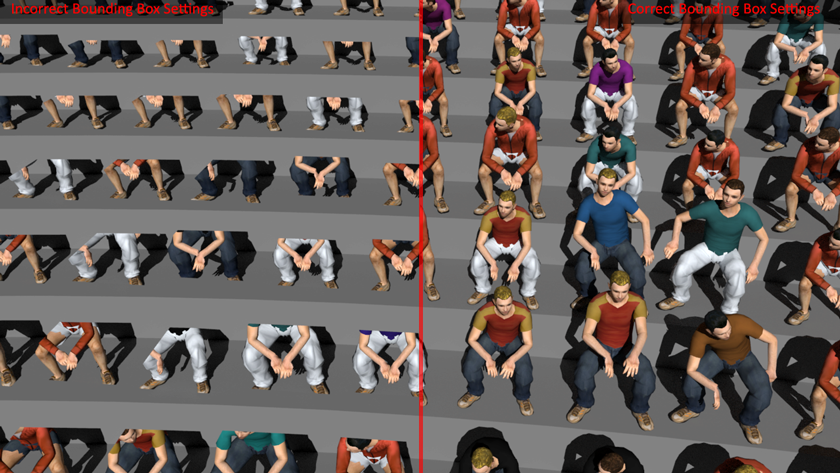
In order to optimize the rendering time, starting from Golaem Crowd 2.0, you need to specify a bounding box for your character when exporting your character fbx from the Character Maker.
 
 
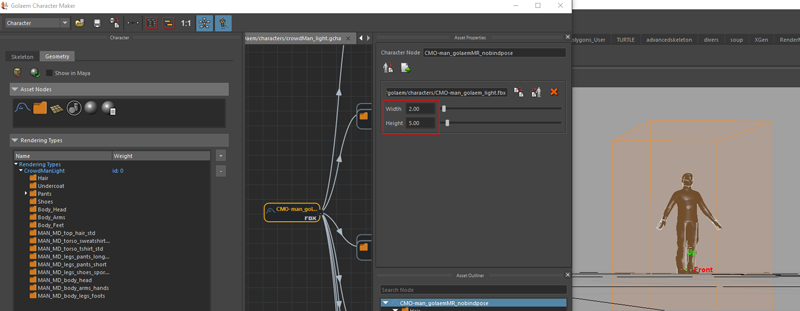
Open the asset manager and select the geometry group. You can see a Bounding Box property. You can adjust the size of this bounding box in the Asset properties of your Character node and check it in the viewport.
 
Note that you should set this box big enough so that when your character take a different posture (e.g. raise his arms in the air), his whole body is still inside the box
 

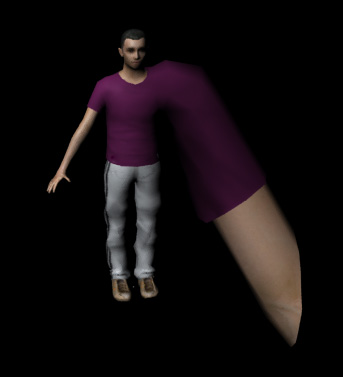
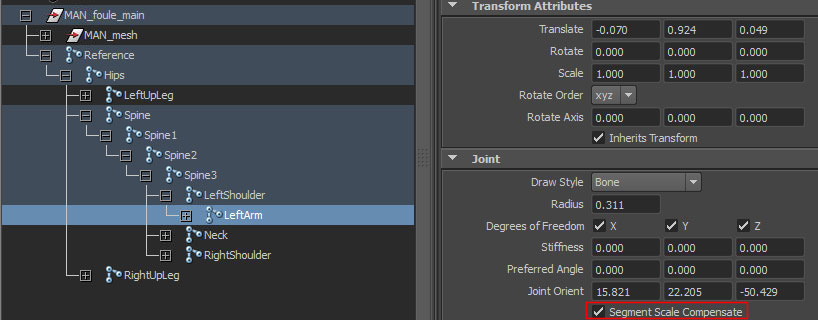
It is probably because "Segment Scale Compensate" is activated on some bones. When Golaem Crowd scale it to fit your simulation, Crowd Field or Entity scale, the scale is applied twice.

You should import you geometry file (.fbx), make sure no extra-namespace has been added, uncheck the  "Segment Scale Compensate" on all bones, and reexport it.

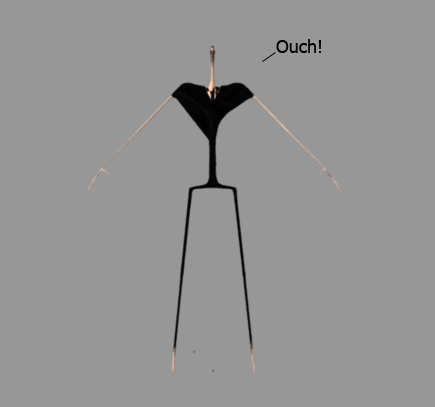
Have you check your character's joint hierarchy? This issue usually happens when the root of your character is under a group already scaled. All the nodes above the root bone (transforms, controllers) should have a identity scale (1., 1., 1.). Also please check if Scale Compensate option is not activated on some bones as described here. Once Scale compensate is disabled on every joints and the parent group is scaled back to 1,1,1 don't forget to export back your Character Geometry ! Please refer to this documentation page for more information about character prerequisites.

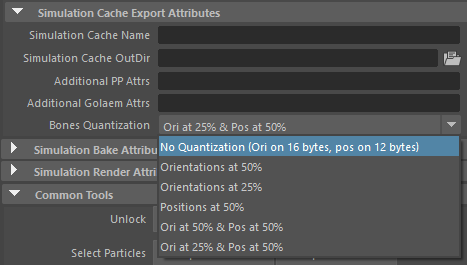
When exporting animations with wide orientation variations, you may experience flickering when replaying the Simulation Caches in Maya. This is due to the fact that, by default, Simulation Caches are compressed using quantization and some data get lost when being exported. One can disable Cache compression for this use case by changing the Bones Quantization attribute in the Simulation Cache Export Attributes of the Crowd Manager Node:

As Golaem Crowd is tightly integrated with renderers, most render passes/elements or AOVs will work natively with the Golaem Crowd Rendering Proxy. However for some of them configuration may  be required.

For more details, check the Rendering Section in the Reference Guide

The Crowd Render Proxy node provides a Motion Blur panel to configure the motion blur aspects. To configure the Crowd Render Proxy node motion blur attributes based on the current renderer motion blur attributes, you can use the "Auto Compute Motion Blur Parameters".

Obviously, it only works the motion blur in the render settings of your renderer is enabled as well.

It can be a good idea to split the simulation by CrowdField, and to use the Camera Frustum optimization.

You can find the detailed procedure here.

You can use the Render Entity Percent attribute of a Crowd Render Proxy node to render the wanted percentage of characters exported in a Simulation Cache

You can use the Simulation Cache Layout to remove some characters from the final render